BUILDING AN 8-BIT COMPUTER FROM SCRATCH #2 (Full Stream)
Key Takeaways
Continues building an 8-bit computer from scratch, including building an 8-bit register using a wire stripper and a graphics tablet
Full Transcript
mic is none. Thanks so much. Okay, so uh there we go. Uh I was just saying that um today is again the day where I release uh my next uh video. Uh it's in in a minute or so and so I will have to do all the Twitter and you know all all the crap of uh publishing it. Uh, so I'm going to just play the new video here on stream for you now while I do uh the regular uh publishing um uh in the background and then if you have also questions feel free to ask and we can talk a bit about the video and after that we head right back into uh here continuing the series with Ben eater uh of the 8bit uh computer stuff. Okay, so let me wrong screen. There we go. Uh, and yeah, and enjoy this week's video. So, we explored how JavaScript core, the JavaScript engine from WebKit, stores objects and values in memory. Now, in this video, I want to learn a bit more about the JIT, the just in time compiler. This series on browser exploitation is supported by SSD secure disclosure. Check out the description for more information. Simply speaking, the just in time compiler compiles JavaScript bite code which is executed by the JavaScript virtual machine into native machine code like you would compile C code. But there is a bit more fanciness when it comes to JIT in JavaScript core. So how can we learn about it? I got another tip from liners to check out some official WebKit resources like this article on the WebKit blog. JavaScript core CSI, a crash site investigation story. Today I will describe some of these tools that WebKit engineers use by telling the story of how we diagnosed a real bug in the JSC virtual machine. So, this is a blog intended for people that would like to contribute to WebKit. And the author shares a lot of very valuable insight into how to debug a crash in order to find the root cause. And this is exactly what we want to know as a security researcher as well. For example, it describes how to create an address sanitizer build of WebKit in order to catch possible heap overflows or use after free issues that for normal programs often don't crash right away. But we are currently interested in the JIT stuff. And further into the article, we find the following. JC comes with multiple tiers of execution engines. You might have read about them here. This is an article that introduces the FTL JIT. There are four tiers. Tier one, the LLint interpreter. Tier two, the baseline JIT compiler. Tier three, the DFG JIT. And tier four, the FTL JIT. So tier one is the regular interpreter. That's the basic JavaScript virtual machine. We can have a quick look into the low-level interpreter CPP source file which contains the interpreter loop. So it simply loops over the JavaScript bite code and then executes each instruction. So now when a function is called a lot, it can become hot. That is the term describing that it's executing a lot. And then JavaScript core might decide to jit the function with the first tier, the baseline jit. And in the corresponding JIT.cpp file, we can get again some additional information. When the LL int determines it wants to do OSR entry into the baseline JIT in a loop, it will pass in the bite code offset it was executing at when it kicked off our compilation. We only need to compile code for anything reachable from that bite code offset. OSR on stack replacement is basically where you can switch on the fly to the compiled code. It's still very compatible so to say with the bite code as there hasn't been any optimization yet from the introducing the webkit ftljit. We can also read the first execution of any function always starts in the interpreter tier. As soon as any statement in a function executes more than 100 times or the function is called more than six time whichever comes first execution is diverted into code compiled by the baseline jet. This eliminates some of the interpreter's overhead, but lacks any serious compiler optimization. Once any statement executes more than a thousand times in baseline code or the baseline function is invoked more than 66 times, we divert execution again to the DFG jet. DFG stands for data flow graph. So that kind of already reveals a bit what that step is about. The article also has a nice picture describing the DFG pipeline. The DFG starts by converting bite code into the DFG CPS form. CPS stands for continuation passing style which means your code doesn't use returns but instead continues and passes onto the next function. If you have ever done some NodeJS express development, I think you can imagine it like the next function. So this form reveals data flow relationships between variables and temporaries. Then profiling information is used to infer guesses about types and those guesses are used to insert a minimal set of type checks. Traditional compiler optimization follow the compiler finishes by generating machine code directly from the data flow graph. So here it starts to get interesting. The JIT compiler guesses types and if the JIT believes types don't change, the JIT can decide to remove certain checks which of course can speed up the code dramatically if it's a function that is called a lot. But that is not all. After DFG JIT, there is another JIT, the FTL, faster than light. When this tier was first introduced, it used the known compiler backend LLVM to apply much more typical compiler optimizations. The FTLJet is designed to bring aggressive Cike optimizations to JavaScript. At some point, LLVM got replaced by B3, but the idea is the same, and that JIT compiler might even make more assumptions on the code. But let's look at this a bit more practically. This is again where the article about the crash investigation is excellent. It introduces several environment variables that can be used to control the behavior of the JIT and enable debugging output. For example, we could use JC use JIT to disable the JIT entirely or use JSC use FTL JIT to only disable FTL the last year or we can disable threads that do JIT in parallel or we can report and print every time when any JIT does optimization. So in LLDB I set the environment variable to turn everything on and then restart JSC. This already causes some JIT optimization debug prints. Looking at the function names that were jitted, it looks like things like jar at, abs, etc. have already been optimized. But now we want to jit our own function. So here's a life overflow function that takes a simple number as parameter. then prepares a result variable and loops from i= to 0 to n and sums it up in a result. Simple. Next, we have to make the function hot. We can do this with a simple loop calling that function. Let's start with only four executions. It shows some output, but not what we want. Also, executing it 10 times in a loop doesn't do anything. But calling it a few more times, we will get the baseline JIT. Here is a compiled assembly code equivalent of the JavaScript function. Let's try to trigger an even more aggressive chip. Let's increase the loop and boom, DFG JIT. And now let's go totally crazy. Adjust the loop. FTL jet. Boom. There's also so much more output. But to be honest, no clue what that all means. But the important part is just that we have learned about various debugging methods and tricks to dig deeper. Now you know a bit more about the JIT compilers. From last video, you also know how JavaScript objects, arrays, and values are represented in memory. Now consider the following idea. If the JIT compiler guesses and assumes types in the code and removes checks and for example just simply moves from a certain memory offset, could that be abused? Just hypothetically, let's say Jitted code expects a JavaScript array with doubles and directly acts on these values. The Jet compiler then optimizes all the checks away, but then you find a way to replace one entry of the array with an object. Now, an object would be placed as a pointer into that array. So, if Jed code has no checks and for example returns the first entry of this array, it would return that pointer as a double, right? That would be pretty bad. And that's actually one of the typical browser vulnerability patterns. And we will see that in action soon. But how does the JIT try to prevent things like this from happening? Well, it turns out that the developers try to model every function that has an effect on the assumptions of the JIT compiler. So if there is anything that could change the layout of that array, for example, when an object is placed into a double array, then such a function should be marked dangerous. Let me read you a quick excerpt from this CDI article about inverting your assumptions, a guide to JIT comparisons. Here they write the way to state that an operation is potentially dangerous to prevent later optimizations is to call a function called clobber world which among other things will break all assumptions about the types of all arrays within the graph. So the JavaScript engine tries to mark everything that could have potential side effects by calling clobber world. Side effects could be things like we just thought about like changing the type of a value and something else didn't expect that change. So here's the function clover world implemented in the DFG JIT part. This will call clober structures which will set set structure clover state to structures are clobbered. So side effects that the JIT has to be very careful about are obviously things where for example the structure of an object changes. Let's say the JIT optimizes accessing a property X on an object and suddenly you remove that. It has to be marked that the structure changed so that jitted code can be discarded. Otherwise you get memory corruptions if you reuse the jittered function. But that's enough for now. Next video we move on to Linus' exploit abusing such a case. Thanks again to SSD secure disclosure for supporting this series. Check out their website and learn more about the SSD vulnerability disclosure program at ssdiscislosure.com. Yeah, that was this week's video. Uh next video, next week we finally look at the uh exploit from Linus. Now we we have we know the basics. We know how like objects and values look like in memory, how we can debug this with the debugger and we have somewhat of a basic understanding of the uh JIT compiler and how it optimizes codes and already an idea for an attack like what if we can somehow abuse these assumptions that the uh JIT compiler has. Um I hope it's clear in that video that I have no clue what I'm talking about. Um, this is as I explained in the very first episode or the start of the series that it's me learning as well, right? So, uh, I might have said some wrong things in this video as well. It's it's kind of like my understanding of it. Uh, and I think it's a good basis to, you know, learn more. But yeah, take it with a grain of salt. I I I hope um I hope that that that is clear. I don't I don't want to pretend I I know what I'm talking about. But yeah, I'm excited. Next, as I said, next video we will start like looking at Linus' exploit and we will able to step through it one by one. Okay. Yeah. So, this was this week's video. Uh okay. So, recap about uh yesterday. So, yesterday I started this stream. Um, basically what I want to do is I want to build the 8bit computer uh from Ben Eater. So, ever since I Yeah, it's it's this one here um or a version of this and he Ben Eater has this long series uh going over he has done this over like two years or something like this and so basically I want to follow that along and build that. So um yesterday we started with the first video which was the introduction to the 555 timer. And if you uh take a look here at uh no at at this here, this is what we built uh yesterday. It's basically the same thing. Uh let me get that on the big view. So, um yeah, you can see here that we have the IC here. And I mean later in the video he adds the uh the what is it called the resistor with the turning thing. So basically uh this here let me quickly show that off to you. And what I've done uh since yesterday I picked up because we made a mess yesterday. Uh the stream video on demand should still be available on Twitch and I will also upload uh it on YouTube but not the main channel because I don't want to spam the main I I I assume people would would just get mad if I would do that. Uh I would love to upload it there but I feel like people would get mad. So I will I've actually created already a second channel and started uploading but um uh I need to fix up some stuff. Uh I've also decided to do some kind of highlights just a very rough cut of the stream to condense like 30 minutes into like 20 minutes or so. Um so as a recap to watch or something like that but uh I will share that at some at some later point. Um yeah okay so let me show you here. So um yeah, we built that yesterday and I've also here brought uh this over and set up here again we have the oscilloscope and I also added uh brought the power supply over. So now we have a proper uh 5V power supply here and so when we uh turn that on and we look here we can see the LED blinking. So, uh, this chip, the 555, um, is a is a timer is a timer chip that you can configure, uh, through capacitors and resistors to be, um, to control how this chip will basically, um, uh, create the clock. Uh, it's a square. We looked at this yesterday with the oscilloscope. You can watch the video, it's in there as well. And, uh, yeah. And so we at the end of the last stream we also added uh here this what what is it called again but uh what is this resistor called when you can turn it anyway it you know you can select the range of resistor values here you can see that we can affect how quickly the LED blinks if we change the resistor value. So uh I find this fascinating that you have these electronic components that do something. In this case, it's creating like a square wave, basically a clock signal. And um uh I find I think it's so coming from a software background where we would where we have functions where we can pass in parameters and those parameters affect the functions or we have config variables that change the behavior of our software. thinking that this is also the case in hardware was somewhat I don't know mind-blowing to me and so the way how you configure basically this chip is with certain resistor values or certain capacitor values because depending on the capacitor um it can charge up um it needs longer to charge up or faster to charge up and the resistors also control how fast um these capacitors are charged or not how much it's basically completely let through. And if you have a v variable resistor like this, you can obviously change your resistor value which affects then the uh speed of the square wave. I think this is so fascinating that you can like configure and uh stuff hardware values as well. Uh are you planning to do a format like scan line? Um I wish I have no clue about electronics. She obviously has uh you know way more experience and I'm sure you can learn a lot more. Um the format I'm doing here is basically watch these videos and try to uh build that computer. So uh it won't be as cool as scan line with cool reverse engineering or makeup projects that where she actually does cool stuff. Uh electronics is just very low-level functional programming. Yeah, I can see that. That makes sense. Uh yeah. Okay. Um right. Was anything else? No, I think that was it. That that's all I did yesterday. Uh any questions so far or shall we just head into the uh next video? the second video. Okay. Um, I turned up the volume of the laptop. Let me know if the um if the volume of the video is like too high compared to my voice or how I need to adjust. I still need to fine-tune all this all these settings. All right, let's uh start with the next part. Oh, so in the last video we used a 555 timer here to build this little clock circuit. And so we have our test test test my voice in between saying clock output on pin three of the triple 5 timer and we can control the speed using this uh potentiometer. And so that's great but there might be times when we want to manually control the clock and we want to be able to just push a button each time we want the clock to advance one one or we want our our computer to advance one clock tick. And so you might think well that's pretty easy. We just hook a button up. And so we have, you know, this output here, uh, of the button is is pulled to ground through this resistor normally. Uh, but then when we push the button, it connects it to our our 5volt supply here. And so push the button, it comes on. And so we can manually pulse the clock like that. And you might think, well, that that works pretty pretty well. And that's almost true. And in fact, you might be able to use this and you might be fine with it. Uh, depending on the button that you have. Uh what happens is inside that button when you push it there are two metal contacts that come together to close the circuit. And sometimes what'll happen when you push the button is those contacts will bounce. Uh and so it'll it'll close and then bounce and then close again or maybe it'll bounce a couple times. And so what happens is when you push that button you actually get a couple quick pulses. And if that's hooked up to, you know, the clock of our computer and we push that button, we could actually trigger a couple clock pulses, uh, when we only meant to trigger one. And that could be really frustrating if you've got, you know, some issue that you're trying to debug in the computer and you've you've spent a couple minutes getting it all set up just perfectly and you're you're right at that point where the next clock pulse is where you're going to figure out what's wrong with it and you push this button to get a clock pulse and you get three clock pulses and it goes right past the problem you're trying to find. That could be really frustrating. So, what we want to do is we want to figure out a way to get rid of that the that that or you know avoid that bouncing. And uh you guessed it, we can do that with our friend the triple 5 timer. But first, I hooked up the oscilloscope just to take a look at the the switch here. And so when we push the switch, you can see this is what we'd expect, right? It it transitions from off to on. Uh but if we try this a few times, we might see some different stuff. Well, ah, there we go. Oh, there's something. Yeah, look at that. So, that that definitely bounced uh right there. Uh, and so that's that's not good. You don't you don't want that. Uh, because that would, you know, that would look like one, two, three potentially clock pulses when you only push the button once. So, you definitely want to get rid of that. And so, this now is a triple 5 circuit that is going to help us with this uh with this switch bouncing problem. And so, well, before we get into it, let's just try it out. Let's push the button. See what happens. Push the button, the light comes on. And then a little while later, the light turns off. Um, and importantly, what happens if we push the button multiple times, the light only comes on once, and that's what we want. And this is called a debouncing circuit. And there's, you know, there's other ways to build debouncing circuits, but uh, you know, I'm using the triple 5 timer just because I think it's a fun chip to play with. And so the timer here that's controlling how long this stays on when you push the button is controlled by the the resistor and capacitor over here. And so you remember before we had two resistors and a capacitor that were controlling the the pulsing. Uh here we just have one resistor and a capacitor. And we'll go into more about how it works, but basically the time that the LED stays on is just, you know, you pretty much multiply the value of the resistor times the value of the capacitor. And so this is a a one megga ohm resistor and this is a well it's a two microfarad capacitor. It says 1 mfd on it but uh I don't apparently these are two microfarads. Uh but anyway the nice thing about about this is one megga ohm is uh 10 the 6 and microfarads are 10 the minus 6. So the math works out really easily here. So that a a two microfarad capacitor when you multiply it together you just get two. And so that gives us a two-cond delay. And sure enough we push the button the LED stays on for two seconds which I guess is further confirmation that this one MFD capacitor is really two microfarads. Anyway uh so you know two seconds is kind of long for what we want. So what we could do is we could put in a a 0.1 microfarad capacitor instead of this two microfarad capacitor. And if we stick that 0.1 microfarad capacitor in there, that's going to give us 0.1 seconds because we're multiplying it by this one megga resistor. So now it's stays on for 0.1 seconds. Matter how quickly I push it, it's kind of hard to tell. Uh but that's what we want. I mean, we want it to pretty much follow what we're doing when we push the button. uh but we critically are getting rid of those bounces. And so as long as any bounces that happen within the first uh you know 100 milliseconds or 0.1 seconds u we we've gotten rid of and that's what we want. And so I understand how this works. Let's look again at our circuit diagram. And I've got the the triple 5 timer here, the the guts of it exposed here, but the the green bits out here are are our are our circuit. And of course we have an LED hooked the output I didn't draw but um and of course we're just looking at this this lower half here is you know this is what we built in the last video. And so we've got our resistor here which is our one one megga ohm resistor. Then we have our capacitor which is a 0.1 microfarad capacitor. And then you know over here I've got the the the button hooked up. And if you look at how this is hooked up, uh the the button is connected between ground and pin two. And then it's also from pin two. You can see we've got a a 1k uh pullup resistor. And basically what that does is it ensures that pin two is normally connected to 5 volts, but then when we push the button, it connects it to ground and then uh pin two goes to zero volts. So, just like before, we've got this voltage divider uh network going on inside the the triple 5 timer. And so, we've got 5 volts up here. And then we've got uh 3.3 volts here at this first point. And then we've got 1.667 uh volts here at the second point. And then, of course, ground is at zero volts. And so, that's just a voltage divider, resistor voltage divider. We've got one/ird of our voltage, two-thirds of our voltage, and then up here is our our full voltage. And so we can see right now, you know, our output is off. You know, the LED is off. So if our output is off, then, you know, that must mean, you know, that the Q output of this SR latch is off. And so the inverted Q output must be on. And so if that's on, then that's going to be uh, you know, putting current into the base of this transistor. And so this transistor will switch on and we'll be discharging or we'll be, you know, we'll be pulling current through this transistor. And so you know in this in this state right now current is flowing you know from our voltage source through the transistor to ground. Uh and if this capacitor had any charge on it that would also be you know uh discharging uh to ground. And so this capacitor doesn't have any charge on it. And so our threshold is at zero. And of course zero is not above uh 3.3. And so this is going to be off. Um and then this down here is five volts right? So it's you know trigger Pin two is 5 volts and 5 volts is not not below 1.6 volts. So this is also off. So both of our S and our R inputs into our SR latch are off right now. And so somehow this latch is just latched into the state where it's off. But what happens when we push the button? When we push the button, we now pull this trigger low. We pull this to zero volts. And so zero volts is, you know, is definitely below 1.6 volts. And so this comparator here turns on and that triggers the set uh of our SR latch. And so that turns the output on. And so sure enough, you know, we push the button, the output comes on. So no surprise there. But the other thing that happens is when that output comes on, uh, this turns off. And so we're no longer, you know, pulling current through this transistor here. And we're no longer discharging this capacitor. So instead, we're charging the capacitor. And we're charging the capacitor through this resistor. And so this capacitor is going to charge uh it's going to start to charge and eventually you know it's going to get above 3.3 volts. And so when the capacitor charges to above 3.3 volts now the uh the reset is going to be triggered. This this comparator is going to turn on. It's going to trigger the reset and that's going to turn off our output and it's going to turn on our our inverted output here. or in, you know, inverse Q. And that's going to, you know, push us back into this state where we're now discharging the capacitor and and now there's no there's no resistor between this capacitor. Remember the circuit before we had another resistor in here, but there's no resistor here. So, this capacitor is going to discharge, you know, immediately. And so, it's just going to, you know, drop right back down to zero volts. Um, which of course is going to immediately turn off this uh this comparator, right? because 0 volts is is certainly not going to be above 3.3. And so this comparator is going to turn off and we're not going to be triggering this reset anymore. But if we're not pushing the button, you know, we're not triggering our set anymore either. And so the latch is just going to stay in its latch state and our and our output will be off, you know. So if we're looking at what our what our output did, as soon as we you know, as soon as we as we hit this trigger, our output comes on, right? because we set the the latch and then it stays on while the capacitor charges up. But then once the capacitor gets to the 3.3 volts, boom, our output goes off and it just stays off. And it stays off until we until we hit that trigger again. We until we push the button again. And so you might hear this referred to as a monostable mode of the triple 5 timer. uh because it's called monostable because there's one state where it's stable and then if you push this button it goes into this other state where it's not stable where it's going to you know eventually this capac charge and then it'll drop out of that state. Uh whereas the you know what we did in the last video with this this is called an astable multivibrator or a stable mode for the triple 5 because it doesn't have a stable state. It's you know constantly altering between two states on and off. So you might hear those terms monostable and astable. So to take a look at that in action, I've I've hooked it up to the scope here. And I've also gone ahead and put the uh that two microfarad capacitor in there again just so we get that nice slow two second uh uh pulse there. So if we uh fire up the oscilloscope here, push the button, you can see the output goes immediately high and you can watch the capacitor charge. So cool. And then boom, as soon as it hits that 3.3 volts. So let's see. One, two, 3.3. Yeah, 3.3 volts capacitor gets there and boom, it just that discharge pin flips and the capacitor just instantly discharges. And then of course our output turns off then. And so you can see any bouncing that the switch is doing in here. Doesn't matter. Our output's already high. We've got that latch that's uh that l that's latched it high. And then you know as as long as this capacitor will just charge away and then boom, turns off. So I've got that 0.1 microfarad capacitor back in there with our onemeg resistor. I think that's what I'm going to go with. And uh yeah, just like before, we've got that uh that control voltage pin, which is uh pin five here that we're not using. And that's just kind of tied into here. And again, the data sheet recommends putting a point 01 microfarad capacitor between that and ground. So I'll go ahead and add that in there. And that's just for that noise reduction that we we saw in the last video. So good practice, put it there. And then the other good practice is pin four. Also not using that. That's a reset pin that kind of ties right into the reset of the SR latch and it's an inverted uh reset. So, normally should be uh at 5 volts and then bringing it to zero volts forces this to reset regardless of what's going on over here. Just kind of override things. Um so, we'll we'll tie that to 5 volts there just to prevent that from accidentally tripping or anything like that. And I think that'll that'll do it. So, now we've got our uh our timer here. So, we've got that and we can adjust the speed. So, we saw that in the last video and go really fast or really slow. And if we don't want to use that, we've got a manual clock pulse here. So, now we just need to come up with some way to switch between the two of those. And we'll we'll look at that in the next video. So, in the last two videos, we used these triple five timers to build an AC. Okay, cool. Uh, first of all, let me answer or let's talk about quickly what was written in chat about the uh science technology category. Uh and also Todding is also streaming there. So uh definitely follow him as well. Um I have streamed before like when I did um the web development stuff. I I did that in science and technology and I agree with you that totally makes sense. However, I'm just experimenting. Uh the just chatting category is obviously massive. It's like a huge part of Twitch. Um I want to just experiment with that. I don't know. I don't think a lot of people like go into um science and technology and and find the view. There's I think a very small group and then just chatting are a lot. And so my hope is that I maybe can catch a few people who were not even considering to do programming or electronics and they stumble randomly then into such a stream and then they might be interested in it. So rather than the people who are already totally into programming and are looking for that. Um so that's kind of what I'm thinking. I don't know. I don't really care to be honest. Um, uh, yeah, I I I think absolutely for like a to to keep the site clean, I understand that it should go into science and technology. Uh, let's see if Twitch like complains that like it wouldn't belong into just chatting or something like that, but I don't know. Let's see. I don't have strong feelings either way. It's just like I I figured I just try try to see what just chatting is doing. So far, I don't see a difference. Um, in terms of like I mean it just was one stream yesterday, so I didn't notice anything different than when I streamed before. Okay, second thing. I'm not sure about like the building thing now. So, I think I want to just quickly skip through the next video or has anybody built this or gone through the videos before? Because I'm wondering is he just like still explaining the 555 or is he actually building the clock module already? So because right now the the thing that I have that we have built here uh looks pretty shitty and he has it way better arranged. It looks way cleaner. So if this is actually how it will stay and this is actually how the clock module will look like then uh I would want to redo this and obviously also do the debouncing of the button. Um, but if he would do a completely different clock module later on, I wouldn't want to build the the the debouncing button or something like this. So, uh, I'm not sure about this. So, let me quickly just maybe let's see here. He's doing the bus ar um, so here's the bus architecture video. before that he explains the SR the the different ledges or flip-flops and then there's a clock video which is in two videos so let's just quickly it's in the last couple videos here okay no it looks like I guess that is the whole clock module yeah okay then let's uh do this properly then let's also build the button then we can also measure this again we can replicate what Benito was showing in the video that that sounds great then let's do So in the last video okay um right [Music] so let's do this properly uh I guess is that blue wire blue and red wire let let me gather all the materials that we need to uh rebuild this properly. So, we got the wire here. Let me show you this screen. I think I knocked this yesterday a little bit. Whatever. Um, oh, thanks for the cheer. Okay, so we got the wire. We need the the capacitor stuff. Let's take this. Uh, then we have here the capacitors we need. So, this LOD is not so great. So, I have here in this box is everything that I ordered from the part list from Ben Eater. You can find the part list on his website. Can't get over how many breadboards these this is. It's crazy. Okay. Anyway, let me find. So, I have a like a red green weakness. Is that a yellow LED or is it a a green LED that he was using there? Here's here are the 555 chips. It's green yellowish. Okay. It's yellow. Okay. Okay. Yeah, that makes sense because I ordered also way more yellow than I ordered uh green. So, that makes sense, I guess. Um, what else am I looking for? We need a wire cutter. Uh okay. Um. Oh yeah. And so so he has this very clean uh blue like the and if you look at his thing the the blue variable resistor and I have like this massive kind of thing that is flopping around. Uh let me check my other electronic supply. I kind of hope that I have a better one but I'm not sure if it has the correct uh uh resistor values. Let's see. I think I have some in here, but they are all shitty like that. Maybe I need to uh look again in the store. Yeah. Okay. So, let's measure this one here. And then I have this one here. These are all kind of like they're not great, but we could uh create a small like base plate or something or like solder it somehow onto something. I mean, if somebody's bored, you could also I think it's a I I forgot the the capacitor. Somebody's bored, you can search in a German store and then order a different one. Oh, buttons. We need buttons. Buttons. Oops. What kind of buttons did I buy? This is terrible. I I do have uh short ones. I thought I paid attention to that, but I I guess I didn't. It's just about the size of the bar. You can just cut it. Yeah. Yeah. Yeah. I thought about that, too. I'm not sure if I don't I think I have a saw. I mean, we could just like cut it short or something, but it's also like how it's oriented. It would be it's like very flimsy. I mean, I can bend these downwards so that I can kind of stick it down like that. Um, I think that is what I would want to do. Um, I am not sure if that's then still like kind of stable enough or I don't know. We will we will try that in a second. Okay. And then I have uh buttons here. Uh how many do we need? First one, I guess. Okay. Okay. Um, yes. So, I have here the multimeter that I quickly want to I guess I could just look it up in the parts list again what kind of resistor that was Here's the part list. Um, a potentiometer. That was the name for the for the variable resistor. Uh so that was one one meg. Okay. So let's see. Um, so I'm measuring here. Oh, okay. That is something smaller. What is it? 50k, I guess. What is this? That's also 50k. And this one was Yeah. One meg to zero. Um, yeah, that's all I had, right? All right. Okay, let's see. Let's unplug this for now. Unplug this. Put this up here. Um, I need Okay. Yeah, let's build this circuit here again first properly. Nicely nicely cut everything. He's building that really tight up there. I mean, this one isn't uh I guess we can shorten it a little bit. Could someone or just post pin a short road map for this task please? Uh what do you mean with that? Uh like what exactly I'm doing right now? Because basically I'm doing exactly what this video is about here that you can see up there uh which is part two of the Benita clock or do you mean what the overall goal what I'm working on what this project is all about? Is that what you want to know? You can find in the description of the uh of the stream um I think a link to that playlist that I'm working on, I think. Okay. Yeah. So, uh basically Ben Ether uh has made this series uh where he was building an 8-bit computer. Uh you can find the link I think in the um uh in the in the stream description. And uh basically I want to build the same. It seems like a really cool project to learn. Um so I don't know like I'm not I'm an amateur in electronics. It seems like a cool project to to learn uh more about it. And so we are following along his uh videos that he made. have ordered all the parts and we are now on the second video right now. So yesterday we had one stream uh about the first video and now we do the second one. Okay. Uh thanks for the cheer. Uh you can also find uh the the V from yesterday in the um in the uh on Twitch. Oh no, you're not bothering. I think I should maybe need like a command or something like exclamation mark topic or something like that that just puts it out. Okay. So, that looks a bit nicer, I guess. Now, now I'm like really not sure. Like, it's good enough, right? But I want this to look really nice. So, I'm wondering because I made it a bit too short and it you see it's like angled. It's like not properly rectangular. Also, is this blue or green that he was using there? I can't. It's more green, right? I think it's more green. Maybe I do that again. I mean, I need to practice doing this properly anyway. So, maybe let's do this again and let's try how how what is a good method to make this uh exactly the length that you want. So, Yeah. How do you do this? So you want it in here. Maybe you keep a little bit to bend like that. Then comes the first bend here. like that up until here. And then here comes the second bend like that. Okay. And then we go up to the second pin until here. And a little bit more for the pin. So we cut we cut it here. Maybe OCD. It's not really OCD. Like I I don't think I'm like really obsessed with perfectionism or anything like that. Uh if I would be that I couldn't I would I would do a lot of things. Uh I I don't think I could have a YouTube channel. I would I would be obsessing way too much. But I'm I'm very much a person who can I think I can recognize when it's like good enough. Uh okay. So stripping it here and here. Yeah, this looks perfect. Cool. This looks way better. Okay. How much OCD should I do now? Maybe this this one uh bend here could be a bit stronger. Cool. Excellent. Okay, now we need um so how do I deal now with the ah wait I needed to also think about so his clock module was pretty full at the end. Uh if we compared it to the state here um later here in the video like with all these chips that are coming afterwards here. [Music] He has only four three before the chip comes. And I'm two, four, I'm five here already. And this is so big. On the other hand, actually, we we don't need the third pin of this one here. So maybe I'm just overextending here a little bit. But then we can't have this very pretty like wiring kind of around this. It's so massive. Okay, let's test this. What if I like bend Oh, what's this? Okay. So, I'm bending this down now like this. And then Yeah. And let's move that also now. Two for that and then we can. So this goes again. Okay. Like that. I guess that looks kind of nice. That's fine. Oh, it's pretty solid there as well. I mean I mean the the the problem is still kind of that um there's kind of not enough space. He has a two he has a resistor going up there and another wire which I don't have the space for. And if I put it in here like that but I have the space now it's overextending. Now the OCD is kicking in. Okay, I will do it like this and I will try to find a replacement at some point for for these. I don't they look crap like they are just that's it's it's okay for now. So, so what do we have here? I also have if it's working, it's not always working. Ah, there it is. Microscope. So, which color is that? Uh, brown, black, red, gold. Okay. So, this goes over to the seventh pin. Goes in here. Did he get smaller resistors because like they are like super short? I don't know. I think he just bended a bit more. You're still wearing the CC wristband. Yeah, it's uh it's called vaccination. Okay, this is not holding. Okay, I think I need to I need also need to learn how long I have to make these. So, this is way too I made them too short. I need to make the legs longer than lower than that also. Uh, I mean, so I I told myself I'm not going to wear the the glittery one throughout the year, but I was so lazy. I haven't even cut the long part off. Like, that is annoying me like hell, but I was too lazy to even do that. Um, okay. So, I think it was this one here. Uh, gold, red, black, brown. Yeah, that matches. I wonder if you are able to wire this as clean as Ben's videos. Mine look like [ __ ] after a few hours. Oh, do you have a pictures of yours? I would like to see that. And yeah, that's also my worry. That's maybe why I'm a little bit uh careful already at the start because I feel like Oh, I should make these things way longer. Wow, they go deep. Maybe I've even made these two short. I'm actually not sure. Um, okay. So, this one goes into the second one. Okay. And I need to put this even further once because there's not enough space there. You didn't finish it. Stopped after the first two registers. Oh, that's a bummer. But yeah, Ben's one looked so nice. I I in my in my head I want to put it into like a like put it onto a wood or something on a plate and then hang it at the wall. That would be so cool. And then maybe like that's the the ultimate dream. Like if I actually manage to finish this and build the extensions of like having more memory and stuff like this, I want to build a module that takes in like um or at least a serial that just writes it into a register or something like that. Like using an Arduino that just places what's coming or serial into a register or something like this. and then having uh chat messages or donations or something like this um as inputs to the to the thing and it can be controlled in a way that would be so cool. Oh, hey Sato. Uh yes and no not really. Uh let me first uh so uh here let me show you. I actually like it was actually in a good state already. So I did this here. Oh crap. Wait. So I did this here um off stream. Um it I didn't change any code. This is literally just uh deploying it basically to AWS and stuff. And I populated it with some data. So this is as much as we got it on stream. So it's online on hacking.app right now. I just haven't announced it yet because there's not really much there. Um, and uh, you can already like explore a couple of videos, but like I said, there's like uh, not much there yet. I made pictures for a lot of stuff already, but uh, again, not for everything. Like here is nothing. Uh, so yeah, and there are a couple of bugs. I have written down a couple of to-dos on mobile. how there's a weird issue with like the border uh and and for example when you go into browsers um it's like you know you have all this space here in between it should all be just left justified basically uh so yeah there are a few things uh that have to be fixed before I want to like really publicize it or something like this but yeah feel free to use it already uh and it worked great like uh so how I do it right now I the Django application is deployed on a server that is only reachable from a VPN and uh I can manage it there and when I want to uh deploy it I basically just run the Django distill command to do the static site generation uh download the files from the server and push them to AWS and that's what you see here. So it's yeah it works. So we did develop this on stream uh this website and the stuff um still have all the recordings. I will probably also upload those recordings on this second channel that I mentioned at the start of the stream that I do that I will create for the stream archive and stuff like that. Uh yeah. Oh, you're not distracting. You know, conversation is content. I otherwise I'm just staring at this and just doing wiring here. That's also pretty boring. I think it's really surprising. Um, you're not the first person asking about it. So, it's kind of cool that uh like people have watched it back when I was working on this a couple of months ago and are now interested at the state. So, it's pretty cool. Um, okay. So, next resistor. You know, I I already did this wrong. I I needed I should have put this into like a a proper thing to hold it. Oh, is that the same one? No, that was a 1K, right? Um, if I remember correctly from the stream. Oh, yeah, it's that is a 1K here. Is that a 1K? Yeah, that's a 1K in circuit measurement. Yeah. Okay. We're also 1k. Okay. Yeah. So, this is also 1k. Uh, and that goes from from two here from here to second up here. Okay. Uh, anybody experience with like bending kind of stuff like this? Like is there like a cool tool or because um this one is like not fine enough. Like when I close this then there are like gaps as you can see like I can't really hold it too tight uh to properly bend. [Music] And um I have this one here, but it has like plastic tips, so it's also like not strong enough to for properly as a like a corner to bend. What's a good What's a good You maybe I could use like a corner like this here. Oh, maybe that's actually a good usage. Sorry, here like the corner like this maybe. Metal tweezers. Yeah, I'm not sure if I have met. Um I might have somewhere somewhere. Okay, I think these are things that I might have to buy. Oh, thanks for the subs, Sait. Yeah, I now that I have like at the I mean the last time I streamed was I think last year in December or something. Uh so since the start of the year, if you haven't uh heard yet, I finally registered a business so I can finally uh also make use of like subscriptions and all that and ad money and stuff like that. So now I can like uh claim income. Steal one from my girlfriend. Yeah, if I I know I don't know where her stuff is. Probably in the bathroom, I guess. Oh, thanks for the subnals. Um, all right. Then we What? What do we do next? I guess this wire up there. I think we can. So, we have wire going up there. Oh, I'm such an idiot. I'm such an idiot. So, I'm an idiot because I did the cap uh resistor exactly how Ben Eater did, but obviously the pin out of my potentiometer is different. Uh, [ __ ] If I put it down and I don't have space, [Music] is there possibility to do some pen testing today? Yeah, for sure we can do some pen testing. Um, I can't find my proper pen testing gear right now. I don't know where my proper pen testing gear is, but uh so I only got like uh this pencil right now, which is a bit light, so it's not not as good. So yeah, this pen this pen is way too light. With a lot of practice, it still works, but it doesn't look as smooth and it's not as well controllable as other pens. Oh, thanks for the sub, Bang Pal. Here's your attempt. Uh, wait. How do I get this? Damn, I'm good. Oh, wait. You didn't see I guess the URL. Ah, crap. Now I don't see the Okay, wait. How do I get I guess I just type it really quick. Uh, the problem is I have the chat on a different computer than the one that is shown on stream. There we go. That's the clock module here. Yeah. Yeah. That's also my fear. I mean, like it doesn't look as clean as Ben eaters obviously, but this is how I imagine mine to also look like. Or that's kind of like I think this is what happens when you just do it right. So I don't understand the magic that Ben eater is doing. It starts with simple stuff like this long yellow line for example, you know, is not perfectly straight and stuff like this. How do you make it as nice as Ben Eater stuff? I don't understand. But it worked. Nice. lost interest or were you just not satisfied with your own result or just other stuff? Was it too much work? I also feel like uh you tried clipping the wires and bending them in nice way but it looks like it is. Yeah. Yeah. Yeah. That's that's also how I imagined it to go for me. Um, but I hope that uh by do and I also would think if I would do it by myself, I might also give up like as soon as I have like I could do it for a couple of days and then real life would catch up with me and I would have other responsibilities to take care of and then I would lose interested. I'm I have a very obsessive kind of like personality. So, uh if I get into stuff, I really get into stuff. uh and then I also quickly lose interest again and move on to something else. And YouTube has been an amazing incentive for me to keep sticking to stuff. Um and it has worked out so well for me. It's so it's it still kind of amazes me that I'm able to consistently do YouTube. And so uh I mentioned it yesterday in the stream already. I hope that Twitch also helps me with a proper schedule and because my life is like in a complete screwed up schedule and also sticking to this like I if if I have like the pressure and the the stuff to make the do this on stream and tell myself to finish this on stream. Um I hope this will provide enough pressure motivation. You still have all the parts even the memory for the ALU. Bought it from China. Maybe we'll pick it up again one day. Oh, that reminds me. I also had to order the it from China and it hasn't arrived yet. So, I mean, I guess I'm glad that we are not there yet. Need to check what the delivery status is. Okay. I think we can reuse this piece of wire from earlier for Um going up there. So this goes Okay. So from here and then uh thanks for the sub procker. Are you born in 91? Uh, if that's the case, you are my age. Um, how much were all the parts? Uh, that's a good question. Um, so on the Benita website, you find the uh parts list where he also listed the price. Uh, so it's about $250 to $300. You can also buy it. Uh, he sells kits, which I would have totally done if I was in the US, but the shipping to like it's $270 uh directly from Ben Eater, which just saves you also a lot of time and stuff like this. But the shipping was $80 and $80 of $270 is quite a major thing. And then also getting that from the US would mean that I might it might get to through duty and then I would have to pay uh the the VAT on the import uh as well. And so I didn't want to run that risk. So I just uh ordered all the parts myself. Um, I've done a spreadsheet for myself where where I ordered the parts in Germany or I actually ordered also still from the US some things but through a proper shop that handles the import things um mainly for the breadboards because he uses good quality breadboards. Uh, yeah. And so I came to €240 was my order everything. Um, I might clean up this spreadsheet that I have and share that at some point, too. Always getting scammed on shipping. Well, I wouldn't call it scammed. I think shipping is super expensive. I mean, it surprises me sometimes how cheap shipping is. I mean, if you think that it has to be transported through all these various places and then put on a plane and then flying over and then getting distributed to my house, I don't know. That seems like insane for $80 actually. But yeah, but yeah, it's it's just too much then like you know for this project. So I decided to to just order the parts in Germany. $80. You can't transport yourself from here to Maloka and back. Yeah. Well, Maloka is also still Germany, so you know that's cheaper, I know. Okay, so we've done that. Then we need a red wire over there, which is just that heat. It's the weird part of Germany where everybody's wasted. Yeah, I have not been there since I was a child. Okay. How's the weather with you guys? It's so warm here. And the and my and the problem is my room is like the windows are exposed to the uh to the sun all day long. And oh my gosh, this room is heating up so much. I have a an AC like an AC unit for that, but the problem is if I would turn that on that would be like crazy for the stream. So I can't use it during the stream. Um, let me check. So, in here in my room, it's right now uh 31° and outside it's 28. I guess it's time to open the window. Oh, sorry to the breadboard. Yeah, you're right. Sorry. Still getting used to all of this. Thanks. Also, I have this uh I have this uh weather station meth measuring app. So, I it measures the CO2 uh parts per million in in this room here. And uh it's I think it's also time to open the window. Okay. Then I need because we screwed or I screwed up here up here, you know, like the the pin out of the resistor. I need like a a very tiny bridge uh a temp for as a temporary solution for uh until I like get a proper like replacement. There we go. doesn't look too great, but I mean this whole thing looks shitty right now. Now, you also have the outside noise. Oh my god. Sorry for that. Uh, okay. So, then we need These ones were the one microfarad, right? I forgot Yeah. Okay. So, not these ones here. Your PC is making is the warmest Berlin the warmest place in Germany right now? No clue. Not a good time of the year for fuzzing. That's why the Russians are so good at IT security. Their fuzzers can run at crazy speeds with natural cooling. So these ones here were also one micro I forgot he's using so he's he has like two different size uh capacitors here. There's big one and small one. I forgot the the values of those Oh, what are those? Um, 10 nano fire. Oh, I'm not logged in. Oh, but yeah, that's my viral video. That is that video that gets recommended to everyone. That's completely skewing my statistics. the video that makes my channel look like it's a big channel. Even though it's just this one video, it still drives like a third of my monthly views. Like that single video is worth a third of my like almost 200 videos or so or I don't know how many I made. 100 videos. I don't sorry I don't know. Wait, why is this not measuring? [Music] Okay. Didn't we measure this yesterday? H sorry the view I think I missed a chance on a clickbay title. I also thought it's a kind of a mundane one, but this video is clickbait. Like, that video has a great click-through rate. It's only it's not viral because people share it or anything. It's viral because the YouTube algorithm deemed it to be it kept people on the site and it had a great watch time and people were clicking on it over other things they clicked on. So, it's a it's maybe it's a thumbnail and not the title or anything, but one of these things must be the clickbait thing which caused YouTube to recommend it to everybody. It's like the views coming from Reddit or any other sites sharing it are unimportant. They are so small compared to it's it's all from YouTube recommending it. Okay, but why can I not measure my capacitors anymore? You didn't. I'm sorry. Wait. Oh, I also need to I forgot actually. Wait. I need There we go. So, this is supposed to be a one microfarad capacitor. And my and my thing here doesn't measure it anymore. And it did measure it yesterday. What am I doing wrong? Hey, CCC nerd. Am I stupid? Oh, polarity. I'm such an idiot. Was it that? Oh no. Okay. Am I What? This is frustrating. I don't know what I What I did. Did I break it? That's the only multimeter I have. Okay. So, yeah, maybe debug with me here. Did I select the wrong thing? So, I put it on 200 micro because it's the only one close in the range. Come on. Stupid autofocus. Come on. Where's your center camera? Please autofocus. I measured this yesterday and it should at least like you see the uh 200 comes with uh comma thing as well. So 0.9 or so should be possible and this is a one one microfarad and it showed up yesterday. I measured it like I'm 95% sure I measured this yesterday. H. Oh, well. Does Bonita have a schematic of his stuff? I he he has somewhere, right? Yeah. Yeah, I can measure capacity. It has a micro. Um I also thought polarity that was the first mistake I realized I was doing and then I switched it and it still didn't show up. Okay, the computer's clock is using this video details. There's the schematic. Okay, so let's see. It should be this one here, right? Okay. So, we have a Okay. Here this Okay. Okay. So, we have two 0.1 microfarads on. Why does he have it in parallel? Okay, whatever. Anyway, and then so we also have a 0.5 that was going to five and the one microfarad was the big one. Okay, so now I need to figure out again somebody posted the So is this one here. 0.1 uh micro farad. No, wait. I need a 0.01. My god, what's going on with me? No, I'm not talking about sea temperature. Look here. Um like here microfarad or am I or am I completely stupid? That is always also a possibility. Come on. This camera is the worst. How can you desire it to still focus on the stupid background? Okay. What else would this measurement to be? M or micro? What what what would that measure here on this scale? That's the capacitors. No. And I'm 100% sure we measured this yesterday as well, didn't we? No voltage is over here. This is uh AC voltage and here's DC voltage. Um oh micro ampere. Uh, that makes sense. Let's forget this happened. Wait, didn't I measure capacity yesterday? Oh my god. This is the good thing with the internet and recording yourself. can't pretend to be uh I cannot tell myself like you are wrong because clearly the evidence is there in the recording that I didn't Yeah. Yeah. For Imperial I'm such an idiot. Unbelievable. Well, this just justifies to buy um a Fluke multimeter. The question is just which one I should buy. Or does anybody have a better recommendation for a multimeter? I don't mind to spend so I don't feel like I want to spend four or 500 for the big fluke one, but like €200 would be fine for a good multimeter, I think. Can anybody recommend one? Yeah. Yeah. So the um here this is the uh one microfarad uh polarized one that is in the schematic uh here. I mean it also has a different uh the diff the polarized capacitor uh symbol and then we have the 0.0 0 one microfarad that are um all over the place uh to stabilize these 55 chips. And then and then besides that we have the 0.1 microfarad uh which is just to um between uh you know to like clean up the like as a filter. Is that the term? Yeah, I I I know that it's printed on uh on this one here. That's So I wanted to measure the capacitance of these of this caramic ones, right? And then I it didn't work. So I went back to this one here because here I know that it's one u one microfarad. And that's when I then got confused why this doesn't measure it. Yeah, it was that was like my test because from this one I know it's printed on it. But uh I forgot how to um I forgot how to uh what is that? Is that 0.01? 10 nanofarad is 0.01 microfarad, right? Uh looks like building a 55 uh high-rise. Yeah. Yeah. I'm working on uh I don't know if you know this uh from Ben ether uh building an 8bit uh computer like this series. Um, so we just got started yesterday. We are on the second video right now and I'm rebuilding uh the the circuit uh right now here based on that. So we are learning about the 555 timer and uh all the other stuff. Okay. So cool. So that is great. So these ones are the small ones and now I need 0.1 microfarad as well. Let's see. Seen the whole series. Love it. Cool. Yeah. I I haven't really watched the series yet because it was like one of these things that I wanted to build at some point myself and then I decided to uh let's go for it. I could stream this whole thing actually. So, H. These ones are something else, right? These ones are 0.2 or something. No, that is 0.02. Then by this calculation 22 and three zeros that's 22 nanop farads then I had somewhere like I think I think these blue ones here like these ones. These are four zeros. So, this is a 0.1. And I had more of these. The question is just where I put them. But it's also curious that I didn't order them. Let me check in my parts list. I did order apparently 16 0.1. Okay. So that that that's quite a lot. So there must be somewhere here. Oh, I think I found them. Yeah, there we go. They are like the blue ones, just different color. There we go. Okay. So that means uh let's go back to okay so this was a 0 point uh 0.1 All right. Oh, yeah. It has auto range there. That would be also cool. You have an X tech X. Okay. I put it on a thing. I will check it out and read some reviews about it later. Thanks. Thanks so much. Fluke 18B. I read about that one yesterday. I was researching a bit yesterday and yeah, was also a bit annoying how I would buy it. I can get on Alex first, but then it takes like ages to arrive here and you know, I don't know. I guess I could do that. I don't know. multimeter recommen reviews tonight. Okay, so Cool. Or maybe we put it. I guess we can Oh, he did put it one row further down. I didn't realize because of the black and red wires at the top that there's another row. Peak Tech 3,000 33 4 Z. Thank you. If I understand the 55 for which one? Uh I mean the the one that is connected to pin five is just for like I don't know to clean it up or stabilize it or something like this. I don't know. Okay. So wait, Ben Eater put it one row down. Okay. I know. I'm sorry. I'm sorry. This is super boring. But then I also want to then I get also a bit more space up there. F. Okay. So you are talking about the Yeah. But this one so this one controls the that will have effects on the speed of the timer. So that's why we want the exact value that the speed is like matching to what we want. Come on. Go in there. From a scale one to 10, how likely is a spark? Well, yes. the the the the thing that is most likely to make a spark is I guess the capacitor, the polarized capacitor. Uh which we were successful with not burning it yesterday already. So So I'm very I'm very confident. There we go. My gosh, that was hard. Guess we can put this down here for now. [Music] Then we have the 0. This one here that goes from pin five over there. Yeah. into ground. So we take like this Do you guys hear the kid outside? Okay, like that. Or maybe I should have No, it's fine. Cool. And then we need Okay, so we got this side done, I think. So on this side we take the big capacitor. And this one needs to cross over. Okay. By the way, I really like your YouTube videos, but I understand 10% of what you are explaining them, but somewhat I watch them just that is cool. Thank you so much. And I my theory is actually that you probably understand more than you might think. And uh I also think it's just like so first of all that kind of sucks because I feel like then I didn't explain it well enough. But I do hope that it gives you a sense of a feeling of I could oh I could totally do that if I wanted to. Like this I didn't quite get it yet in the video but I have some pointers where I would get started if I came across this again. So, for example, if you would get into security and you would come across something and then you realize, oh, wait, didn't I film make a video about that? Let me rewatch it again. Oh, okay. Now I have kind of an idea what to do. Like that would that would be my goal. That would that's what I was would hope to achieve. And if you have feedback like if if if especially if you know a topic right and you watch my videos and you think oh well this wasn't explained how I would have explained it that seems like way too confusing doing it like that would have been like way better or something like this. If you have feedback like this, that is that would be I have never received such feedback and uh I'm not sure why. So if if if you have thoughts on something like that, I I would really welcome that. Okay, then we need another power. Wait, let's take this one here out for now. Can you help me? Because I have my new gaming PC and right now I trying to connect to my TV. It has an RB PC plug and I have plugged in and running. I still I have no clue what you're talking about. You have a TV with an RGB RGB PC. I don't know what an RGB PC plug is. I have no clue. cuz most of people watching to me are way less or even no knowledge of every time you say but but look what I found. I'm like let's see from I have also no clue what an RCA connector is. I watch a lot of Linus tech tips, but I still feel like I have no clue about RGB NPCs. And then we have the LED. Oh, wait. Is that how is that called in German? Uh, I know what now I know what you mean. Is that also what it's called in Germany? RC a But yeah, then how do you connect that? Then you need like a converter or something like this. And then again, I don't understand how that would have worked with your OPC. Does your graphics card have such a connector or I don't understand. Regarding feedback with computers, there are always tons of ways to reach a goal. So, Emma, there's no reason to say I would have done it different. Yeah, true. I absolutely agree with you that I get I get sometimes super annoyed at like comments with why didn't you just do this because these comments are stupid because like I don't know why it did it. It doesn't does it matter. I did it like it worked my way. But this is in the case of like CTF videos or where I describe like my my path of how I did that. But so there are like two different kinds of style of videos, right? There are the style of videos where I just tell you how I did it. And then of course like if you tell me why didn't you do this and that well then I can just shrug and I don't know like maybe I didn't know this or like it doesn't really matter. I still got the solution. But then there are part parts of the video or entire videos where I want to explain a concept. So, um, like my binary exploitation series, this is where I am not really showing you how I do it. This is where I I'm showing you where I try to explain it to you. And for these, I'm deliberately thinking about what would be a good way to show it, what would be a good way to visualize it? What would be a good way to approach it? The order of things, right? It's not like a CTF challenge or project you finish and you show which tools you used it at this moment. It's like what how do I decide to show this to somebody? Does that make sense? Don't such comments increase interaction? Uh do you mean like in terms for the algorithm like comments increasing engagement or something like this? Yeah. So, so a good example is the, you know, the here at the bottom right, my Raspberry Pi video. I mean that one like got viral, right? That it caught the attention of like weird people and so people were then um like telling me about the wind32 disc imager which is oh no different example. They were telling me, uh, why didn't you just plug in a monitor and, uh, and a keyboard or something like this. And then like, well, if I had a monitor, I might have just plugged it in, but this person didn't have a monitor. Or people were saying, why didn't you just use a Linux machine? Why did you use Windows? Well, it was explained in a video that this person had a Windows machine. Like, what am I going to do? Like, you do understand that installing a Linux machine now on his MacBook would take way longer than just trying it on his Windows machine like right now, right? Like these comments are not helpful. So, this is not what I mean. But, but if a person So, right, this was a story where I was telling my process, right? But then in my videos like the um the browser exploitation videos now the um the the binary exploitation series where I just explain buffer overflows the web security series or also for example the XSS videos the Google XSS where I try to explain a concept for example in the case of the Google XSS I explained the concept of sanitizing HTML and why you have a sanitizer in in the client. client side in the browser and not on the server and and why that exists right so that's a concept I need to explain and I need to uh convey why it is done in that way right and so there I'm looking there it would be really good to get feedback on okay I I think this would have been a better example to explain like a sanitizer or something like this this would be really helpful because there I actually wanted to explain a concept versus just me showing ing uh my path. Does that make sense? Like the difference between me showing my path like how I solved something versus me trying to explain a concept like these are the kind two types of videos. Does it make sense? Don't such comments increase your interaction? Uh maybe. I I don't know if it really matters to be honest. I don't see like a big difference in like videos that receive comments or not. To be honest, at this point, I only think what matters for YouTube algorithm is the click-through rate. So, how many people like if you have a front page of YouTube and your video shows up, what is the percentage of people that click on your video versus all the other videos? And then uh the retention rate, how long can you keep the person on that video uh before they go somewhere else? And how and that also goes into how do you keep them on the video? Like that does your video make them want to watch more or will they move away and do something else? I think that's the only thing that matters. So you're looking for what was missing in my explanation, what was hard to understand. Yeah, exactly. Like I I'm sure there are a lot of like small details that I could have mentioned or you know for if you want to explain a computer, you can do it like bottom up. You can start with the transistors and the chips and then you build up slowly how what a computer works or you can do it top down. You can start with look here's software here's a web server and here is an operating system and that's running on chips and you go down right these are for example two different strategies how you could explain how a computer works which one is the right one I don't know but I could I would maybe choose one method to do it and then a person then I would really appreciate another person saying look I think a top down would have been here better because for these and that reasons and I would have shown these examples or something like this like that would be really helpful. Lives are a thing now. You mean live streaming? Uh I mean it's the second live stream I started yesterday. Sorry. Okay, we got distracted. Is this done now? I think this is done now, right? Uh I did do a little bit of live streaming uh last year web development and originally I started with live streaming you know like three years ago that's why life overflow but I stopped I try to start again and I want to build this 8-bit computer this uh series that I'm following in the top left corner there. Okay I think we can plug this in. I think this looks fine. Let's try. A crap. I need to turn this again. There we go. Also, maybe I want to turn down the ampair. I I haven't properly Okay. Uh oh. Uh oh. Okay, I just noticed that this is definitely the wrong way. This is minus. Oh man. Okay. Wrong polarity of this thing here. Let's try again. Okay. So, what did I screw up? Uh, I mean, no fireworks, but I could have still destroyed it. Nothing feels hot, though. Hi, Ednner. Um, on Twitch, we don't have this weird vague AI algorithm that can screw you over at any moment. Yeah. So, luckily, like, that's also one reason why I don't want this to be like my full-time job or anything. Like, it's awesome to build like a little bit of a business around it and, you know, have like the subscription and the ad money and it's fun. And it's an interesting experiment, but oh my gosh, if this would be my actual livelihood, my income, my main income, I would be so stressed out. Like, I wouldn't want to live like be the AI, the YouTube algorithm, my employer, you know, which you can't even talk to. You know, you are just guessing what your boss wants. And if you screw up, he fires you and he will never tell you exactly what you did wrong. And if you do well, then it's great. I'm so glad that I don't need to care about that really much. Also, for example, I couldn't I wouldn't do the browser exploitation series because the browser exploitation series means my views and engagement goes way down because it's like way too technical and stuff like this. But luckily, I don't care that much about it. So, uh yeah. Okay. So, what did I do wrong here? Um, let's compare this. H. So, pin one is connected to ground. I got that. Pin two has the capacitor and I think I got the polarity uh correct. Now going to uh up here going to ground with the side of the capacitor that has like the marking. I mean his marking is on the other side but wait that is weird. I think his capacitor must have a different polarization marking because that's negative, right? This side here. And so, god damn it. Okay. Why is this so hard? Okay. So, and then pin two is also connected to pin six over here. That looks also correct. Pin three is the LED. Yes. And it is connected to where the uh resistor is and the resistor value. Let's measure. It should be the correct resistor. Let's see if we if I can measure that in circuit. I'm not sure. Yeah, 200 something. So, that should be fine for the LED. That should still glow. Um, thanks, Bang Po. Oh my god, I'm [ __ ] idiot. I removed them earlier. Now that you say this, I remember I removed them. God damn it. There they are again. Good eye. Good eye. Thank you so much. Oh man, there's like this a saying in like the German I don't know. I know it from like the hacker space like German subculture or is it a general expression? I don't know. It's it is in man trophies like it one time with professionals would be nice. Now it's blinking. Oh my gosh. Thanks so much. Now it's also drawing a current. There we go. Now it's blinking very fast blinking. And we can slow it way down. That's the slowest blinking. Awesome. The browse exploitation series is awesome. It always looked like black magic before. Well, it's still black magic, believe me, even after having done these videos to for me. Uh, but yeah, I think so, too. I think these are the videos that I want to make and I wish I had watched myself, you know, like it doesn't work too well for YouTube algorithm in that sense. But like I said, I'm glad I don't have to care about it. Well, and Patreons uh also make this way easier. you know, like Patreon pays actually now as much as YouTube ad money. So, um it's a huge chunk and so those Patreon support I guess more of these technical videos or something I would say or I would hope so. And so, yeah, it's nice. It's good. Can't you use the small jumper as used elsewhere to prevent from forgetting them? Uh yeah, I actually wanted to like Ben Eater. If you look in in his thing, he he has like these nice black and red wires just going over the top. I removed my my wires here because I also wanted to do that. I've removed them then forgot about them. Yeah, I love that shirt. I I I love it so much that I'm I I worry of wearing it too much and destroying it. Okay, cool. Yeah, so this works. Let's not procrastinate. We are already streaming for over two hours again and we haven't actually done the second video yet. So, let me quickly uh build that bridge cable here. Uh this black and white over uh black and red one over here. And then we uh quickly do the debouncing circuit. Does he have a big closeup? Okay. What are the max frequency possible 455? Can it catch 1 MHz? That's a good question. I have absolutely no clue. Wait, what just happened? Maybe minimum period. Oh yeah, a lower comparator storage time can be as long as 10 microsconds when pin 2 is driven fully to ground for triggering. This limits the monostable pulse width to 10 micro seconds minimum. Delay time reset to output is 0.4. four times microsconds. The pin current switch within 30 nconds. Um the sh with time of Okay. Uh yeah. Okay. So no, this is frequency divider. Okay. Wait, that's a different uh application [Music] 20. No, this is just I got question what the shortest is. I don't know. Maybe somebody else can look it up and can tell us where we can find it in the data sheet. That would be cool. But yeah, let me quickly make these cables here. 500 kilo herz to two MGHertz as a top things like some can get up to 500 and some can even get to 2 MHz like depending on the quality or whatever. If you don't know how the the timer works, you should watch the first video uh of from Ben Eater's uh series here. Uh it's really excellent. Um ex like showing the schematic from the chip from the inside and explaining exactly how the uh like walking through an example pulse uh how the internal components uh make this thing create like this square wave. Uh it's really it's really good. Max is 2 MHz and you say 500 kHz is a start because it doesn't make sense because this thing can run at like 7 hertz or something. But yeah. Okay. Top is up to 2 MHz. A crap. I'm an idiot again. Okay, for now it's fine. I will fix that later. The problem is that here it's going over the ground and so I would have to have like a angle like going up and then going down again and stuff like that. Uh yeah, I'm still in university. I'm actually trying to finish my degree right now. I'm working on my master thesis right now, but I'm a bit of a long-term student at this point. So, I'm a bit older than what would be the typical time in university. So, are you new new in this channel in like this the first time you see this Twitch channel and so the first time you see me or uh do you know my YouTube channel and stuff and just the first time on Twitch or something I'm asking in case I need to do an introduction or something first time I see. Okay. Okay. So, quick introduction. Uh my nickname is live overflow. I do mostly YouTube videos uh on YouTube as life overflow about IT security and yeah mostly IT security like hacking and uh stuff like this. There are like hacking challenges that I make a lot of videos about uh trying to do walkthroughs explaining my thought process of solving them or not solving them and uh also some tutorials on various topics. So right now we have a series on trying to understand a little bit browser exploitation which is super complex topic for me and so I I try to learn some basics and create videos about it. Um, yeah. Yeah. And on Twitch, I just started streaming. I want to build this uh 8-bit computer uh from Ben Ether. If you know his YouTube channel, he has built like this 8-bit computer and I want to build that as well. Um I'm as I said I work also in IT security as a freelancer that's why I'm so slow with studying. Um IT security is like my main topic but uh as I tried to also convey on my channel IT security and hacking is basically just a way to apply your knowledge that you learn about computers. And so doing programming and also doing electronics is a way to just learn about computers that you can then apply uh also in a security context. So for me this is educational trying to learn more about electronics and at the same time having fun and building like uh a cool 8bit nerdy computer thing. So that's what's happening on stream but it's only the second stream so far. Okay. So this looks nice I guess. Okay, cool. Now, let's build this debouncer circuit. Uh thanks for the uh gifted subs uh Proer. This is the first time that anybody has gifted subs. Did the alert work? Did an alert pop up? There was an alert. No sound though. Oh, okay. Wait. Yeah, I'm still learning everything. Just set up these alerts and stuff. Uh, yeah. Thanks so much. Programming. See, it's difficult. I'm not sure what you mean by that because um uh in some sense uh C uh is extremely simple. Uh C only has a few concepts that you need to understand and they translate very well to assembly. So you have a very good understanding of uh if if like if you know like C and assembly kind of go hand in hand and if you understand these two things you can debug them. It's very easy to understand. There's really not much magic going on. pointers might seem weird at the beginning but if you look and debug assembly for like a little bit it's so easy it's so basic to understand the so it's not difficult from that sense but creating a good application with it that is bug free that doesn't have memory corruption issues that I think is very difficult so in some sense programming in C is very difficult and in some sense it's very ba it's very basic Are you doing physical hacking too at your job like entering building without permission? No, not at all. I have never done this kind of pen testing. Uh I don't most I basically only do like either blackbox testing against applications or what I prefer more is like source code audits and looking for vulnerabilities there. Um, I'm also a terrible actor and I'm extremely nervous in person and I could never I I don't think I could do like do that at all. Like going into a building and trying that. Oh my gosh, I would [ __ ] my pants. Your twitching was also annoyed. Oh, really? Oh, wow. Need to check that later. the student finds in. Oh man, you know that video is just giving me like on some way it's like awesome that so that how viral it went and how many people have found it and and saw the video which makes me obviously proud because you know I spent so much time on it and I think it's a fun video but then again it's also a very embarrassing video because I was having so many did so many mistakes and I decided to leave them in. So, uh, uh, that's kind of like I don't know, like I met somebody the other day at a conference and he didn't know that I have a YouTube channel and he was checking it out and then the next day he came again and said, "Oh, I checked out your YouTube channel." Uh, I watched one video and I asked him, "Which one did you watch?" And then he said, "The Raspberry Pi video." And then I was then I felt a bit embarrassed. And then I told him, "Please watch a different video." Uh, okay. But and then we need another 555. Okay, I guess let's start with pin one of the 555. So, we need another wire to ground. Okay, that just didn't happen. Ignore it. Thanks for the sub. Uh, Frankies. Wow, you're live. Even though the email was from yesterday. Uh, what do you mean with email? What? What? You mean um like No, yeah, I was live yesterday and uh today again. I try to have this now a regular stream. Uh I plan to only stream for like two to three hours or less even preferably, but so far I have been pretty slow. I need some discipline to keep this shorter because I want this to be an ongoing thing. And if I do it too much, then I will not have the time to do it uh next to work and uh my working on my thesis. And but if it's like a little bit of a relaxing thing once a day or so or every other day, uh then I can do it. And so I need to pay attention to that to not overdo it. Oh, you got a Patreon notification. Well, thanks so much for being a patron. I don't know how many VIPs I can have, but I definitely know that my that this channel is not very big, so I'm sure I can. Yeah. Uh Toby Plus, um uh I I started uploading uh I mentioned in the Patreon that I want to upload the archive and stuff uh on on a different sub uh thing. I will share. I've uploaded the first stream from yesterday which also has a VOD available on Twitch but I also did like a highlights cut a 20 minute cut of the video which I've uploaded but I haven't shared it yet. I will I will share that later. But then you don't have to then nobody has to watch 3 hours. So, pin two of the 555. Now, it's so warm in here. I'm sweating. I hate Germans for not having AC everywhere. I have an AC unit, but I mentioned earlier that it's it's just like, you know, like a an inefficient unit thing that you have to put like at the window and stuff like this. So, it would be super loud. So, I would really like like a central uh like if there were such a thing as central heating in Germany, which is also not the case, then we could also have like central air conditioning or something like that. Oh my gosh, if I ever have the money to build an apartment or a house or something like that, this is like the biggest thing I will invest in. And then we come to pin three which is an LED again. Uh will you continue uh working on the website too? Yeah, for sure I intend to. So my plan is I'm sure I will intermix like working on that soon again uh with with like this stream format here. Um, there are few small to-dos as I mentioned uh that a few bugs that I want to fix. And also like as I mentioned during those streams, I'm not sure if you were there when I mentioned that. Um like what would be also cool would be to watch together IT security videos and then we can talk about them uh and discuss them a little bit and then I can also add them to the website and so we can like go through like people can suggest other videos we can like watch them and together and then uh yeah that kind of stuff I think that would be that would be pin three. No. goes here. And then we need another uh I guess it's the same one that we used up here. Yeah. Um your wiring techniques. What did you use for wiring? I'm not I'm I don't You weren't here yesterday, right? I mentioned that I ordered these from the US because I couldn't find this kind of uh uh rigid or like one core wire uh that are, you know, you you see they are like a they're not floppy or anything like that. You know what I mean? Uh I couldn't find them in Germany, so I imported these from the US. I could only find them in different like sizes and I was not sure if they would work on the breadboard and this is the size Ben eater was using you were using Oh, you mean like you you use this here? Oh, what do you mean? Yeah. Yeah, of course. like these are not like the nice size and yeah. Yeah, that's I figured I need that here for like the long wiring and all that kind of stuff uh to make make it look nice. Okay, so what did I use like a is that like 200 or something? 100 ohm. I think so. Something made a weird sound. that I've never heard before. What was that here? I bought a a phone for testing, you know, like mobile testing for work, the Pixel 3a, and it made a weird notification sound I've never heard before because I just got it. When I started the project, Benia didn't have any parters on the website. I think it had the website at all at this point. Yeah, I I that makes sense. That makes sense. He took him quite a while. I'm not even sure. Did he finish it now completely? Like, is the C series completely done? But it also took him like two years or something. Yeah, if you followed along like early on and stuff, I can imagine that must have been a bit harder. There we go. That is all right. And then we have pin five. Does he connect pin five? No, pin five is not connected. We will check the schematic also in a second. Uh if you did like any modification or something in it. And then uh six and seven uh has uh one single unit up. I need to get this with the camera differently. Like I want to show what I'm doing here, but I forget always that I need to be over here and not not here. Okay, there we go. Um, and then I guess this is also again one uh 100k ohm. No, another not 100k. 10k. No, wait. Uh, let's check the schematic. Uh, so, oh, one meg. Yeah, it was one meg at pen. So, that would be Oops. Uh, pin five, six, pin seven. Yeah, pin seven. Oh, no. So, it's Wait, what? No, wrong here. Over here. Pin seven is connected with a one meg to R4 uh to to VCC. So one one over here. Can I not open this before? Yeah. 25 80. Yeah. I thought about that trying that out, but I was not sure. Wait, 26. Is that Is that smaller? Is it thinner? Yeah. So, I was not sure about this. is I I try to like look through some uh forums with like breadboard wire AWG and seeing if I can find any discussion about this if anybody shares like some experience but I couldn't find anything. It's way thinner. Yeah. So I think it's like for doing some wiring on like a PCB or something but not really for pushing it with breadboard. It's I I ranted about this yesterday already. I don't I cannot comprehend how this is how I cannot find this in Germany easily. This seems like wouldn't anybody who does anything with electronics on a breadboard wouldn't want something like this? Like am I the is there something I'm completely overlooking here and how people solve this problem differently? Like I I don't I I don't understand. Is this really our only choice that we have? the overpriced pre-made one and jump. Yeah. Okay. Jumper wires. You are right. I completely forgot about that. Yeah, of course jumper wires. But then again, it looks all shitty. But yeah, you are right. That makes sense. Jumper wires. Yeah. Uh so, okay. One leg. Shenen style market in Germany. Yeah, unfortunately stuff like this would never be possible here. Maybe I need to rearrange my whole desk thing. I was thinking like you see over here the white table where this laptop is laying. So I thought about like moving this whole like this setup here over there. Wait, how would this look like if I if I would like work like here? Ah, then you can see my hunch back. I'm not sure if I want that. But then I could maybe also move the camera like over here in that corner maybe. But then you see that part of the room which is looks crap. Oh man, everything sucks. What do you think about the new AMD processor coming out? I have absolutely zero clue what it is about. I'm I have no I know nothing about computers. I'm a person who buys MacBooks. Okay, that should say that that should tell you everything. Okay. Uh, we need another black connection to ground for the button here. Dirty, dirty MacBook user. Look, there's a second one right here. right here. Uh but uh to for my defense like uh on the the stream the the the computer screen you are seeing is coming here from my uh from my Linux laptop or the ThinkPad. Okay. And then we need the capacitor. Which value does the capacitor have? So why are here two capacitors listed? Uh so at pin six is this one here which is a 0.1 microfarad. So this was um Oh, here. Wait, wait, wait, wait. Oh, Fel. Okay, I need to check that out. So, I ended up ordering from Mousers. Where's FEL based? Is that are they delivering from Germany or is that also imported? I don't actually know. Oh yeah, I remember. Sorry. I always procra procrastinate responding to stuff like that. Yeah, sure. I would be interested. Come on. And sometimes I also have very [ __ ] up uh time zone things. So 4:00 a.m. might even be doable for me. Okay. So wait. So look at this uh at this schematic here in the middle. There's a 0.1 microfarad going from pin six to to pin six through the Wait, I'm so confused. Oh, pin six is connected to ground. Wait, I'm so confused by this schematic. So on here it says pin six is connected to seven. Yeah, that that we have that Okay. So, pin six and seven are connected. We got that. And then seven has a one meg going to VCC. And then six has on the other side. So, uh one 0.1 microfarad going to ground. Is that what he did here? Oh, I'm such an idiot. Yes, he did that. Okay. Ah, I cut this badly. So you're building the clock generator right now. But what is the reason for the second I see in the middle with the push button. Uh okay. So right. So this is this was in the first video we built we used the first chip uh up here to create the basically a clock signal that we can uh adjust the speed with the potentiometer. And now the second one as far as I understand um is to we also want a button as a clock so that we can for I guess for debugging reasons or so uh have like single clock clicks forward instead of um the auto clock and to implement the clock like this we have the bouncing issue of the uh thing. So the second one is also 555 that we use as a debouncer. Um that is the topic of the second video. Um we will check this out with the oscilloscope in a second. As soon as we have assembled this we connect this to the um oscilloscope and have a look at uh and replicate the what Bener did. Okay. So now he also has in the schematic on pin five a 0.01 01 microfarad connected u which we also have done uh previously on the other one. So let's do this as well. So, put that in here. And that also goes to ground. Yes, I tried this a few years ago. It was very fun, but I couldn't could only get to seven bits. What do you mean by that? You only could get to seven bits? I I don't know. Maybe maybe that makes more sense this uh as soon as I'm further into the series. Uh is is that a thing like that you build like bit by bit something like the bus or something? I don't know. So I don't understand quite yet. But yeah, I hope that uh through the pressure of this stream I will have the motivation uh or the pressure to also finish this because I think it's a cool it's a cool thing. That's quite an elegant way to debounce a button. Well, I don't know if it's an elegant way, but I think it's an interesting way. Like, I think showing off the five5 timer in a different application that is different to the regular timer or something like this. Uh, seems interesting to learn. And so I also encourage you to rewatch the Ben Eater videos because he explains based on the internal circuit of the 555 why this debouncing works or how the internal circuit works. So that's super interesting. Uh that really gives a good understanding of um how how this works. Okay. So did we finish this now? Um I think so. Let's compare really quick visually. We have the LD. We have this connection. Oh no, we miss a resistor at the bottom but button. Is that is that the pullup resistor? Uh yeah, that should be the pullup resistor. That was 1k I think 1k pullup resistor. Check the schematic at the switch. We have a yeah a 1k pullup resistor. Let me be honest with you. I don't understand pullup resistors and pull down resistors. I do. So, I kind of know that you like where you place them, but I don't really get it. If anybody has like and I have read a lot of like Wikipedia and Stack Exchange, it hasn't clicked for me yet what it means. If you think you have a good resource, a good concise like video or article that explains not only like what where you place them, but why you place them there because I feel like I don't know like I don't know there's something missing for me that it hasn't clicked yet what they are for. Uh like why you why you don't connect them directly? Why do you need the resistor? What what and and what's the why does it have to be like 1K? Why is it not more or less kind of thing? I guess I understand because if you don't if you just use a wire, you have a direct connection. But what what what is what is special with a resistor that it doesn't cause a short and it burns through. I don't know. You know, it's overkill method to debounce a button. Imagine you have a keyboard. Yeah, for sure. I mean, that's true. Wait, this goes to like that. Okay, now I think we got it. So, do we feel brave? Are we plugging it in? Okay, we definitely screwed something up because it's not blinking. Oh, wait. Oops. I'm an idiot. I connected the oscilloscope. No, it's blinking again. Cool. Okay. So, now it's blinking. Now, let's press the button. Okay. When you press it, it it turns on. Okay. So, now let's look at this in the oscilloscope and then we uh we can also soon wrap up this stream. Uh, oh, sorry, there were a few more comments. Uh, now I know what to do with the whole box of 555 order from China some years ago. Uh, Toby, uh, you should, uh, search on Google for 555 competition. There's like this some like a while back some people made like a competition of using the 55 like building circuits only with the 555. Like that's the only allot chip and then what they can come up with. Uh that's super funny. It's too non-connected wire that can have some voltage from static electricity. Yeah, but like if you look at the connection, it's like a resistor directly between uh for example ground and VCC then at that point, right? Or not, I don't know. Yeah. Okay. So, maybe maybe that's the problem I have. The resistor value isn't that important. It's just to prevent having a short circuit. And that's what I don't understand because every wire has a resistance. So, I mean, it might have like 0.1 ohm or something like this, right? It might or 1 ohm or whatever. might be super small but everything has a resistance. So at one point and where is that point uh does it go from a damaging short circuit to like not damaging? And why do we usually use like 1k? Why do we not just say any resistor over 500 ohm or something like this works like uh pull up and pull down resis like weak logic values just to get the current range. The resistor is set to 1 k ohm because it's about 5 milliampere you use. Okay. Wait. Uh so the formula was I = to U / resistance. Okay, I don't still don't get the significance of that. Okay, cool. So, let's connect this one here directly to the button so we can like record the bouncing and then also to the output of the to see like the debounced value basically. So, wait uh this is ground and this is This is ground. This is high. Great. And then use this one here. with a near zero ohm resistor you will get nearly infinite current consumption. So if you have right so if the in that formula I equals to voltage divided by resistance if it's the smaller it is the the larger the value gets okay that makes sense okay yeah okay okay now I now I think I get it now looking at this formula again like I equals something and then the resistor value if the smaller it gets the higher the current will be and that's a problem so you can limit the current flow yeah and and based on because we often work with five 5 volt that's why like 1K is like a good reasonable uh amount but theoretically we could also and we don't go too high Because is it does it matter if we go like does does it matter if we go like 1 megga ohm does is that would that would be a problem and the output uh is here. Okay, cool. So, let's um let's see. Let me bring that maybe closer. Uh, okay. So, I connected the the probes to the directly to the button. So, we should be able to What did I do? Something is broken. Oh, [ __ ] I had a short circuit. Okay. Still seems to work. Uh, one of the pins touched uh, so the the uh, ground rail here touched the VCC and you maybe heard the relay clicking of the power supply cutting off the power because of the short circuit. Oh my god. Okay. So, Okay. So, let's set the trigger here. And let's trigger on the pull out uh the the output of the 505. Uh well uh now wait we can let's trigger on the button. We trigger on the slope up and we want let's try a single one. Oh, wait. What is Can I set the hold off time somewhere? Okay, let's see if it that works. Okay, so this is just signal. Let's change. Okay, cool. Okay, so wait, uh, let me think. So, yellow is the output of the button. No, wait, that's not true. Wait. Uh we I need the other way slope. Uh because we have a pull so we want to catch it's a pull up resistor. So we want when we click we it drops down to ground. Wait. Oh my gosh. Try an error. Yeah. Okay. So I think now it's correct, right? Wait, let me zoom out. We will see that There we go. Okay. So, we can see here yellow is the is um is the state of the button. It's high all the time. And when we press it, drops down to zero. And when we release it, it goes up again. when we try to press like super short, we see that it drops down the the the press and then I release and it goes back up and then uh so now the button is up again and blue is the output of the 555. So you can see that um the 555 then kept it longer on and then went down and blue will always be consistently the same length except we keep the button pressed longer of course. So, and no matter how short we press, uh, the output of the 55 will always be that high. See that always be the same length no matter how long we like press the button except obviously when we keep a bit longer press then the whole thing will be extended. Okay. So the reason why we do this is for the debouncing. Ben eer explained that in his video, but if you joined later, we I show you what bouncing means. If we zoom in a lot on when we press the button. So you see here kind of also the delay like here. This is when we press the button and then it takes a moment for the 555 to like uh trigger on that. Okay, this might have been like a bounce. Uh maybe I need to zoom out a little bit more. That could look that bounce. Uh that's maybe a triggering issue here. Maybe the bounce is Here you can kind of see it bouncing a bit. The trigger is just too fast again. Like I I think it triggers on like weird values. Like this is like the this was bouncing here. Look, it triggered like it was down. This is when we pressed and this was when it was coming back up again. It like bounced there once and then it triggered on that. Uh, maybe we do the single trigger and then I just need to um Yeah, I you can kind see the bouncing, right? Like if it would be like a perfect button, it might just be like, you know, going down, but it doesn't. It like has like weird crap from the context, just like the metal cont. Come on, bounce for me. Okay. Well, this is a great demo. Ah, there we go. That's I think a pretty good bounce. So, it went down and then went up again and then finally it went down and and because of like it just, you know, the N55 registered like fairly slowly. So something like this could be, you know, causing a if we had the whole CPU and this is how a a single clock pulse would look like, that could maybe cause, you know, issues with the with some calculations because it some components might register. Oh, look at this. That was a perfect bounce. It went down once, it came back up, and then bam, it went down again. And only then finally the 55 was coming. I mean, it was too short this bounce 455 to trigger there already, I guess. There's some bouncing happened before again. Yeah, maybe that was Here, look at this. This is also a nice bouncing, I guess, showing like how this flakes. Oh, yeah. This was great. Okay, now I didn't record much, but yeah, you can see like how how crazy like it might bounce sometimes around. Uh, let me read the stuff you wrote. Uh uh so the polar resist par anyway um the higher the pullup gets the slower the voltage level would change when the switch component does not conduct. Okay I guess I don't know don't quite get it. Um, when you stop pressing the button, it also bounces. Yeah. Yeah. Okay. Yeah. I I think we we dealt with that. Do you have a capacitor near the button? Um, were you wondering just because we didn't see a lot of bouncing or what? Yes, kind of. I mean, there are some capacitors on the power rail like over here. So, it's not like close to the button, but it certainly I don't know if it affects stuff. Cool. Awesome. Was there anything else you would like to see measured? I'm not sure if I forgot something there now that we should do before I end the stream. Uh because Okay. So, I would end it in the next 10 minutes or so. So, let's I think right I finished that video. Or was there anything else in the video? No, it was showing just the Yeah, I should be fine. Yeah, cool. I think that was pretty uh good um success again for today. Um there you go. Auto automatic wire stripper. I will check that out. I might I I thought I wanted to buy a good uh like u a nice wire stripper too, but I didn't exactly know. Is that a good one? I looked at them and they looked weird. I thought maybe they were gimmicky, but are they good for like small Oh, yeah. They are for 24 to 10. Well, I have 22. I should still be fine, maybe. Yeah, I I will look around for one again. Uh, which software would you recommend for PCB design? Unfortunately, I've never really done any PCB design. I only used Eagle like once to create like one PCB in my life where somebody helped me was also nothing special. Just some shift registers and LEDs. Oh, Cabone, you can also recommend them. Okay, awesome. And then I might order the order one of these too. You could also add a Schmidt trigger after the output to clean up the created pulse. Well, that goes on the I need to Google that list. Well, I'm also curious what Ben Eater will does next with uh with this circuit because somehow we need to like combine them, I guess, somehow the regular clock pulse and the button now. And if we checked like you know that module later in life. So there's another button. I think that's a switch that might be used to switch between these two ones. I think maybe you can select if you want the uh button press clock or if you want the autogenerated clock. That's my assumption. And then I don't have no clue what these are over here. But yeah, we will figure that out in the next few streams. Yeah, just as a quick recap, uh we finished the second video of Ben Eater's series on building an 8-bit computer. You can see it blinking uh still over here and the button press. We looked at we replicated the test beneed it with the oscilloscope as well. Uh, the stream is being recorded and should be available as a VOD on Twitch for as long Twitch keeps it there and it will also be made available on a YouTube channel where I will upload it. Um, I will still need to work on that YouTube channel. I will share it on Twitter. Um, probably uh once it's once I can share it. Um, yeah. So, follow me on Twitter if you want to stay updated. follow on Twitch and you know check out my YouTube channel live overflow as well. Yeah, that's all. Any any qu any remaining questions? Otherwise, I would head into the um I would uh stop the stream soon. I recommend Kipex. Okay, I put it on. Do you know? Yeah, I can. I read the name I think somewhere, but I have no clue. I wrote down the Kipex as well. Okay, then. Thanks so much for hanging out with me today and I see you most likely uh sometime tomorrow. I don't know exactly the times yet. sometime. Oh, my emotion my uh emote got approved. You are the first person to I didn't even try out this emote because it wasn't approved yet. Oh [ __ ] I I did it wrong. Oh, I can't do it myself because I'm not subscribed to myself. Uh, it's just I guess I I think the the integration Oh, it works on your screen. Oh, it did. Yeah, you are right. It also worked on the stream. Uh, it didn't work in the in the OBS uh Twitch integration thingy. Okay. All right. Uh, nice. Cool. Uh, let me know if you have ideas for any other uh emotes emotes that uh that I could add. Okay, awesome. Cool. Uh, again, thanks so much for hanging out. I see you probably tomorrow. I don't know the time yet. Um, so keep a follow here and, you know, enable the email, I guess, or whatever, or watch the VOD. Um, yeah. Bye-bye.
Original Description
-=[ ❤️ Support ]=-
→ per Video: https://www.patreon.com/join/liveoverflow
→ per Month: https://www.youtube.com/channel/UClcE-kVhqyiHCcjYwcpfj9w/join
-=[ 📄 Info. ]=-
Main Channel: https://youtube.com/LiveOverflowCTF
Twitch: https://twitch.tv/LiveOverflow
-=[ 🔴 Stuff I use ]=-
→ Microphone:* https://amzn.to/2LW6ldx
→ Graphics tablet:* https://amzn.to/2C8djYj
→ Camera#1 for streaming:* https://amzn.to/2SJ66VM
→ Lens for streaming:* https://amzn.to/2CdG31I
→ Connect Camera#1 to PC:* https://amzn.to/2VDRhWj
→ Camera#2 for electronics:* https://amzn.to/2LWxehv
→ Lens for macro shots:* https://amzn.to/2C5tXrw
→ Keyboard:* https://amzn.to/2LZgCFD
→ Headphones:* https://amzn.to/2M2KhxW
-=[ 🐕 Social ]=-
→ Twitter: https://twitter.com/LiveOverflow/
→ Website: https://liveoverflow.com/
→ Subreddit: https://www.reddit.com/r/LiveOverflow/
→ Facebook: https://www.facebook.com/LiveOverflow/
-=[ 📄 P.S. ]=-
All links with "*" are affiliate links.
LiveOverflow / Security Flag GmbH is part of the Amazon Affiliate Partner Programm.
#liveoverflow
Watch on YouTube ↗
(saves to browser)
Sign in to unlock AI tutor explanation · ⚡30
Playlist
Uploads from LiveUnderflow · LiveUnderflow · 1 of 42
← Previous
Next →
▶
 2
2
 3
3
 4
4
 5
5
 6
6
 7
7
 8
8
 9
9
 10
10
 11
11
 12
12
 13
13
 14
14
 15
15
 16
16
 17
17
 18
18
 19
19
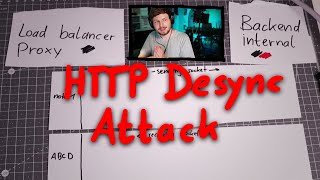 20
20
 21
21
 22
22
 23
23
 24
24
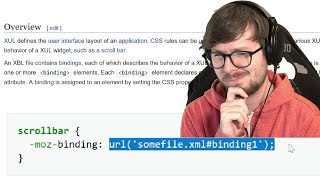 25
25
 26
26
 27
27
 28
28
 29
29
 30
30
 31
31
 32
32
 33
33
 34
34
 35
35
 36
36
 37
37
 38
38
 39
39
 40
40
 41
41
 42
42

BUILDING AN 8-BIT COMPUTER FROM SCRATCH #2 (Full Stream)
LiveUnderflow
LiveOverflow's Makeup Tutorial #1
LiveUnderflow
MakeUp Tutorial for Streaming and YouTube
LiveUnderflow
MurmusCTF, SSD CTF Challenge, Google CTF writeups - PwnNews 27/06/19
LiveUnderflow
Google CTF 2019 Chat - Looking at Writeups
LiveUnderflow
Discussing Hacking Videos - Community Guidelines YouTube
LiveUnderflow
Hacking Skills Perspective
LiveUnderflow
Chatting about Cryptography and Exploit Regulations
LiveUnderflow
BUILDING AN 8-BIT COMPUTER FROM SCRATCH #1 (Full Stream)
LiveUnderflow
BUILDING AN 8-BIT COMPUTER FROM SCRATCH #3 (Full Stream)
LiveUnderflow
BUILDING AN 8-BIT COMPUTER FROM SCRATCH #4 (Full Stream)
LiveUnderflow
Studying Cybersecurity in USA vs. Germany | ReHacked
LiveUnderflow
Examining JavaScript Inter-Process Communication in Firefox | Watch Together & Q&A
LiveUnderflow
Reading SECRET U.S. Air Force HACKING Document!!
LiveUnderflow
Why Don't Use alert(1) for XSS? | Watch Together + Q&A
LiveUnderflow
Escaping from JavaScript Sandbox (AngularJS)
LiveUnderflow
Why proofing impact for every XSS is "dumb" - Bug Bounty Reports
LiveUnderflow
Password Cracking Explained | ReHacked
LiveUnderflow
HTTP Desync Attack Explained With Paper
LiveUnderflow
Better than Stack Overflow for Development
LiveUnderflow
Thumbnail A/B Test Experiment for CTR
LiveUnderflow
How To Exploit a Heap Overflow
LiveUnderflow
Log4Shell | Bug Bounty Public Service Announcement #shorts
LiveUnderflow
New Details on Commercial Spyware Vendor Variston - Revisiting Firefox Sandbox Escape
LiveUnderflow
Can AI Hack Websites with XSS? #ChatGPT
LiveUnderflow
ping Vulnerability Patch Analysis (with #ChatGPT) - CVE-2022-23093
LiveUnderflow
Using CodeQL to Investigate GraphQL Resolvers
LiveUnderflow
Security Issue Found in US Gov CISA Tool?
LiveUnderflow
Using joern to Find GraphQL Authorization Issue
LiveUnderflow
Analytics from 7 Years on YouTube...
LiveUnderflow
3D Printer Researching Igus Bearings - Prusa i3 MK3S+ (part 3)
LiveOverflow
Attacking VSCode Extension from Browser? - Live Security Research
LiveOverflow
I Don't Trust Websites! - The Everything API with ChatGPT
LiveOverflow
Do Hackers Need To Know Algorithms and Data Structures?
LiveOverflow
"Remove the video as soon as possible"
LiveOverflow
Arm®-based Video
LiveOverflow
How to make good HACKING videos
LiveOverflow
LEEROY fällt auf HACKER rein?
LiveOverflow
Hacking for an Intelligence Agency
LiveOverflow
Tier List of My Worst Tweets
LiveOverflow
Step by Step Phishing Setup Tutorials are Unethical!
LiveOverflow
Hacker Reacts to 23andme Data Leak
LiveOverflow
Related Reads
📰
📰
📰
📰
How Creative Characters Like Sprunki Inspire Kids to Learn Coding
Medium · Programming
Computer Applications for Primary School Children: A Fun + Safe Guide for Ages 6-12
Dev.to · Ogunkola Adeola
From 0 to 20 Chapters: My Story‑Driven Rust Book for Kids Now Has a Bilingual Interactive Demo
Dev.to · born1987-ir
How Kids Can Build Fighting Games Stickman in Scratch
Medium · Programming
🎓
Tutor Explanation

 DeepCamp AI