YOLOv9 Tutorial: Train Model on Custom Dataset | How to Deploy YOLOv9
Key Takeaways
The video provides a tutorial on YOLOv9, a state-of-the-art model in real-time object detection, and demonstrates how to train the model on a custom dataset and deploy it using the inference package. The tutorial covers the setup, training, and evaluation of YOLOv9, as well as its deployment using Rook Flow and Supervision for annotating inference results and visualizing model output.
Full Transcript
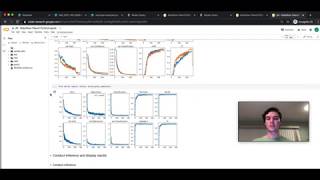
YOLO v9 is out and it's beating out the competition in both speed and accuracy the creators of YOLO V4 YOLO X and YOLO V7 have released new model and according to the paper is new state of the art in realtime object detection in this video I'll show you how to run the inference using pre-trained cooes train and evaluate the model on custom data set and deploy the YOLO v9 model using inference package so without further Ado let's dive in the link to notebook I'll be using is in the description below but you can also find it in roof flow notebooks repository I strongly encourage you to open it in separate Tab and follow along we navigate into model section and search for YOLO v9 object detection notebook then click open in collab button and after a few seconds we should get redirected to Google collab page before we start we need to make sure that we have access to GPU it is especially important if we plan not only to run the inference but also fine-tune the model on custom data set this process can be unbearably slow in CPU only environments to do this we scroll slightly down into before you start section and execute Nvidia SMI command this command will only execute successfully in GPU accelerated environments with Nvidia gpus if your result is similar to mine then you're probably good to go however if you see a message saying that Nvidia SMI command is not recognize it probably means that you do not have access to GPU in this case click runtime and from extended dropdown select change runtime type then choose version with Nvidia T4 G GPU the next step is to clone YOLO v9 repository and install all necessary libraries unlike YOLO V8 and yolon Nas YOLO v9 is not distributed through peep package at least at the time of the recording this means we need to clone the repository and manually install all dependencies after installation instead of CLI or SDK we'll have a set of script to detect train evaluate and Export the model the project structure is quite familiar to the one known from older models like YOLO V5 or YOLO V7 so if you have any experience with them you should feel quite familiar if you don't don't worry I'll still guide you for the whole process additionally to make our life easier we'll also install roof flow peep package it will allow us to download the data set in format compatible with yolo v9 I will use the football player detection data set but you can download whichever you you like there are already more than 500,000 data set on rlow Universe the links to both universe and my data set are in the description below unfortunately YOLO v9 lacks support for automatic model weights download you can download them manually from GitHub but inside the notebook you'll find set of commands allowing you to do that automatically so let's run them now to finalize the setup process our next step is to run inference with pre-trained I think it's a great way to get familiar with new model and at the same time it will allow us to confirm that the installation was successful and everything works as expected to test the model I will use the image of my dog but if you want to run it with your data simply drag and drop your image into the left panel of Google collab and replace the source image path value with path leading to your image as I said before YOLO v9 does not have dedicated CLI or SDK so to perform the inference we will need to use the tech py script the most important arguments that we need to provide are weights and Source the first one is simply path to weights file that we already downloaded from GitHub The Source can be a path leading to individual image or video but also to the whole directory with multimedia files or if you run locally to webcam stream on top of that we will set values for two extra parameters confidence threshold and device I set the confidence Threshold at 0.1 because I want to capture as many detections as possible even those that the model is not entirely sure about the device specified the hardware we want to use during the inference we could pass the CPU here but given that we have a GPU will pass the Cuda device index in our case Zero now let's run the inference using two architectures and compare the results the commands we will use are almost identical the only difference lies in path to model weights let's start with Gan C by default YOLO v9 save inference results in yolow v9 detect exp directory we can override this Behavior by passing custom values for project and name arguments now let's run the inference for YOLO v9e and compare the results this time the results of the inference were saved in X to directory we can see that using the same parameters YOLO v9e is capable of detecting more objects in the same image and that's consistent with the performance reported in Yolo v9 paper last week we had our first Community session where we discussed yellow World a almost Real Time Zero shot object detector and I would like to use this opportunity to thank to everyone who joined the stream I really had an awesome time meeting you all and answering your questions we decided to continue this initiative so if you have any questions about the code or demos that I will show today or about YOLO v9 in general make sure to leave them in the comments and I will make sure to answer all of them during the upcoming stream and of course it would make me even more happy if you could join it live you can find more details along with exact day and time in the description below and once again thank you okay we know how to run Yola v9 using pre-trained weights now it's time to learn how to fine-tune the model but before we can do that we need to prepare our data set as I mentioned earlier I will train my model on football player detection data set if you'd like to try a different one feel free to browse for universe and pick one that seems interesting then from left panel select data set and click download data set button when the popup window appears pick the export format in our case YOLO v9 make sure that show download code option is checked and click continue after a few seconds a code snippet will be generated you just need to copy and paste it into Google collab and you're good to go I however will stick with my original choice I just press shift enter and once it's done I see a prompt asking me to provide roof flow API key I follow the link that takes me to roof flow website I click generate token copy it and then return to collab paste and hit enter the downloaded data set is divided into three subsets train validate and test the train and validate subsets are going to be used during the training while the test subset will be used for evaluation remember that the test set should not contain any images that were used during the training each part consists of two directories one containing images and the other containing labels each label file is essentially a txt file in standard yellow format known from earlier versions of the model each line describes a single bounding box and consists of five numbers separated by spaces the first one is the index associated with the label for example for Coco data set index zero is class person the other four are relative coordinates describing the position and dimensions of bounding box in the image now that our data set is ready we can finally start the training and to do it we'll use train py script this time however we need to specify a lot more parameters let me briefly introduce you to the most important ones let's start with arguments typical for any computer vision model training batch size image resolution and EPO this affects the amount of GPU memory required during the training as well as the total time needed to complete it bad size regulates how many images pass through the network simultaneously it should be as high as possible naturally limited by the amount of available memory before entering the network all images must be scaled to a common size which is defined by image resolution the higher the value the smaller objects will be able to detect unfortunately this also means increased memory usage and longer training time Epoch Define the number of training iteration it's usually a matter of intuition it needs to be large enough so the model has time to learn but not too long so overfitting wouldn't occur data defines the path to yam file specifying the structure of our train set finally weights and config indicate the checkpoint and architecture we would like to use during the training in this tutorial we will train the smallest architecture available in Yolo V8 repository Gan C it's time to press shift plus enter and get it going the training process can take time so let's use the magic of Cinema to speed it up [Music] after several minutes our training was completed now it's time to evaluate the model and check how it performs with object detection on new images and videos model evaluation is a must have after fine-tuning the model custom data set after all we need to understand the strengths and weaknesses of our model and check if there are any differences in accuracy across different categor from our data set let's start by going through the directory storing the training artifacts inside besides weights we can find several visualizations that will help us understand the progress of training session let's start with the graph showing change in key metrics over time the six charts on the left display various types of loss function calculated for both the train and validation sets these charts are excellent tool to for detecting overfitting all of them are expected to decrease as training progress however when a model is trained for too long the validation loss function often tends to increase signaling that the model is too closely fitted to images from the train set in our case it's clear that the model could have been trained for much longer without any issues the charts are still steeply decreasing and there is plenty of room for further optimization the remaining four charts are various metrics such as Precision recall and map and their values should increase as the training progress the next chart we can analyze is the confusion metrics it shows how often objects of different categories are confused with each other I like this chart because it allows us to delve deeper into model's characteristics in our case we can clearly see that the model excels at detecting play ERS referees and goalkeepers but performs significantly worse at detecting balls YOLO v9 provides another useful visualization this time focusing on label distribution we can draw deeper conclusions by analyzing both of these charts simultaneously we see that our data set is unbalanced with player class being significantly over represented hence probably the best performance of the model in detecting players the ball class performs the worst not only because it appears the least frequently but also because the bounding box sizes for this class are the smallest since we decided to train our model using 640 input resolution such small bounding boxes might simply be scaled down to Tiny group of pixels possibly not carrying enough information to reliably detect the ball class now let's Benchmark our model using while py script as expected both recall and map for this class are significantly lower than average this is likely to high number of Mis detections a solution to this problem could be training the model using 1280 input resolution but as mentioned the training session would then be slower and require more GPU memory okay it's time to put our newly trained model to the test and see how it performs with previously unseen images and videos the command does not differ much from the one we executed at the beginning of the video we switch the path from the model pre-trained on Coco data set to the one we just ftuned and as the source we pass the entire directory containing the test data set let's take a look at some of the results as expected the model performs relatively well the biggest issue is reliable ball detection where we encounter both false negatives and false positives double detection also occur frequently when a referee is simultaneously detected as both a player and a referee now let's have some fun and see how our model handles sh video clip [Music] so how do we deploy the model that has no SDK we can certainly try to hack a solution based on the detect py script available in the repository however it seems that a much better and certainly more robust solution would be to use roof flow to manage your weights and deploy the model anywhere you want it's super easy you can do it in few lines of code let me show you how we start where we left off with our model already trained in collab first we need to install two additional packages inference and supervision we will use inference to deploy our YOLO v9 model locally but you can use it to run all all sorts of different computer vision models supervision is a computer vision Swiss army knife that this time we will use for annotating our inference results now we use the deploy method specify the model type in our case yolow v9 and the directory containing the training results this will send the weights to roof flow and enable us to use them both running the model locally and through the API now let's try to load the model back into the inference we specify the model ID which is the end part of the address displayed above the project name/ data set version and we pass our roof flow API key to get your roof flow API key you need to log into your roboplow account and then by expanding the drop-down in the upper right corner go to settings from the panel on left side select workspace and go to roof flow API section now you can simply copy your private key return to collab paste it and press enter to initiate model download Once the model is loaded we can choose a random image from our test set loaded using open CV and run it through the model finally using supervision we visualize the result since supervision offers a variety of different annotators we can choose something more suitable for our use case for examp example the ellipse annotator funny how such a small change can make the results seem much more interesting at the end of last year we released a video covering my favorite object detection models the goal was to evaluate popular detectors not only in terms of speed and accuracy but also take into account less obvious criteria such as Community size ease of use and Licensing I mentioned that the higher accurate accy of the based model on KOCO data set does not always translate into higher accuracy of the fine-tuned model and that the accuracy of detections is usually more affected by the quality of the data set that was used for training than the choice of specific architecture assessing Yolo v9 from similar perspective it's worth to mention that it is still a very young project although according to the paper it has managed to beat the competition in terms of of speed and accuracy on the other hand it has no SDK no CLI and no documentation beyond the GitHub read me so to sum it up I encourage you to try y v9 train your model deploy it with inference however keep in mind that there are still plenty of other popular object detectors that might be just a little bit slower and less accurate but still be a valuable alternative because they have large community great documentation and a lot of examples online that you can use to build your own project of course a powerful realtime object detector can be applied in many scenarios in this tutorial we trained a model for detecting players on a football field but YOLO v9 can be just as well used to Power Smart self-service checkout the customer simply needs to move the product in front of the camera and it is automatically added to the bill I also encourage you to check our hagging face space where you can upload your image and compare YOLO V8 v9 and yolon Nas side by side we are using models pre-trained on Coco data set so detection is limited to only 80 classes if you want to go beyond that I encourage you to check our YOLO World space where you can detect any class without any training and that's all for today if you like the video make sure to like And subscribe and stay tuned for more computer vision content coming to this channel soon my name is Peter and I see you next time [Music] bye he
Original Description
Description:
Get hands-on with YOLOv9! This video dives into the architecture, setup, and how to train YOLOv9 on your custom datasets.
Chapters:
- 00:00 Intro
- 00:36 Setting Up YOLOv9
- 03:29 YOLOv9 Inference with Pre-Trained COCO Weights
- 06:35 Training YOLOv9 on Custom Dataset
- 10:44 YOLOv9 Model Evaluation
- 13:53 YOLOv9 Inference with Fine-Tuned Model
- 15:18 Model Deployment with Inference Package
- 17:37 Important Considerations for Using YOLOv9
- 19:00 Demo: Build Self-Service Checkout with YOLOv9
- 19:50 Outro
Resources:
Object Detection Model Leaderboard: https://roboflow.com/models/leaderboard
- Roboflow: https://roboflow.com
- Roboflow Universe: https://universe.roboflow.com
- 🔴 Community Session March 14 2024 at 09:00 AM PST / 12:00 PM EST / 06:00 PM CET: https://roboflow.stream
- ⭐ Inference GitHub: https://github.com/roboflow/inference
- ⭐ Notebooks GitHub: https://github.com/roboflow/notebooks
- ⭐ Supervision GitHub: https://github.com/roboflow/supervision
- ⭐ YOLOv9 GitHub: https://github.com/WongKinYiu/yolov9
- 🗞 YOLOv9 arXiv paper: https://arxiv.org/abs/2402.13616
- 🗞 YOLOv9 blog post: https://blog.roboflow.com/train-yolov9-model
- 📓 YOLOv9 notebook: https://colab.research.google.com/github/roboflow-ai/notebooks/blob/main/notebooks/train-yolov9-object-detection-on-custom-dataset.ipynb
- ⚽ Football Players Detection dataset: https://universe.roboflow.com/roboflow-jvuqo/football-players-detection-3zvbc
- 🤗 YOLO ARENA Space: https://huggingface.co/spaces/SkalskiP/YOLO-ARENA
- 🤗 YOLO-World + EfficientSAM HF Space: https://huggingface.co/spaces/SkalskiP/YOLO-World
Stay updated with the projects I'm working on at https://github.com/roboflow and https://github.com/SkalskiP! ⭐
Watch on YouTube ↗
(saves to browser)
Sign in to unlock AI tutor explanation · ⚡30
Playlist
Uploads from Roboflow · Roboflow · 0 of 60
← Previous
Next →
1
 2
2
 3
3
 4
4
 5
5
 6
6
 7
7
 8
8
 9
9
 10
10
 11
11
 12
12
 13
13
 14
14
 15
15
 16
16
 17
17
 18
18
 19
19
 20
20
 21
21
 22
22
 23
23
 24
24
 25
25
 26
26
 27
27
 28
28
 29
29
 30
30
 31
31
 32
32
 33
33
 34
34
 35
35
 36
36
 37
37
 38
38
 39
39
 40
40
 41
41
 42
42
 43
43
 44
44
 45
45
 46
46
 47
47
 48
48
 49
49
 50
50
 51
51
 52
52
 53
53
 54
54
 55
55
 56
56
 57
57
 58
58
 59
59
 60
60

YOLOv3 PyTorch Notebook Tutorial
Roboflow
How to Train YOLOv4 on a Custom Dataset (PyTorch)
Roboflow
How to Train YOLOv5 on a Custom Dataset
Roboflow
How to Use the Roboflow Dataset Health Check
Roboflow
What is Mean Average Precision (mAP)?
Roboflow
How to Use the Roboflow Model Library
Roboflow
How to Train EfficientDet in TensorFlow 2 Object Detection
Roboflow
How to Train YOLO v4 Tiny (Darknet) on a Custom Dataset
Roboflow
Ask the Roboflow Team Anything - Episode 1
Roboflow
Exploring The COCO Dataset
Roboflow
Community Spotlight: Improving Uno with Computer Vision
Roboflow
Mosaic Data Augmentation - Deep Dive
Roboflow
Hands on with the OAK-1
Roboflow
Glenn Jocher: What is New in YOLO v5?
Roboflow
How to Use Amazon Rekognition Custom Labels and Roboflow to Build an Object Detection Model
Roboflow
An Interview with Brandon Gilles, Luxonis Founder and OAK Chief Architect
Roboflow
How to Train a Custom Mobile Object Detection Model (with YOLOv4 Tiny and TensorFlow Lite)
Roboflow
Tackling the Small Object Problem in Object Detection
Roboflow
Fast.ai v2 Released - What's New?
Roboflow
Teaser: Roboflow Train (1-Click Computer Vision AutoML)
Roboflow
How to Train a Custom Resnet34 Image Classification Model
Roboflow
How to Label Images for Object Detection with CVAT
Roboflow
Deploy YOLOv5 to Jetson Xavier NX at 30 FPS
Roboflow
Elisha Odemakinde Hosts Roboflow ML Engineer, Jacob Solawetz
Roboflow
Getting Started with VoTT - Computer Vision Annotation
Roboflow
How to Manage Classes in Object Detection (Rename, Combine, Balance)
Roboflow
How to Train YOLOv4 on a Custom Dataset in Darknet
Roboflow
Is Grayscale a Preprocessing or Augmentation Step in Computer Vision?
Roboflow
Getting Started with Image Data Augmentation
Roboflow
Glenn Jocher: Image Augmentation in YOLO v5 and Beyond
Roboflow
GA Hosts Roboflow - Healthcare and AI
Roboflow
How do self driving cars know when to stop?
Roboflow
What is PASCAL VOC XML?
Roboflow
AutoML Showdown: Google vs Amazon vs Microsoft
Roboflow
How is computer vision changing manufacturing?
Roboflow
The Alphabet in American Sign Language
Roboflow
Luxonis OAK-D: Computer Vision on Device
Roboflow
How to Train a Custom Faster R-CNN Model with Facebook AI's Detectron2 | Use Your Own Dataset
Roboflow
TensorFlow vs PyTorch: Fireside
Roboflow
Occlusion Techniques in Computer Vision
Roboflow
A Customizable Web Application for Your Computer Vision Model
Roboflow
Model Tradeoffs and the Future of Computer Vision
Roboflow
Designing an Augmented Reality Board Game App
Roboflow
YOLOv4 - Advanced Tactics
Roboflow
How to Use CreateML and Build a Computer Vision iPhone App | AR Object Detection
Roboflow
Fireside Chat: Computer Vision in Agriculture
Roboflow
Scaled-YOLOv4 Tops EfficientDet: Research Rundown
Roboflow
What is Image Preprocessing?
Roboflow
Building a Community of Creators with BlkArthouse and Von Deon
Roboflow
How to Train Scaled-YOLOv4 to Detect Custom Objects
Roboflow
Intro to Computer Vision: Fireside
Roboflow
The Best Way to Annotate Images for Object Detection
Roboflow
The Computer Vision Process: Fireside
Roboflow
How to Annotate Images with Your Team Using Roboflow
Roboflow
Introducing the Roboflow Object Count Histogram
Roboflow
How Fast is the M1 at Machine Learning? Benchmarking Apple's M1 and Intel's Chips
Roboflow
CLIP: OpenAI's amazing new zero-shot image classifier
Roboflow
How I hacked my Nest camera to run custom models
Roboflow
Getting Started with the Roboflow Inference API
Roboflow
Transfer Learning in Computer Vision | What, How, Why
Roboflow
More on: CV Basics
View skill →






🎓
Tutor Explanation
 DeepCamp AI