TypingDNA Tutorial - How to Use Typing Biometrics for 2FA
Key Takeaways
Demonstrates how to use TypingDNA API for 2FA through typing biometrics
Full Transcript
[Music] hello everybody and welcome to another youtube video so in today's video i'm going to be showing you how we can implement typing biometrics as a form of two-factor authentication for a website for a sign-in page or some application where you need to authenticate or log in users so for this video i'm teaming up with a company called typing dna and they are providing a completely free api that actually allows you to authenticate users based on the way that they type so this is super cool i had an awesome time building this project i'm really excited to show it to you guys in this video and again just to clarify what we're going to be doing is taking this api here i'll discuss obviously how the api works and kind of the flow and everything like that and we're going to be implementing it into a project so i'm going to show you how you can take a project that has you know kind of a standard sign in and sign up form and then how you can take this api and integrate it with it such that when users sign in it will actually send a request to the api and see if the user who signed in is the user that they say they are based on their typing biometrics now when i say typing biometrics i pretty much mean the typing pattern of users signing in so when they type in their username and password typing dna is going to keep track of their typing pattern so kind of the sequence of keys that they press and the duration of time between those key presses that's going to act as the biometrics it's then going to send that data to the typing dna api the api is going to kind of check that against previous typing patterns it has and then it's going to tell you whether or not this user is validated and whether or not this typing pattern matched so this is super cool i'm really excited to show this to you and specifically what we're going to do is integrate this into an existing project so i have a really simple project i've set up i'm going to demo it to you in just one second this project just has a sign in and sign up form it has a really simple flask web server kind of running the website i'll walk you through the project itself so you have an idea of all of the code that's pre-written and then i'll show you how we can take this and add it in so with that said let's dive in i'll quickly mention that this tutorial is not for beginners you should have some familiarity with javascript and web development you don't have to be an expert you just have to kind of know a little bit about it to be able to follow along so anyways i'm going to get into the demo now and show you what we're going to be building all right so i've got the website up here now this is actually the finished implementation this is not the starter project although the starter project looks almost identical and again in the starter project it has the fully functioning website except the sign in and sign up forms are not kind of coded out yet or they're not hooked up to the back end so we'll have to hook those up to the back end when we actually start working on this now the point of this website was to stay as simple as possible just to make it really easy and really clear on how we do the implementation i don't want to confuse you with you know a really complex website just wanted to spin something up that would be kind of usable and that we could actually test this api with so you can see here i have a website i'm using bootstrap and this is just standard html i have a home page a login page and a sign up page now on the sign up page we'll actually start by just creating an account so to create an account i'm going to say tech with tim let's just go with 12 at gmail.com and notice that this little typing dna thing here is going up and down indicating that it's keeping track of my typing pattern now we're not going to have to code this out this is provided by typing dna we just need to add it to the front end of our website so it can keep track of a user's typing pattern all right now that we have that i'm going to type a password so i'll go with tim12345 and then i will press submit now when i do that it says we need to collect some typing data from you you may be asked to fill out this form multiple times so the way that this api works is that you need a certain number of entries or typing patterns so that typing dna can actually validate another typing pattern against them so you need i think three typing patterns to start and then as soon as you have three typing patterns you can actually start using the next patterns you send to the api as like authentication patterns rather than let's say enrollment patterns or patterns that are going to be validated against so anyways i'll talk all about this later on just want to give you an idea of why we have to type this multiple times so techwithtim12 at gmail.com and then tim12345 i think it was 12 that i used okay we need to collect some typing data from you you may be asked to fill out this form multiple times all right so tech with tim12 at gmail.com and then tim one two three four five okay let's submit that it's going to ask me one more time and now this time when i type in my username and password it's actually going to tell me if i am validated so if this typing pattern matches the patterns that it's collected previously so techwithtim12 at gmail.com tim oops one two three four five okay so submit and notice we get typing dna indicated that there was high confidence in your login so there we go we are now signed in that validated us and this is what i'm going to be showing you how to build now the reason why this is great is because whenever you sign into a website you're going to have to type in your username and password anyways right so this is an extra layer of security that you can add that's fully automated and that doesn't require the user to do anything else that they wouldn't normally have to do so you no longer need to whip out your phone and typing type in like a two-factor code or go to your email and type in that code or anything like that this is just a really great added security layer that is pretty easy to implement it's kind of like why wouldn't you just add it to your website now that said this should not be used as the primary form of authentication this obviously can fail if you're typing with one hand you're typing really slow or you're trying to you know break the authentication you will break it you have to type the same way most of the time when you're typing in your username and password and if you're like deleting characters and retyping characters this may fail as well but most of the time it's going to work and as i said it's kind of just like why wouldn't you add it in it's super simple automated and i just think it's actually really cool so that is the demo now i'm going to show you the starter project which you're going to need to download to get started we're then going to create an account with typing dna this account is just so we have access to the api and we can get our api key and api secret i will then very briefly discuss the flow of our application so how things are going to be communicating with each other then we will jump into the code and start doing this implementation so there is a github repository down below in the description in fact all of the stuff i show you here will be linked down below as well as timestamps for when i go over certain parts of the implementation anyways what you need to download is this typing dna starter code folder now it's a github repository if you're not familiar with github all you do is press on code and press download zip that will download the entire project and then you will have the finished project which is just the code i wrote before this video that i'm going to be kind of referencing and then i have the actual starter code which just has a very bare bones website that functions but doesn't really do anything we need to kind of hook up some different components so you want to download this folder or you'll download that entire thing and then you want to go into this folder and this is where you can follow along with me as we do the implementation now notice here i also have links to some of the documentation we'll be using but anyways go to the description download this project that is how we get started now once you've done that what you're going to want to do is go to the typing dna website again link in the description and you can read through this and kind of see how it works it's actually interesting we don't have to use typing dna just for logins we could use it for credit card payments uh for just other texts that you may be typing in this is just an example of how you do this specifically for login but you can use typing biometrics for a ton of other stuff so anyways you're gonna go here you're gonna go to check out our api now free you're gonna press on that and it's gonna bring you to a page that looks like this now actually it should probably bring you to a sign up or sign in page on that page you're obviously going to create an account again totally free and then you should be brought to some like dashboard like this once you're here you want to pay attention to this api key and this secret we will be using these later on when we actually communicate with the api so now that's all set up i'm going to walk you through kind of the flow and just a little bit of the documentation for typing dna and then as i said we will discuss the starter project and then do the implementation so the api documentation is linked in the description it's also really easy to find you can find it here from like the tutorials page or the api documentation page and this kind of illustrates how this actually works so the idea is you're going to have a typing biometrics recorder this is a javascript class that's provided by typingdna in fact this is the file right here typingdna.js we're literally going to download this file bring this into our project and this is what's going to be kind of sitting on the front end and actually keeping track of what the user is typing and their typing pattern we're then going to use this class to get the user's typing pattern we're going to send this typing pattern to the back end of our website so from the front end it's going to go to the back end the back end of our website is going to send a request to the typing dna api there's actually only one end point we need to use that automatically knows whether we're verifying or whether we are enrolling new typing patterns it's called the auto api we're going to send that typing pattern and that's going to send back a response to us that will tell us this pattern was registered we validated this user or whatever it is that it needs to tell us so that is the idea then we are going to get that response on our back end we're going to send that response back to the front end and then we're going to display to the user whether or not they were validated now of course you don't have to send this back to the front end the reason we're doing that is just so we have some visual that tells us yes this worked or no this didn't work now the idea is when you actually use this in a real world application you would not allow a user to sign in unless they were validated by typing dna now if they were invalidated you could ask them for another form of two-factor authentication or whatever else you might want to do so that is kind of the idea and the flow and again the api documentation is available in the description now notice that there's a few different ways to use this so there's same text any text and a few other methods that you can use to kind of send typing patterns so in our case we're going to be keeping track of the typing pattern of a user's email and password now this is because we want to have the same text the user is typing in and we're collecting the typing pattern for every single time we're performing like a validation we're sending that text to the typing dna api but you can see here that it's saying like an average email and password contains 30 characters and that is enough characters to give us a relatively high accuracy or confidence rate in being able to validate a user so the more text you have the better this is going to be and if we use both the email and the password that should ideally give us enough text now if you're going like under 15 characters of text this isn't going to be very accurate so just keep that in mind the more text the better so you want to use as much information as you can but you need to ensure that the user's always going to be typing in the same information and sending the same text pattern otherwise you're going to have stuff that's not super accurate all right so that is kind of the idea now i guess i should just walk you through the starter code i have this open in visual studio code i will show you how to run this project and install the dependencies that you need so you can see here that i have this website folder this again you would have found just from the github and right away there's this requirements.txt file now of course we're going to need python installed we're using flask which is a python backend web framework and what we're going to do is install flask and install flask sql alchemy which we will use for our really simple database that we're going to have that keeps track of track of users emails and passwords so what we need to go do is go to some terminal or command prompt depending on the operating system you're on and we're going to use pip to install these packages so you're going to go to your command prompt and you're going to type pip install and then hyphen r and then this is requirements.txt now make sure you're in the correct directory so you're beside or in the directory where the requirements.txt file is and you run the command pip install hyphen r requirements.txt that should install what you need in your python interpreter if for some reason this doesn't work try pip 3 install hyphen requirements.txt if that doesn't work for you try python3 hyphen m pip install hyphen requirements.txt if that doesn't work for you try python hyphen m pip install requirements.txt and if that doesn't work for you i have two videos in the description or linked in the description sorry that will tell you how to fix this command so anyways get flask installed get flask sql alchemy installed and then we're pretty much ready to go so first of all to run this project and let me just close the other instance that i have running on my other screen what we need to do is go to this main.pi file and just run this file that's literally all you need to do so from vs code i will press the run button it's going to say no module called flask okay so i need to just change my python interpreter let me just do this quickly in visual studio code i think this is the one i want to use you guys shouldn't have this problem it's just because i have a ton of python interpreters okay let me change this again what's the one i want to use let's see if this is the right one and okay so when i have the correct python interpreter that has flask installed when you run this it will say that you go to the following url so 127.0.0.1 colon 5000 if you go to that url in vs code i can control click it will bring you to the website so that's all you kind of need to know to run the starter code and you can leave this starter code running while you are actually working on the project one quick tip here though if you have this running and you update any javascript what you need to do is right-click if you're in google chrome go to inspect element and then hard reset and clear the cache you just need to clear the cache so that it refreshes the javascript for the website uh just keep that in mind if your javascript's not working clear your browser cache and then that that should work for you okay so that is how you run this project let me just run you through kind of how this is coded out so that you have an idea of what we're actually going to be doing here so this is flask i have a ton of tutorial series on flask if you're unfamiliar with it you're welcome to watch that this is not going to be a tutorial on flask or on python web frameworks it's just going to discuss how you implement typing dna into a project so this main dot pi file says from website import create app it runs that function and then it runs our flask application in debug mode that's all this is doing if you go to this website folder which is in the same directory as main.pi and you go inside of here to the init.pi file this file runs as soon as this folder is imported by another file so whenever you have underscore underscore nit underscore underscore.pi it makes whatever folder it's inside a python package which means when you import that package this file runs so when we import that it runs this file we set up a really basic sql alchemy database this is an sqlite3 database that's sitting locally on our computer you can see database.db right here then what we do is we create and configure our flask application so we say the app is equal to a new flask instance that uses the name of the file we then have the configuration variables so our secret key this is for encrypting session data we then have our sql alchemy uri which is the location of our database we're calling this database.db we then initialize the database with our application we then import the two files that are going to contain our endpoints i'll show those to you in one second we register these two files and the way this works is we have endpoints these are like you know slash home slash authenticate slash login in these two files just to keep things organized so we just register them with the app we then import our model our model is just going to be what will actually represent our user in our database we then create the database if it doesn't already exist so we just check if the database exists if it does or sorry if it doesn't we create the database then we print out create a database we then return app and what you have to do is do app.run debug equals true to run this application which happens in main.pi right so that is kind of the basic flow of starting up the application now if you go inside of used up high and you go inside of off.pi you'll see we have a few endpoints so auth.pi we have auth is equal to a flask blueprint a blueprint just means this is a file that stores endpoints it's easy as it is we register to roots so slash login and slash sign up stored in this auth blueprint then if you go to init top hi you can see we're registering this blueprint called off from the auth file same thing with views views is for views that don't have to deal with authentication so i have my home view and my typing patterns view the typing patterns view is the view you see when you need to type in your username and password multiple times to send enough typing data to typing dna so that's what we have there uh models this stores the model for our user so we have user we have an id an email and a password these are just the fields and the database that we need to store and then finally we have our templates folder inside of our templates folder we have a bunch of html i won't really discuss this because again this is not a tutorial on html but what i'm doing is loading bootstrap which is the css framework i'm using i'm also loading jquery which is a javascript framework required for bootstrap and i'm configuring my index.js file which is stored in my static folder inside of this website folder so whenever you have static files javascript being a good example or images or something like that you put them inside of a static folder for your flask project that's just important you have to do that it's just a flask requirement and then i'm loading this javascript file from what i'm calling my base html template so if you're unfamiliar with flask it has a templating language called jinga or it renders templates that use a templating language called jinga j-i-n-j-a i believe and what you can do is you can create html documents that have overrideable parts so notice here i have this block title and then i'm ending this block now this block can be overridden from another html file so i can kind of use all of the html here and just change for example the title or anything that is defined inside of a block so this means i can use this web page right here as the base of my entire website now notice i also have this block called content so if i go to say home.html you can see we override the content block and the title block and we extend from the base template and that means it inserts this html into that block in the base template and then shows that on the actual web page same thing for login we're overriding the content and the title block and i have all the html i want to appear in this block on this website now this is just a really simple login form i have a few names for my fields labels and all that and this uses bootstrap same thing for sign up same thing for typing patterns you're welcome to read through this on your own so that is the idea last thing if i go to views.pi you can see i'm rendering these html templates so when i go to the root slash typing patterns it renders the html template stored in the templates folder that is called typingpatterns.html so that's all i need to walk you through for this starter code i do apologize if you don't understand a lot of this again this is not a flask tutorial you really don't need to understand a ton of this to follow along if you would like to follow along though again on my channel i have a ton of tutorials on flask so with that said let's start implementing typing dna the first thing that i want to do is actually configure my sign up and my sign in pages so that they are going to actually work because right now if i try to sign in or sign up on my website so i go to log in or sign up and i press login nothing happens we haven't configured anything so we need to do that now so as i was saying what we need to do is make it so this email and password field and actually let me just reset this cache here because you can see that typingdna logo was popping up but that was the old javascript that was rendering that i need to reset my cache to see the updated javascript for this starter project because previously i was running the finished project and the javascript is getting all mixed up anyways what we need to do is make it so when we type in an email or password we can create a new user account or we can sign them in or we can confirm whether the username or password was correct so we need to create two endpoints one endpoint for logging in and one endpoint for signing up now based on the way that we're going to be doing things here we need to have an api endpoint so an endpoint that doesn't actually return html but instead returns a response like it tells us you signed in successfully where you couldn't sign in because of this reason so rather than showing html it's just going to send something back to us that tells us whether or not this login was successful so the idea is from our front end from javascript actually we're going to call this api endpoint the api endpoint is going to return some information to us and then we'll show that on the screen so what i'm going to do is i'm going to go into my auth.pi file and i'm going to create two new endpoints here now the first one that i'm going to create is going to be at auth.root and then here i'm going to say slash api slash login now notice this is different from regular login because regular login will actually show the login page this is not going to show the login page it's going to actually you know validate or authenticate the user so what we're going to say is the following define api underscore login and then inside of here what we are going to do is get data that was sent to us from a api request so a request is going to be sent to this endpoint and it's going to send a username and a password so we need to get that information so we're going to say data is equal to and then request which notice is imported up here dot and then this is going to be get underscore json so the way we're going to be sending this data it's going to be in json format so we get the json from this request and then we're going to parse the json to get the email and the password so i'm going to say that the email is equal to and then data dot and this should be get and then email and then i'm going to say that the password is equal to data dot get and this should be password all right so now that we have that what we want to do is we want to check if this password is associated with the correct user with this email so i understand if you haven't used floss before this might seem a little bit confusing but when we define a database model we are using kind of a flask inheritance structure or we're inheriting from flask database model what this allows us to do is use this database model to actually run queries on the user table so what we can do is say user is equal to and then user which i've imported from the models file here dot query dot filter by and then we're going to filter by a column so a column is just a field stored in the database so i'm going to say email equals email so i'm looking for the user object in my database that has the email that this user tried to sign in with because keep in mind this email is what the user typed in this password is what the user uh typed in but this user right here is actually what's stored in the database and what account was created so it's quite possible that the email or sorry the password they typed in is actually not the correct password we need to check that against the password that's stored in this model so now what i'm going to say is if user so if there's no user if this returns nothing to us that means that a user with this email doesn't exist so in that situation we'll say else and what we're going to do is return a response so we're going to say return and then make underscore response and what this response will do or what this function will do is create an http response that will return to the sender whatever sent this request some information now we need to return json here so i'm going to say jsonify what jsonify is is a function that we've imported let me make sure yep from flask it will take a python dictionary and turn it into a json object so we're going to say jsonify and we're going to say message colon and then no user with that email exclamation point and then for the status code whenever you send an http request you send a status code we'll send 401 i believe 401 stands for unauthorized or bad request so we're going to send 401 if the user doesn't exist however if the user does exist we need to check if the password we typed in matches with the password the user typed in so we're going to say if not and then this is going to be check password underscore hash and we're going to need to import this function so the idea here is we're going to store a hash of the user's password in this model you never want to store plain text passwords you want to store hashes of them if you're not familiar with hashes it's pretty much a one-way function so a password goes through a hash function it creates a unique hash every single time the same password goes through that hash function it generates the same hash but from that hash it's nearly impossible at least with our understanding of mathematics and cryptography to get back to the original password so that's what a hash is if you're unfamiliar but i'm going to say from and i can never pronounce this uh this name it's work z workzig some german name or something dot security you'll have this installed if you installed flask and we're going to import two things generate password hash and check password hash so what we're going to do is say if not check password hash and we're going to compare user.password which is a hash of the password to the password that the user typed in when they tried to sign it so what this is going to do is take the password hash which is stored in the user object so user.password so whatever user has that email we get their password and then we pass the actual plain text password it will hash this password for us compare it to this here and tell us if this is true so if not uh check password hash that means that the password was incorrect so we are going to say return make underscore response and we're going to say jsonify again if i spell jsonify correctly and i see why this wasn't working i wasn't spelling it correctly okay so jsonify and then inside of here a python dictionary we're going to say message colon and then the message we're going to say is password incorrect exclamation point and we're going to send again for the status code 401 because we know that this was like a bad request or it was unauthorized all right now finally in the situation where the user has the correct password and the email exists we're going to return to them this was successful they actually you know signed in so we're going to say return like this and then make underscore response jsonify inside of here the message is going to be let's just say login successful and then the status code is going to be 200 for ok and we are also going to send some more information we're going to send something here that i'll discuss in a second it's going to be user underscore id colon and then user dot typing underscore id now we haven't i haven't discussed what this is yet just leave it here i'll come back to it when we do this but we need to send the id that's associated with the typing dna user account so we can get the users typing patterns i know this is confusing makes no sense right now just throw it in there and we will work on that in one second so now we have this login function done now what i want to do is code out the sign up function or the sign up api endpoint then once we have that we're done a lot of the kind of annoying grunt work that we need to do and then we can actually implement the typing dna api so what i'm going to do now is make another route i'm going to say at auth dot root this is going to be slash api slash sign up and then what we're going to do here is define api underscore sign underscore up and actually i just realized that when we define these roots here sorry we need to define the method the http method that's accepted which is going to be post so i'm going to say method or sorry methods equals post up in the root what this means is we cannot send a get request to this api or to this endpoint we only can send post requests which is what we want to do because we're posting a sign in or we are posting a sign up so now from sign up i'm actually going to copy the entirety of this log in function or log in root paste it in here and we're just going to make some very minor changes so now what we're going to do rather than checking if the user's password is correct we're going to check if this email is already in use and then if it's not in use we'll actually create an account for them but first i realized i made a small mistake here if you go to user what i need to do is dot first now what dot first will do is just return to the first entry that it finds or i believe none if there was no entry that was found so when we do a query we just need to add dot first if we want only one entry of course you can query a database table table for multiple entries then you wouldn't use this.first function but for our purpose we need to add this so just tack this on to the end of the query all right so now that we have this uh what we're going to do i'm just reading my notes here to make sure this is all good is make sure that the user's email is valid and when i say valid that means it doesn't already exist and it is of adequate length so i'm going to say if user or belen of email is less than four so if there's less for less than four characters in their email we're going to remove this line because we don't need this and we are going to return a response that says that this email is already in use or email is invalid email is invalid exclamation point and again we will send 401 as the response code now if that is not the case so inside of an else statement here let me get rid of this what we want to do is actually create a new user that has this email and has this password and then add it to the database and we actually want to return information about that user to our front end once we create it so i'm going to say new underscore oops new underscore user is equal to user right we're going to use this user object which is modeling our users in the database we're going to say email is equal to email we're going to say password is equal to so here we cannot store the plain text password we need to store a password hash so we're going to generate a password hash so generate password hash and then what i'm going to do is put the password and i'm going to say that the method is equal to and then sha 256 which is a very popular encryption algorithm or method whatever you want to call it so let me just make sure this is good looks good okay password equals that method equals that i think we are good with that okay so now that we've created the new user what we need to do is actually add this user to the database so to do that we have two things that we need to write now notice here that i've imported my database from dot what that means is import from this init.pi file right here i have this variable called db that stores the database instance or like access to the database so i can use db and what i can say is db dot and then i'm going to say session and not commit that's the next line db.session.ad and we're going to add this new user which is the user object to our current database session we're then going to commit this so db.session.commit which will actually write it into the database and save it permanently so now that we have that that's like pretty much all we need but what we're going to do is modify this response here so that we also send back one piece of information this is going to be called user underscore id and again this is going to have new underscore user dot typing underscore id now again i'll discuss what this is in a minute and we're going to send for our response code not 401 but 201 because 201 stands for created i think that's correct at least so we're going to send that all should be good now okay so now what i want to do is very slightly modify our database or modify our user model sorry so that we have now this new field called typing id which i've been discussing so i want to go to models i'm going to create a new field here but let me discuss why we need this by first referencing the typing dna documentation so when you go to typing dna documentation let's go here to where the actual api is here we are so this is the api so what we're going to do is send a request to this url right here now our application will have a client secret or an api secret and api key that we will send along with this request but what we need to send is an id of a user along with their typing information and then typing dna handles literally everything there's only one endpoint we need to send this information to but we need a unique id for our user that is different than the id that is used to represent that user in our system so what i mean by that is our user has an id an email and a password we should not use any of those three pieces of information for the id that we send to typing dna so just to be clear here typing dna kind of stores all of our users right if i go to my dashboard you can see it says i have 15 users these are just ones i was using when i was testing so these users are associated by their id so when we send an id that's how it figures out what user we're talking about but this id must be unique for typing dna this is just for security purposes you do not want to have the same id being used for your internal representation of users and your representation for users for typing dna so what that means is every time we create a new user we need to generate a unique id that is going to be unique for that user different than the id they have in our system and then we use that with typing dna that is what the typing id is that i've been referencing here now notice if you go to python for example this shows you how to actually send the request it literally gives you everything that you need so to send the request to typingdna you just copy and paste this code into a file you have some function that you know runs the request and then you just need to pass it the correct typing id which is i believe tp yeah i think tp is what the typing id is going to be and again we just send this information to the auto endpoint and that's all for the api of course you need to have this account created first of all so there that's why we need the typing uh id or typing whatever yeah typing id so let me go to models what i'm going to do is create a field here i'm going to call this typing underscore id and this is going to be equal to db.com it's going to be db db.string this is the type of the column it's going to be a string id that has at most 100 characters i'm going to say that the default is equal to the string of uuid dot uuid 4. now i'm not going to discuss uuid in depth because this is kind of somewhat complicated topic if you want to understand how this actually works what this line does is generate a completely unique id that will never be the same as something else just know that that's what it does you can look up uuid if you want to see how that works but you import the uuid module and then say string uuid.uuid4 and that will generate an id for you that will be used as the id for this column so when you do default this means that it's going to automatically default to this random id so we don't need to actually you know insert an id when we create this model it just generates one for us automatically so that's kind of the idea here same thing with this id here since this is the primary key of our database model it just automatically generates an integer id for this model or for this user so now that we have this in here what we need to do is actually we're done with the off end points i believe let's just see if this actually works now uh so we need to hook this up to our front so i'm kind of getting a bit ahead of myself there's a lot of stuff we need to do so it's hard to discuss or figure out what order we should go in but we have this sign in and we have this log sign up and login page now of course i need to have my server running otherwise this isn't going to work so let's go ahead and run this and refresh but what we want to happen or what we want to happen is when we go to sign up we type in our email and password we press submit we want to collect this data and send it to our backend so we can then create the user account so to do that it's going to require some javascript now while we do this let's also implement the typing dna api and specifically the typing dna pattern recorder so from the api documentation you can find a link to this page right here which is the typing dna recorder javascript file now you can also find this right from my github repository there's a link there will be one in the description too what we need to do is take this file right here from this repository typingdna.js and we need to copy the contents of it and bring it in to our project so what i'm going to do is go to the raw of this i'm going to copy all of this now it's important you go to raw to make sure you don't get any of the github weird indentation so i pressed on raw just copied did you know control a control c and then i'm going to go here i'm going to go to my static folder i'm going to create a new file i'm going to call this typing dna dot js it actually doesn't matter what you call it and then i'm going to paste all of this in and i'm going to save so let's go to the top of the file and we're just going to make one very slight modification to this file and we're going to say export this function the reason we need to export this is because we need to import it from another file i won't discuss all the javascript and how that works but you just need to export this function so you can import it from another file so now we can use this typing dna function this is going to return to us what's called a singleton which is a single instance of a class and this class will be used to keep track of what a user is typing in the input fields and their typing pattern so now what we're going to do is import this javascript class from our javascript file so we're going to say and let me just go to my javascript file to make sure i don't mess this up import typing dna and then this is going to be from and then the name of your file so typingdna.js and now we have this javascript javascript class imported now what we need to do is create an instance of this so i'm going to say const and we'll say typing or you know what let's do t dna is equal to new typing dna like that that's all we need this will create the recorder and then what we have to do is tell this typing recorder what input fields it should be recording information for so i know we're going fairly fast through this but that's kind of what we need so we took this file brought this in to our project and now we're going to actually use this class to record information that users are typing in the input fields but what i was getting to before is that we need a way to send this information to our backend so what we're going to do is run a function whenever this sign up button is pressed it will send a request from javascript to our python backend the python backend will then return a response and that's kind of how this is going to work so what i'm going to do is i'm going to say const and we'll start with login and i'll say login button is equal to and then document.getelementbyid and we're going to get the element called login hyphen button so if you go to the login page you can see that we have a button here and it says login button we are going to check for the on click event of this button and when that button is pressed we are going to run a function so let me go back to index.js so now what i'm going to say is if a login button the reason i need to do this is because this javascript class will run for every single one of our html files so if the html file that's rendered is not the one that has this login button we want to make sure we don't crash or have a problem with that so we just check to see if we actually found the login button first before we do anything if we found the login button on our page then what we do is say login button dot add event listener we're going to add the event listener for click and we're going to use an arrow function what this is is just kind of like a one line function in javascript that's going to call another function which is going to call be called log in or sign up and we're going to pass the boolean variable true now this function here login or sign up is actually going to send the request to our backend so this is just kind of configuring the you know the on press event for the button now what we want to do though is if we are on the login page if we have a login button we want to tell this typing dna recorder which input boxes it should be recording information for so we're going to say t dna dot add target like that this is a method that is a part of this class right here this is from the api documentation i'm getting this information and i'm going to add the id of the fields that i want to collect the typing pattern for so i want the typing pattern for email and i want it for password so we'll say password like that so we've now added our two typing targets we have now uh created the login button on click event listener and now what we need to do is code out this login or sign up function but before we do that i'm going to just code out the event listeners for my other pages so if we go to sign up or you know we'll just do it here sign up also has a button right so we need this button we need to configure that to do something when we press it and then that typing patterns page i have let's go this typing patterns this one has a button as well that we need to configure so that when it's pressed it you know calls this function so what i'm going to do is go to index.js i'm going to copy all of this i'm just going to change a few things so instead of line up or line up log in instead of login we're going to say sign up button and we can just go with a uppercase u2 we're going to change this to sign hyphen up button and then we're going to change the variable name here to sign up button and this variable name should be changed as well to sign up button all right so now we have an event listener for this we're going to do the same thing for this function except now we're going to call false the reason we're passing false here is because this is going to tell us whether we're logging in or signing up this function does like the exact same thing it just has a very minor change if we're logging in or signing up so we're telling this function whether we're signing up or logging in with this and then we're going to copy this again and add the same thing for the typing patterns button so we're going to say typing patterns typing patterns like that typing patterns button let me copy this paste this here paste this here and then change this name here uh what did i call this button i think i called this typing hyphen patterns button you can find this id here yep okay it's called typing patterns button so now that we have that we have our three on event click listeners so now what i'm going to do is define a function i'm going to say export function and then the function name is going to be login or sign up we're going to take login equal to true so when we pass false that means we are not logging in we are instead signing up then what i'm going to do inside of here is i'm going to send a request to our backend that has the appropriate information so i'm going to start by getting the user's email and getting the user's password so whenever we call this function that means we press the submit button on one of these pages we then need to collect their email and their password which are named by the same field like the id of the fields are the exact same so what we can say is const email equals document.getelementbyid this is going to be email and then this is going to be value and then we'll say const password is equal to document.getelementbyid we're going to get password field and we're going to get the value that's stored in there and i always forget if we need the semicolons or not i don't think we need them but for good practice we will add our semicolons all right so now that we have these uh these email and password we want to send this information to the backend so we need to first decide what endpoint what url are we sending this information to and we know that we just coded them out in this auth file we have the login endpoint and the signup endpoint and these are the ones that handle the logic of creating a new user or authenticating our user checking if their password is correct so what i'm going to do is go to typing dna or index.js i'm going to say let endpoint and then i'm going to define this endpoint based on if we are logging in or signing up so if login then what we're going to say is endpoint is equal to and then slash api slash login otherwise so else we will say that endpoint is equal to and then this will be slash api sign hyphen up let me just make sure that is the correct name i think it is so now that we have the endpoint the email and the password all we have to do is send this information to the endpoint so in javascript there's a method called fetch so we're going to say fetch and then we're going to send this to the endpoint and then we're going to pass some information with this request namely the method of the request so is it a post request is it get request is it a put request the headers so it's the content type that we're sending and then the body of the request which is going to be the data so the email and the password that we want to send so i'm going to say endpoint method colon post then i'm going to say headers and this is going to be colon and we're going to pass a json object this is going to say content hyphen type and this is going to be application slash json let me just make sure that's right sorry we have a lowercase a so application json i won't really discuss this this is just what we need to do to send this request properly and then finally inside of here we're going to have the body so we're going to say body colon this is going to be equal to json dot stringify and we're going to stringify this object email colon email and password colon password now let me just save and format this uh there we go so now you can actually read this so we have fetch endpoint method post headers content type application json and then sorry this body should not be inside of the headers this should be right there so let's format that okay that looks good all right so now we have all the stuff we need to send for our request we're sending this information to our endpoint and i think that's good so now what's going to happen is we're going to send this request we then want to wait for a response so we're going to say dot then what this is going to do is run whatever function we define in here as soon as a response is returned so we're going to say then res equals and then i guess this is less than sign or greater than sign i don't know which one you call that and what we're going to do is just return the res.json so if you don't sorry if you only have one line in your function like this in javascript it just automatically returns what you write after this line so we are getting the json from the response which is what we want that's going to have the message that we're sending and then after that so after this function runs which will happen immediately what we want to do is get the data which will be contained in the response.json and we're just going to print this out we're going to say console.log data so let's run that okay that's all good so now we have this and now what's going to happen is when we press these buttons it's actually going to send the request to our backend and then our back end if we go to auth here is going to return a response to us we're then going to print out the json or the data of that response to the console now the reason we're doing all of this is because we need to make sure that the user is typing in the correct email and password before we send this information off to the typing dna api so once we get this response back that says hey this was all good you know you're typing data or sorry not your typing data your email and your password was proper and this was successful then we can go ahead and send all of our typing patterns to the api so it's a lot of work to do this beforehand but anyways we do need to do that so let me refresh this page let's actually go to sign up and let's try to create an account so i'm going to say tim gmail.com and for my password let's go tim12345 and i will press submit now notice nothing happens here right we don't see anything but if we go to the console nothing's happening either ah i remember we forgot to empty our cache and hard reload for our javascript and what does this say failed to resolve module specifier typingdna.js relative reference must start with either slash or dot slash so i realized i made a small mistake here let's go to index.js and we see that we need to add dot slash here because we're importing this from the same file so sorry am i bad on that let's go back here let's refresh failed to resolve okay let's refresh again and there we go that's good don't worry about this fave icon not found you know it doesn't matter for this but now let's try this so if i just press submit notice it says email is invalid and it tells me i had an unauthorized request because well the email was invalid so now let's type in an email tim gmail.com but let's not put any password when i submit this it says no user with that email oh what the heck do we are we sending this to the right okay i think i'm sending this to the uh the wrong thing or maybe my message is incorrect um okay let's go back to the drawing board here because i think i made a small mistake let's go to off dot pi and let's see what's happening here ah i realize i made a mistake here so first of all we need to make sure that the user actually types in a password in this case we didn't type a password it actually created a user the reason we got this response though is because i forgot to rename this this should have said user created not no user with this email because well there was a user with that email but before we do this we need to make sure that the password is valid as well so i'm just going to do an l if down here um if user yeah we'll say l if uh len of password is less than 7 then what i will do is return a response that just says their password is too short so we'll say password too short okay so glad i caught that issue um that could have been a pretty big deal so we're making sure that their email is long enough and their password is long enough and then only then are we creating an account but anyways that was working let me just rerun this server and we just had the wrong response message okay so let's try this again let's refresh let's create a new email this time so tim1 gmail.com and let's see if this fails when we don't type in a password so when i press submit password too short awesome we'll try again so now i'm going to say tim12345 and there we go user created and it gives me the id of this user now this id is the typing id right the thing that we want to send to typing dna okay so now that we have that that is all good what we want to do now is see if we can sign in so let's go to log in and let's see if we can sign in with this account so tim was it one i think it was at gmail.com and then tim12345 log in login successful awesome now let's type the password wrong and this says password in correct suite so this is indeed working uh and yeah that's awesome so now that we have that what we want to do is send this information this typing pattern to typing dna we also want to make sure that after a user signs up it redirects them to a page the page we want to redirect them to is the typing patterns page because we need to collect more typing patterns from them so now what i'm going to do is code out a function this function is going to send the typing data we collected to typing dna but only if the user logged in or signed up successfully so that's why we needed all this stuff right because we're only going to send the data if the sign in or log in was successful to start there's no point in doing a two factor authentication if the first factor was not successful right so now we're going to make a function we're going to say function and this is going to be called send typing data we're going to take in here an id and text now what the id is is the id of our user for typing dna so what i've been returning right if i go back here what i've been returning as the user id this is the id that we want to use for typing dna so that is why i'm sending it back to the front end so that we have access to it and then we can send it to the back end so the backend knows which user it's going to be dealing with anyways we'll get to it when we get to it it's hard to explain stuff without the example but send typing data so what we're going to do here is say const pattern is equal to tdna so typing dna dot get pattern now when we get the pattern we need to pass in an object here and this object defines what type of pattern we're looking for and the text that we want the pattern for so we're going to say type colon 1 and text colon text now let's go to the documentation and i'll show you how this works so if i go to the documentation here let's load this up full screen and we go and we look for let's see here get typing pattern okay perfect so here it is typingdna.gettyping pattern i just realized i used the wrong name let's go back good job i referenced that not get pattern we want get typing pattern okay so this is the correct function name or method name so anyways this is the main function outputs the user's typing pattern as a string returns a typing pattern in string form this is the pattern we want to send to typing dna api options object an object of the following form type number text string text id number target id all of that so it shows you all of the potential options you can pass here and it tells you what you should pass based on the application you're using so zero for any text pattern one for same text pattern two for extended pattern so pretty much it with typing dna there's three different ways you can perform authentication you have any text any text means like doesn't matter what text you type it will just be able to validate you so if you typed like a random string the first time you enrolled information with typing data and then later on you typed another random string it can compare those two typing patterns and still validate you now we're not using any text we're using same text so it says recommended in most cases for emails passwords phone numbers credit cards short text this is exactly what we're using shorter text that is identical which allows us to have a better accuracy so this is again for our email and for our password so we're using type one for that reason then two for extended pattern most versatile can replace both any text and same text patterns best accuracy recommended in cases where text is not a secret and is uh as it records the typed characters as well okay so this you don't want to use for usernames or passwords because well the username and password should be kept secret and this is recording the text that is actually typed whereas the other ones are not okay then you have text only for type one and type two a type string that you want the typing pattern for okay awesome so since we're using same text we need to give it the text we want the pattern for and then the other ones here we don't need to specify because they're optional okay great so that's what we have and it shows you kind of an example of how this works so let's do this let's go back here and you see this exactly what we're doing we define type one text is equal to text and we'll pass in here the username plus the password as the text we want the pattern for now that we have this we want to send this information to our backend so what we're going to say is the following fetch and we haven't created this endpoint yet but we will create it and we're going to send to slash and we'll call this typing dna and then we want some options in here as well so for the options we need to define our method so we'll say method colon post we will then say headers colon and this is another object this is going to be content type application slash json let's just format that so it's easier to read okay and then finally we want to send the data or the body so body is equal to and then this is json.stringify and we're going to stringify the pattern that we're sending which is going to be equal to pattern like that and then finally the user underscore id which will be equal to the id which we passed to this function so this is why we need the typing uh id because we're going to send it to our back end again so that we know on our back end how we should send this information to typing dna then of course the pattern is what we're getting from this variable here all right then we're going to say dot then and we will do the same thing so res will return res.json and then dot then again and we will say data and we will console.log oops uh come on what is this what's going on here console dot log data okay awesome so i think that is good now of course we're going to do more than just this we're going to check the data we're going to like you know show something on the screen we're going to redirect the user but for now let's test this so this obviously we haven't created this api yet so we need to create this api we also need to use this function so the idea is that after this after we successfully hit whatever endpoint we send this request to so log in or sign up we take the typing data and we send it to that endpoint so we're going to say send typing data and we're going to send for typing data as the id this is going to be the data dot and then user underscore id and the text that we're going to send is going to be data or sorry not data this is going to be email plus password so we're just going to concatenate the email and the password together that's the text we want the pattern for so we send that as text and then the id is the user id that was returned to us however we can only send that if we got a user id so if our login was successful so what that means is inside of here i need to make this actually the body of a function and i'm going to kind of tab down here and say if and this will be data dot user underscore id so if data.userid that means we signed in successfully because if you go back to auth we only send a user id when we created the user or we signed in as that user so if we have a user id we signed in successfully if we don't have a user id this is not good so we're going to say else if data dot message so if we didn't have an id but we have a message then what we will do now is we will alert that message to the screen so we'll say alert this is just that little you know kind of crappy pop-up that shows up on the screen and we will just show the message so data.message so now rather than printing it out it will actually pop up on the screen so we can see it so now this should actually work except for this request because we haven't code out this endpoint let's quickly code at this endpoint just so it returns like an empty response and then we can go from there so if we go now to views.pi we're going to create a new view here i'm going to say at and we'll say views dot root and actually now that i think about it we should put this in auth because really like the typing dna is going to be a part of authentication so it makes more sense to go in here so let's say at auth.root we're just going to call this uh typing hyphen dna i'm going to say define typing dna let me just go to my notes here to make sure i'm not messing this up too bad uh and in fact just to say consistent i know i keep changing this around we're going to go back to views because in my project that i already have coded out it's on github i did this in views so just to not confuse anyone we'll just do it in views here so we'll say views dot root typing dna this will be slash typing dna and in fact no hyphen just typing dna then typing dna we want to define the method here so we'll say method is equal to post then what we're going to do is collect the data from the response so data equals response dot get json we are then going to get the pattern so pattern equals data dot gets and then the pattern we're then going to get the user id or the typing id so we'll say user underscore id equals data dot get user underscore id and then what we're going to do is now send this information to typing dna but for now i'm just going to return a response i'm going to say return make response jsonify and then we'll just put inside of here message test and we'll just go 200 for ok all right let me make sure i have all of this imported i think i do okay so we should be good now we now have this root let me re-run this nick got an unexpected keyword method ah sorry this should say methods my apologies let's rerun this and now we can actually test this out so again what we've done is just created a root here called typing dna we're going to get the information from the request we're then going to send that to typing dna we've not done that yet we will do that in the next step okay so now let's go to our website let's refresh and let's try this so i'm now on login so i'm going to say tim1 at gmail.com and then my password login and login successful user id okay that is good let me refresh my javascript because i have a feeling that was not working let's do this again so i'm going to say tim1 gmail.com and then tim12345 and now let's see it says message test okay awesome so what happened let's just run through the flow here was we go to our javascript we sent the request to our back end right we then looked at the request from our back end and we saw that we had a user id so since we had a user id we then called the send typingdata function the sendtypingdata function then got the typing pattern it then sent a request to our backend again to slash typingdna and then the response was returned that said test right and then we just printed that out so if you go here to views message test is what showed up in our console which means we called first of all this login api endpoint we then called this typing dna endpoint so that is the idea all right so let's just try this now with an incorrect password just to see if we get this message password incorrect awesome and this should work from sign in as well okay so now that we have this what we want to do is send this data to typing dna so let's go to the api documentation and let's go down to the verification section now i recommend you read through this but i will just read through the first sentence the auto api enrolls all typing patterns it receives for a given typing profile until a minimum initial enrollment value is reached for auto that value is fixed at 3 for an optimal balance of usability and accuracy verification results are not performed until a user's typing pro file contains at least three previous enrollments before which the enrollment uh intention is assumed this requirement ensures that we have collected a reasonable baseline of the user's typing behavior before attempting verification in practice this means that the first three typing patterns submitted to the auto api for a given typing profile will be enrolled only and this is a prerequisite to verifying any future patterns for the user so then it says actually i'll just finish reading it why not developers have the choice of recording initial enrollment patterns from their end users over time to reduce friction or collecting all initial enrollments and submitting them at once diluted by a semicolon the enrollment process is the same for a single or multiple submission so we're kind of going to do a combination of what it's saying here when a user creates a new account or more specifically when a user doesn't have enough typing patterns we're just going to ask them to send more typing patterns so we're going to send enough and then this will actually tell us the response from typing dna will tell us if we have enough patterns and as soon as we have enough patterns then we will just start verifying now this endpoint handles all this for us it knows if we have enough patterns it knows if we're in rolling patterns or if we're verifying which is really awesome it means we have to do like very little work so anyways we're going to go here we're going to go to python and we're just going to copy all of this code because this is the code we need to send information to typing dna so we're going to copy all of that we're going to create a new file in our website folder and we're going to call this typing dna we'll go typing dna dot pi and then we'll paste this in and actually let's keep this lower case just for consistency okay so typing dna.pi now we're going to modify some of these things for example where it says id api secret api key tp we need all of those pieces of information but once we have this we'll turn this into a function that can send a request then what we will do is from this function here we will call that other function which will send the information to typing dna it will then get the information from typing dna we'll then send that back to our front end and then our front end can display that information so the first thing that we need to do here is we need to get our api key and our api secret from our typing dna account so where it says api key it's going to copy this and we're going to paste this into our typing dna where it says api key so api key will be equal to that now api secret we're going to copy the secret i'm just going to leak mine here because i don't really care if you guys see it i'm going to close this account after the video anyways so let's copy this i'll create a new account to clarify just because i know you guys some of you are going to go and try and mess with my account but let's take this and paste this here so now we have our key in our secret it's worth noting you should not have your api secret in plain text in a code file usually you'd want to store this in an environment variable i'm not going to show that for this tutorial because it just makes it kind of more complicated than it needs to be for this purpose but just understand you you probably should not have this in plain text now id this is going to be the id of the user that we want to send to typing dna so we can delete that because we're actually going to create a function here we're going to say define send underscore typing underscore data and as a parameter here we're going to take the user id and the pattern that we need to send and this reminds me tp actually stands for typing pattern so tp can be equal to pattern and then let me just have a look at this i think this is really all we need to actually send the information so since we have a user id and we have a typing pattern i just need to go in here and find where it uses the id variable okay so id is right here we need to replace this with user id and this should be all we need to actually send the typing pattern to typing dna yes i think that is good so last thing i'm going to do here as a modification is i'm instead of printing i'm going to return the and that not resbody.dica we will use that but i'm going to return instead json.loads so load s this now let's import json first of all we need that from here so what this is going to do is this is going to take the response body you don't have to understand what all this code does essentially just sends a request to typing dna gets a response we have the response body we need to decode it in the form of utf-8 utf-8 is just like a text coding i i don't even know how you would describe that and we're going to decode it this is going to give us a string so this will give us just a string we want to take this string and convert it into a python dictionary object to do that we use json.load s load is obviously loading json but we're loading a string this that's what the little s stands for is load string and this will parse this string and turn it into a python dictionary object for us so then we can return that dictionary object and then from views.pi we can print it so from views.pi we're going to call this function we're going to pass it the user id and the pattern then this function is going to return to us the response from typingdna after it sends the request and then we'll be all good from there we can then use the information that we get so we're going to say from here first of all let's import this file so we're going to say from dot and this is typing dna import send underscore typing underscore pattern let me make sure i haven't messed this up too badly i think this looks good okay so now we have this function yes and ah send typing data not pattern okay so send typing data now inside of here we're going to say what should we call this response is equal to send typing data and we're going to pass the user underscore id and the pattern then we will print the response and we will also return this response from this function so we're going to say is jsonify and now instead of message test response and now i can show you what this response actually looks like so let me re-run this no module named website.typingdna why why am i getting this did i put this file in the wrong place i think i put this in the correct place from not typing dna ah i've spelt typing dna incorrectly that would be why let's spell that correctly okay so now we should be good let me rerun this server okay so all is working now and let's test this so we're going to print the response here on the back end we're also going to show it on the front end so we can see if this is working so let's go to our website let's go to sign up or actually let's go to login why not and now what we're going to do is sign in so tim gmail.com tim12345 log in now when i press this notice it takes a second and then i get an actual response here this is the response that came from this function that we just coded out so let's have a look at what this says this says action enroll enrollments 1 message patterns enrolled not enough patterns for verification message code 10 status 200 and then it shows you all this information so if you go to the api documentation you can now see uh we should let me go full screen here uh it should show you what all this means so here you can see all the things that are going to be returned in the response so firstly this is the successful response there's also response codes if there's an error right you have like all of these different error codes that could happen i'm not going to go through them you're welcome to read through them on your own but the idea is we're going to have all of these fields so this just kind of describes what they are they're really straightforward i mean you can read through it and just see exactly what it is but when you are not simply enrolling so the first three times you send this for each user it's going to enroll the typing pattern right and then once the typing patterns are enrolled what will happen is it will tell you if there is a high confidence that the pattern you just sent matches the other patterns that were there so it's just pretty much verifying you so if you get one that means that you have high confidence if you get zero you do not so you would want to use one as like a successful two-factor authentication and zero as a failure so we're going to be looking for this high confidence field we're also going to be looking for the message code now let's go to code here you can see all of the different codes if you look at 10 it says patterns enrolled not enough patterns for verification so if we see this what we're going to do is ask the user to submit more patterns so whenever the message code is 10 then we are going to redirect them to that other page the typing patterns page and then from there we're going to ask them to sign in again and again and again until they have enough patterns and then we will be good to go so let's go ahead and do this uh again that was like the documentation that i needed to show you so now that we're actually sending the patterns and everything is all good we're going to go to our index.js file and now since we have all of the information from that response from our backend we sent the information to our front end and just at this point it's good to clarify you need to make sure that you send the typing patterns from the back end of your website not from the front end this is just a security issue i think i discussed this at the beginning of the video but make sure you're not sending like a fetch request from the front end of your website to the typing dna api you have to do what i'm doing instead send a request to the back end and then the back end sends it to typing dna just so it can't be intercepted and then we take this information and send it back to the front end all right so that was just important to go through but now in the send typing data function instead of logging this result we actually want to look at this result right and we want to tell them first of all okay did you have high confidence or like was this valid or do we need more typing patterns so we're going to say dot then data we can print out the data still if we want to do that but after that let's put that inside of here we want to check if the message code is 10. so we're going to say if data dot message underscore code and we should always get a message code is equal equal equal to 10 so if it's equal to 10 we don't have enough patterns we need to enroll more patterns so we're going to have an alert and this alert will say we need to collect some typing data from you for two-factor authentication uh you may be asked to fill this out and then multiple times dot dot okay uh you can make this say whatever you want obviously i'm just gonna go with that so now we alert the user of what we're you know redirecting them to and then we're going to redirect them to the typing patterns page where they will be asked to type in more patterns so the way you do this in javascript you say window dot location is equal to and then i'm going to say slash typing hyphen patterns so this is pretty much the equivalent of a redirect we're just redirecting them to this page now if the message code is not 10 that means we had enough enrollments so what we need to check is if the pattern we just sent had high confidence so we're going to say else and then we're going to say if data dot and what is this called hi underscore confidence is equal to 1 that should be three equal signs then what we want to do it did i spell confidence correctly let me check i think i did we want to alert them that they had high confidence if it was not we want to alert them that it was low confidence so i'm just going to copy this in to avoid having to type all this out but alert typing dna indicated that there was high confidence in your login otherwise else we're going to say alert typing the dna indicated there was low confidence in your login and now i think that's pretty much all we need there's one or two more things i'm just referencing my notes because there's a lot i want to make sure i don't mess this up uh so after we do this so if the message code was not 10 right then what we want to do is we want to redirect the user back to the home page so i'm going to say window dot location equals slash so this is kind of the equivalent of like them signing in right if they signed in successfully then what we do is we say window.location equals the home page so it redirects them to the home page like as if they had signed it and then finally at the very bottom of this function we're going to say tdna.reset this is going to reset this singleton class so that if we send another request it's going to reset the typing pattern so after we send the typing pattern information and we do all of this stuff here we want to reset this and in fact now that i think about this we should reset this right after we get a response from this request or actually let's think yeah right after we get a response let's do that so inside of data here we'll actually say tdna.reset we could do it in here or up here it doesn't really matter but the reason we're resetting is so that if they send something again from the same page without refreshing the typing pattern gets clear okay so just quickly recap we check if the message code is 10 if the message code is 10 we need more typing information so we redirect them and alert them that we need to collect typing data and then from this page ideally the user will type in or sign in a few more times and rule more typing patterns and otherwise if it's not 10 that means we're all good hopefully at least and we're going to check if the high confidence flying is equal to 1. if it's equal to one that means we're good we validated if it's equal to zero uh we are not good or so if it's not equal to one we're not good and then we tell them low confidence either way after whatever happens here we redirect them to the home page now that i'm thinking about this though we should probably only redirect them if it's high confidence right because if it's low confidence we don't want them to be able to sign in now in theory they can just go to the home page this is not you know a full-fledged website but this is the idea so sorry everyone for the abrupt cut here but i realized while watching this video back when i was editing that i made a pretty big mistake that i definitely need to jump in here and fix so you can see that what i've been talking about is this data.high confidence flac and i've been saying if this high confidence flag gives us a one we're all good to go and it is validated now this is not true this high confidence flag what this actually tells us is how confident the api was in the result that it gave us so this does not actually tell us the result this tells us if it is confident that the result that it returned to us is correct so what we need to do is we need to change this to result because what we actually get back here in this api data which i will show you in a second is we get a result flag as well or a result key whatever you want to call it and if this result key is equal to 1 that means it actually was a match and if it was equal to 0 that means it's not a match so if high confidence is equal to 1 that means whatever result is the api is confident that is correct however if high confidence is equal to zero that means whatever the result is it's not quite confident that that is actually correct and that could be based on something like we didn't have enough text or the pattern it just wasn't quite sure if it was actually correct so it's giving you a result but it's saying i'm not very confident in that result or i am very confident in this result so hopefully that's clear throughout the rest of this video you're probably going to see me have high confidence here so just understand that actually what we want is result not high confidence so if you ever see me use high confidence here i just understand that is a mistake it's just because i'm not going to refilm the entire video because of this one thing right here so make sure you understand that we are using result not high confidence and that high confidence is telling us the level of confidence in the result that we're getting and a result as i said if it returned zero that means there was not a match we are not authenticated whereas if it does return one that means there was a match we are authenticated so let me just print out the data here and then i'm going to print out after the data the data.result just to show you so let's remove this copy that paste this down here and then we will show it data.result and then of course here we should probably change this to say rather than indicate there was a high confidence we should just say typing dna indicated there was a match or something like that right because this is not necessarily correct uh because we're not actually checking the high confidence flag so usually you would probably check the high confidence flag in combination with the result flag because if you had low confidence in the result and the result was one maybe you don't want to authenticate the user but that's kind of up to you okay so now i'm just going to load the website up here i've just created a new user account just so that i can go through this quickly and i'll show you now what data returns and what the result actually actually returns versus high confidence so the account i made was techwithtim27 gmail.com and then oops my cap box is on my password is the same thing techwithtim27 gmail.com let's submit this and let's see what we get okay so there we go typing dna indicated there was high confidence in your login and you can see uh well i closed out of it but it was showing me that the result which is the thing i was printing last was a one which meant we actually had a match now you may notice this website looks a little bit different than what it did before i took the cut in this video that's just because this is after i finished everything i'm now on the website again because this right now is after i've filmed the entire video but anyways hopefully that clears it up use result do not use high confidence although you can of course check high confidence but that is not telling you whether or not there was actually a match so let's refresh now and reset our javascript and let's see if this works so empty cache and hard reload let's go through the whole process so let's create an account i'm going to say tech with tim you know let's go 25 at gmail.com and let's go tim one two three four five and let's press submit okay we need to collect some typing data from you for two factor authentication you may be asked to fill this out multiple times all right so now we get redirected to this page right that's exactly what we wanted now we're gonna do this again check with tim25 at gmail.com and then tim12345 submit uh email is invalid is it did i what did i type for the other email check with tim 25 okay um okay i guess i typed in the email wrong uh i don't know if i mistyped it the first time or if that was actually incorrect or showing me let's try this again techwithtim25 at gmail.com and then tim one two three four five submit email is invalid okay so i think we're having a small mistake here uh i have a feeling that what's happening is that from the let's go here uh typing patterns button ah this is the issue sorry so from the typing patterns but we need to change this to true what was happening is that since we were passing false here from the typing patterns button it was trying to create a new account for us not sign us in so obviously the email is invalid because it was already used so that was the issue we were having so now they should fix it when you change it to true now the endpoint it's going to send to is login not sign up okay so let's reset here let's just go to log in and let's do this so tech with tim 25 at gmail.com and then tim12345 log in and we need to collect some typing data so notice it says we have one enrollment and we need more so let's go ahead and do this tech with tim25 at gmail.com and then tim12345 submit okay we need some more typing data let's go ahead and do that techwithtim25 at gmail.com and then tim12345 and this time there we go it says we had high confidence so now we have enough enrollment and now notice the action is verify enroll not just enroll so it did actually enroll this typing data it's keeping track of all of the typing data from now on but it's also verifying us this time and it told us we have high confidence so that is working that is good and then redirect us to the home page awesome so now let's just go to the login page and let's try this now so now we have enough enrollments so we shouldn't be asked to do this again it should just tell us if we have high or low confidence so let's do this and let's see and we have high confidence awesome and then redirect us to the home page so there we go that is functioning now what i'm going to show you how to do is add those little icons onto the fields here that kind of show that typing dna is keeping track of what you're typing in so this is called the autocomplete disabler as well as what is what is it called in here uh there's like a specific name for it uh typing visualizer sorry that's what it's called so what we want to do now is disable the autocomplete on our website because typing dna doesn't work if it just auto fills in the username and password right so it makes sense to disable autocomplete when you have this typing dna form of authentication so that like a password manager something can't fill in the password and then override the uh the two-factor authentication although it wouldn't override it it would just tell you it failed because you didn't actually type in the pattern and well there was no typing pattern so we're gonna use this autocomplete disabler from typing dna again link in the description and we're going to use the typing visualizer as well so what we want to do is get both the auto complete disabler and typing visualizer file so i'm going to go to raw for both of these i'm going to copy this this one is the autocomplete disabler i'm going to create a new file here inside of static called auto complete and then disabler like that dot js i'm going to paste this inside and go to the very top going to make one change we're going to export this function we'll say export like that that's all we need now we're going to close this i'm going to make a new file i'm going to call this typing visualizer uh i think i spelt that right and well we need the dot js so let's add js now we're gonna go to github i'm gonna go back to this page here we want to go to typing visualizer now and we want to copy this we'll say raw copy and we're going to make one change this file the same one we did before we're just going to export this function so we can access it so export function and now i will show you how we can add the typing visualizer as well as the autocomplete disabler all right so this part is actually super easy it's literally like five lines of code now that we have these uh files go to index.js and at the very top under when we define typing dna uh or sorry we're actually going to go above that we're going to import the auto complete disabler so we're going to say import and then auto what is this actually called auto complete disabler just want to make sure my capitalization is correct we're going to say from then dot slash autocomplete disabler dot js so now we have this class imported now we're going to use this so we're going to say const auto complete disabler is equal to auto complete disabler and then inside of here we're going to pass some options so this auto complete disabler actually also handles the typing visualizer so we need this typing visualizer file because this auto autocomplete disabler is dependent on this file and now that i'm thinking of it this file is probably going to be half it's probably going to have to be named the same thing typing visualizer let's see maybe not we'll see if it works if it doesn't work we're going to have to change this name to whatever it was on the github in fact let's just do it now to be safe say typing hyphen visualizer so the reason i made this change is because i'm pretty sure somewhere in this file it or not in this file in autocomplete disabler it imports the typing visualizer so i just want to make sure the name matches what it would have been on the github repository so that this file doesn't have any mistakes in it all right so now we want to pass two options inside of here we want to pass the following show typing visualizer this is going to be true and then we want to go show typing dna logo this is going to be equal to true as well so this is pretty straightforward this is going to do what it says we're going to show both the visualizer and the logo i'll show you what both of those are if you want to see exactly how this works just go to the github there's not really too much documentation because it's really straightforward and you can read through the usage but it's like really simple then what we're going to do after this is we're going to use the auto complete disabler so auto complete disabler dot disable and then we want to disable auto complete so it's going to be disable auto and then complete like that and then we're also going to disable copy and paste just to make sure that the user cannot copy and paste stuff in to their username and password field so we're going to say auto complete disabler dot disable and then this is going to be copy paste like that and that should be all we need so now after we've initialized this initializing just meaning you know creating it and sorry this should say new before this what will happen is we will say let's show the visualizer let's show the logo let's disable autocomplete let's disable copy and paste if you didn't want to disable either of these you just wouldn't have these two lines and then it would still show the different logos because of the way you've initialized it so that's literally all we need for the autocomplete disabler and the typing dna visualizer now if you go to the website and you reset the cache you should see the typing dna visualizer was not loaded okay so it looks like we got an error i'm going to look at why this isn't loading and i'll be right back all right so i've found the error and it's actually it's not really an error but it's just something that i forgot to tell you to do so the reason why and let me just show you what's happening if you look here we had the typing dna visualizer was not loaded so that meant pretty much that the autocomplete disabler could not find the visualizer so what we need to do is import it in this file now this is a small mistake that they do need to fix i actually talked to them about this hopefully they will fix this we just need to include a line here in this file in auto complete disabler which notice i've renamed it now to the same thing it was on the github we're going to say import and it's going to be typing visualizer and this is going to be from if i can type properly dot slash typing visualizer dot js so now what this will do is load the typing visualizer since we're importing from that file it will actually load the code that we need and then this shouldn't be a problem anymore so again just make sure you have the export in this file as well as in the typing dna visualizer file make sure you have the export then go to auto complete disabler import and again make sure you have the export okay so now let's run this we've got to reset our cache and we should see that we get the logo awesome so there we go some messages have been moved to the issue panel yeah there's no worries so this is the typing dna logo right and i don't think it doesn't do anything if you click on it but it's just showing you that hey if you start typing here we are going to start keeping track of what you're saying so you can disable either the logo or this right so you can pick if you want to have the logo or if you just want to have the visualizer so in fact if i go to index.js and i disable the logo let's see what we get now so let's reset now why the logo is still here eh okay show typing visualizer true but show logo false maybe i have to actually put false here let's try putting false show typing dna logo false let's reset the cache and okay so now it doesn't show the logo but it does show the typing pattern so sorry you do need to include the option you just need to explicitly set it to false anyways i want the logo and the visualizer so i'll leave them both true but of course you know feel free to disable or enable them as you please let's reset our cache and there we go now as i type it kind of shows that it's keeping track of what i am typing okay so that is pretty much all i had to show you for this tutorial now this is obviously not a fully complete website the idea was to give you something that actually works that you could you know test out yourself and to show you how you can use typing biometrics as a form of two-factor authentication now another massive thank you to typing dna they were the ones who sponsored this video as i said at the beginning i had the opportunity to work with some of the developers and some of the people at typing dna there are great people uh super interested in just making the developer community so much better with products like this and they were super open to all of my feedback i had for example you know fixing these files like adding the exports and you know adding the imports and making it work better and all of that but definitely show them some love check them out from the link in the description i assume if you guys fall to this point you have an account already but all the information you need about typing dna will be there again you can find all the information about your application from the typing dna dashboard so typingdna.com clients all of the api documentation and all of the resources i used will be linked in the description and just remember that typing dna does not only work for login and sign up you can use it for all kinds of other applications i would definitely recommend doing a quick read through their website because it's very interesting the kind of applications they've used it for so anyways that is going to conclude this video i hope you guys found this useful if you did make sure to leave a like subscribe to the channel and i will see you in another youtube video
Original Description
Identify users by how they type! In today's video, I'll be showing you how we can implement typing biometrics as a form of 2 factor-authentication for your sign-ins. TypingDNA is providing a free API that can identify users based on how they type. We'll be taking this API and implementing it into a project, so that when users sign in their typing pattern is used to authenticate their login.
📄 Resources 📄
TypingDNA Website: https://www.typingdna.com/?utm_source=Youtube&utm_medium=referral&utm_campaign=API_free&utm_content=techwithtim
TypingDNA Demo: https://www.typingdna.com/#demo
TypingDNA API Docs: https://api.typingdna.com/index.html#api-guidelines-message-codes
Start Project Code: https://github.com/techwithtim/TypingDNA-Implementation
Typing DNA Recorder: https://github.com/TypingDNA/TypingDnaRecorder-JavaScript
TypingDNA Autocomplete Disabler: https://github.com/TypingDNA/autocomplete-disabler
⭐️ Timestamps ⭐️
00:00:00 | Typing DNA Overview
00:02:28 | Typing Biometrics Demo
00:06:08 | Starting Code Template
00:07:28 | TypingDNA API Account
00:08:15 | TypingDNA API Flow
00:11:17 | Starting Code Walkthrough & Usage
00:19:46 | Code Implementation Starts
00:19:50 | Login and Sign Up Endpoints
00:32:33 | TypingDNA User Ids
00:36:06 | Connecting Front-End to Back-End
00:36:48 | Adding TypingDNA Typing Pattern Recorder
00:39:25 | Sending Data to Backend
00:52:31 | Collect and Send Typing Patterns to TypingDNA
01:18:24 | Important Bug Fix
01:24:47 | Autocomplete Disabler and Typing Visualizer
01:32:29 | Conclusion
◼️◼️◼️◼️◼️◼️◼️◼️◼️◼️◼️◼️◼️◼️
💰 Courses & Merch 💰
💻 The Fundamentals of Programming w/ Python: https://tech-with-tim.teachable.com/p/the-fundamentals-of-programming-with-python
👕 Merchandise: https://teespring.com/stores/tech-with-tim-merch-shop
🔗 Social Medias 🔗
📸 Instagram: https://www.instagram.com/tech_with_tim
📱 Twitter: https://twitter.com/TechWithTimm
⭐ Discord: https://discord.gg/twt
📝 LinkedIn: https://www.linkedin.com/in/tim-rus
Watch on YouTube ↗
(saves to browser)
Sign in to unlock AI tutor explanation · ⚡30
Playlist
Uploads from Tech With Tim · Tech With Tim · 0 of 60
← Previous
Next →
1
 2
2
 3
3
 4
4
 5
5
 6
6
 7
7
 8
8
 9
9
 10
10
 11
11
 12
12
 13
13
 14
14
 15
15
 16
16
 17
17
 18
18
 19
19
 20
20
 21
21
 22
22
 23
23
 24
24
 25
25
 26
26
 27
27
 28
28
 29
29
 30
30
 31
31
 32
32
 33
33
 34
34
 35
35
 36
36
 37
37
 38
38
 39
39
 40
40
 41
41
 42
42
 43
43
 44
44
 45
45
 46
46
 47
47
 48
48
 49
49
 50
50
 51
51
![How to Fade Your Screen in Pygame [CODE IN DESCRIPTION]](https://i.ytimg.com/vi/H2r2N7D56Uw/mqdefault.jpg) 52
52
![How to Create a Button in Pygame [CODE IN DESCRIPTION]](https://i.ytimg.com/vi/4_9twnEduFA/mqdefault.jpg) 53
53
 54
54
 55
55
 56
56
 57
57
 58
58
 59
59
 60
60

A* Path Finding Algorithm(Visualization)
Tech With Tim
Python Programming Tutorial #1 - Variables and Data Types
Tech With Tim
Python Programming Tutorial #2 - Basic Operators and Input
Tech With Tim
Python Programming Tutorial #3 - Conditions
Tech With Tim
Python Programming Tutorial #4 - IF/ELIF/ELSE
Tech With Tim
Python Programming Tutorial #5 - Chained Conditionals and Nested Statements
Tech With Tim
Python Programming Tutorial #6 - For Loops
Tech With Tim
Python Programming Tutorial #7 - While Loops
Tech With Tim
Python Programming Tutorial #8 - Lists and Tuples
Tech With Tim
Python Programming Tutorial #9 - Iteration by Item (For Loops Continued...)
Tech With Tim
Python Programming Tutorial #10 - String Methods
Tech With Tim
How to Overclock a NVIDIA GPU
Tech With Tim
Python Programming Tutorial #11 - Slice Operator
Tech With Tim
Python Programming Tutorial #12 - Functions
Tech With Tim
Python Programming Tutorial #13 - How to Read a Text File
Tech With Tim
Python Programming Tutorial #14 - Writing to a Text File
Tech With Tim
Python Programming Tutorial #15 - Using .count() and .find()
Tech With Tim
Python Programming Tutorial #16 - Introduction to Modular Programming
Tech With Tim
Python Programming Tutorial #17 - Optional Parameters
Tech With Tim
Python Programming Tutorial #18 - Try and Except (Python Error Handling)
Tech With Tim
Python Programming Tutorial #19 - Global vs Local Variables
Tech With Tim
Python Programming Tutorial #20 - Classes and Objects
Tech With Tim
Cool VBS Script to Prank Your Friends!
Tech With Tim
How to Overclock an AMD GPU
Tech With Tim
Best GPU'S For Mining Ethereum (2018)
Tech With Tim
Recursion and Memoization Tutorial Python
Tech With Tim
Ethereum Mining Rig - Hardware Guide
Tech With Tim
Pygame Tutorial #1 - Basic Movement and Key Presses
Tech With Tim
How to Install Pygame (Windows 8/10)
Tech With Tim
How to Trade Your Cryptocurrency (Bitcoin, Ethereum etc.) For Cash!
Tech With Tim
How to Mine Ethereum 2018 - WORKING (Super-Easy)
Tech With Tim
Microphone Comparison - $10 Mic vs $150 Mic (Blue Yeti USB)
Tech With Tim
Pygame Tutorial #2 - Jumping and Boundaries
Tech With Tim
Pygame Tutorial #3 - Character Animation & Sprites
Tech With Tim
Pygame Tutorial #4 - Optimization & OOP
Tech With Tim
OBS Studio Tutorial - Best OBS Settings
Tech With Tim
Linear Search Algorithm - Python Example and Code
Tech With Tim
Make Any Mic Sound AMAZING! (WITH OBS)
Tech With Tim
Binary Search Algorithm - Python Example & Code
Tech With Tim
Pygame Tutorial #5 - Projectiles
Tech With Tim
Pygame Game - Mini Golf
Tech With Tim
Pygame Tutorial - Projectile Motion (Part 1)
Tech With Tim
Pygame Tutorial - Projectile Motion (Part 2)
Tech With Tim
Pygame Tutorial #6 - Enemies
Tech With Tim
Pygame Tutorial #7 - Collision and Hit Boxes
Tech With Tim
Pygame Tutorial #8 - Scoring and Health Bars
Tech With Tim
Cloud Mining vs. Hardware Mining - 2018
Tech With Tim
How to Install Pygame on Mac OSX (Fast-Simple)
Tech With Tim
Pygame Tutorial #9 - Sound Effects, Music & More Collision
Tech With Tim
Pygame Tutorial #10 - Finishing Touches & Next Steps
Tech With Tim
How to Fade Your Screen in Pygame [CODE IN DESCRIPTION]
Tech With Tim
How to Create a Button in Pygame [CODE IN DESCRIPTION]
Tech With Tim
Pygame Side-Scroller Tutorial #1 - Scrolling Background/Character Movement
Tech With Tim
Pygame Side-Scroller Tutorial #2 - Random Object Generation
Tech With Tim
Pygame Side-Scroller Tutorial #3 - Collision
Tech With Tim
Pygame Side-Scroller Tutorial #4 - Scoring and End Screen
Tech With Tim
How to Create A Message Box in Python - Tkinter
Tech With Tim
Is Ethereum Mining Still Profitable - Is It Worth It (April 2018)
Tech With Tim
How to Run MAC OSX on a WINDOWS PC (Clover Boot-loader)
Tech With Tim
Programming Problem #1 - Alphabet Soup (Beginner/Novice)
Tech With Tim
Related Reads
📰
📰
📰
📰
Your app has two caches. What if it only needed one?
Dev.to · Dencio
Run a Full JavaScript Website with AxonASP — No Node.js Required
Dev.to · Lucas Guimarães
A complete Laravel API with clean architecture in 30 seconds, tests included
Dev.to · Loic Aron Mbassi Ewolo
Pain point #2: Django’s ORM Performance Problem
Medium · Python
Chapters (16)
| Typing DNA Overview
2:28
| Typing Biometrics Demo
6:08
| Starting Code Template
7:28
| TypingDNA API Account
8:15
| TypingDNA API Flow
11:17
| Starting Code Walkthrough & Usage
19:46
| Code Implementation Starts
19:50
| Login and Sign Up Endpoints
32:33
| TypingDNA User Ids
36:06
| Connecting Front-End to Back-End
36:48
| Adding TypingDNA Typing Pattern Recorder
39:25
| Sending Data to Backend
52:31
| Collect and Send Typing Patterns to TypingDNA
1:18:24
| Important Bug Fix
1:24:47
| Autocomplete Disabler and Typing Visualizer
1:32:29
| Conclusion
🎓
Tutor Explanation
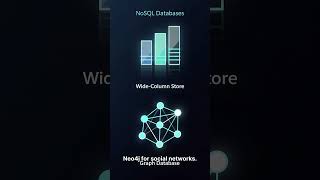
 DeepCamp AI