Learn Docker - DevOps with Node.js & Express
Key Takeaways
Teaches Docker fundamentals by building a Node/Express app with a Mongo and Redis database
Full Transcript
you are about to master the core fundamentals of docker by building a node express app with a and redis database sanjeev teaches this course he starts at the absolute beginning and then takes you through a full production workflow what's going on guys so in this video i'm going to show you guys how we can set up a workflow for developing node.js and express apps within a docker container so the first thing that i want to do is i want to set up a quick and simple express app that we can use for demonstration purposes and the reason why i didn't actually prepare the the express app ahead of time is first of all this is going to be the quickest and simplest of apps we'll be able to knock it out within like a minute but i want you guys to focus on these steps that we need to actually create this app because they're kind of important because we're going to recreate those steps within the docker container as well so i've got my project directory i called it node docker already here and i've got it opened up in vs code so you know with any other express app the first thing that we have to do is get our package.json file so i'm going to do an npm init and that's going to create our package.json and since we are creating an express app we're going to have to install express i'm going to do an npm install express so now we've got our dependency uh the next thing that i want to do is also focus on the fact that we did uh create our node modules folder so that happened when we installed express and the final thing that we need to do is actually create the rx application so i'm going to create an index.js file and i'm going to import our express we'll do const express require express and then we can do const app equals express right then i'm going to specify the port that i want my express server to live on so i'm going to do const port so this variable is going to represent the port that it's going to be listening on and i'm going to set it equal to process.env.port pipe 3000 right so if you don't know what this line is it's basically saying that if the environment variable called port has been set we're going to set this variable to that value however if it's not set we're going to default to a value of 3000. usually common configuration and then we can do an app.listen and we'll listen on that port and when our server comes up we can say console.log listening on port and then we'll pass in that variable all right so now the last thing that i want to do is set up a quick route for testing purposes so i'm going to do app.get and we'll just say the root root path and then we'll do rec res and so if anyone sends a get request to this path uh we're just going to send back a simple response which is going to be uh we'll just send an h2 that says hi there and i forgot the comma right here all right and so that's our entire express app uh i'm going to start this app real quick we're going to do uh node and then index.js and it looks like i forgot to save probably all right so it looks like i already had another express app listening on port 3000 so i deleted that so now if we do a node index.js it should start it's going to be listening on port 3000 we can go to our web browser real quick and we can just go to local host colon 3000 and when we do that we should see it say hi there i'll zoom in for you guys so that you can see that and so that confirms our express app works so we've got our dummy express app so now we can go ahead and get started with actually integrating our express app into a docker container and setting up a workflow so that we can move to developing our application exclusively within the docker container instead of developing it on our local machine like we just did so now that we got our express application complete or the demo express application uh let's work on setting up our docker container now for this video i'm going to assume that you already have docker installed on your local machine if you don't go ahead and do that now just follow the instructions on their website it's fairly straightforward just make sure you follow the directions for your respective operating system but once you have docker installed on your machine head on over to hub.docker.com and i want you to just search for node within that search bar right there once that's finished loading you'll see that the first result is the official node docker image so this is a public image provided by the node team and it's a fairly lightweight image that basically has node already installed for us so that we don't have to do this ourselves and if you take a look at the documentation you'll see that we've got all of the various different versions that it supports so you can get version 15 version 14 all the way back down to version 10 if you really want and it's got directions for this image or any specific things that are relevant to this image when you want to deploy a container from it now this docker image right here is not going to have everything that we ultimately need for our application because the whole idea behind docker and an image is that the image is going to have every single thing that's needed for your application to work and so for our application we obviously need to get our source code into the image and we also need to get all of our dependencies like express and the other dependencies that our application may need so to do that what we're going to do is we're going to create our own custom image and we're going to base this custom image off of this node image so we're going to take this node image we're going to copy all of our source code into that node image and then we're going to install all of our dependencies like express and then that final image is going to have everything that we need to ultimately run our application so let's get started on doing that now okay so let's get started on creating our own custom image to create a custom image we need to create a docker file so the docker file is just going to be a set of instructions that docker's going to run to create our very own customized image so let's create a new file and we're going to call this docker file with a capital d now in our docker file it's going to have a set of commands that docker is going to run to create our own personalized image and the first command that we always have to do is we have to specify a base image so when you create a custom image what you're ultimately doing is you take a base image or a known image of some sort doesn't matter where the image from it can come from your own uh docker repository it can come from docker hub it can come from anywhere you just need a image that docker has access to and we're just going to tweak it a little bit so that uh it contains all of our source code it contains all of our dependencies and things like that so in this case you know we already found our um our base image it's going to be this node image because that's really the only thing that we need to run right we just need it to have node and anything else to run node so we're going to take this as our base image and the instructions here is going to show you how we can ultimately use that so here you just specify node and then you can do colon and then the specific version you want if you don't specify the version i forget what version it grabs but if you read the instructions it's probably going to say it grabs like version 14 or something like that or maybe the latest version right so what we do is we do from and we'll capitalize from and then we say node because that's the name of that uh image or our base image and then we can do colon and then the version we want so i'm going to specify version 15 not that we need version 15 we can run 14 or really any version we're not doing anything specific to any new versions i just want to show you guys how to actually specify a version uh so that's something that's absolutely needed the next command is technically optional but it's still recommended and that's called the work dur command and i'm going to set that to slash app so what this command does is it sets our working directory of our container to be the slash app directory within the container so i know this slash app directory exists in the container because i've run the node image and i know it's got a slash app directory but setting the work directory is really helpful because anytime you run a command when you set the work directory it's going to run that command from this directory so we can put all of our application code in slash app and we can run node index.js on slash app and it's going to run it automatically in slash app without us having to specify uh so the working directory just uh is the directory where you run all your commands and it's also the directory where if you copy any files to your container it's going to by default send it to this directory so this is just recommended but it's not technically necessary now the next thing we want to do is uh we want to copy our package.json file which is this file which contains all of our dependencies and anything else that we need and we're going to copy it into our docker image so let's go to um so we can run the copy command and so we copy the path to the package.json file which is our current directory so we just do package dot json and then we have to specify the directory we want to copy it to in our image and so i'm going to do this dot which means the current directory and the reason why i do that is because we set our working directory up here to be slash app so when you do dot it's going to assume the slash app directory we could technically also just do slash app same result but since we have the working directory set we can just specify it relevant relative to that directory uh the next thing is once we have our package.json remember it's got a list of all of our dependencies we want to actually install our dependencies so we want to run an npm install so in our docker file to run a command we can do run and we can do npm install right so we now have our package.json file copied over and then we run npm install now we've got express installed for us the next thing we want to do is and this part's going to be a little bit confusing but we're going to copy the rest of our files so all of our source code everything else into our docker image so we'll do a copy again and here instead of specifying a specific file i'm going to say the current directory so it's going to grab every single file every single folder within our current directory and we're going to copy it to just like we did here where we just did a dot which is going to send to the slash app we're going to do the same thing so we can just do dot or dot slash same thing and right here you might be a little confused you might be wondering well why do we copy the package.json first and then copy all of the files over do we even need this step before if we're going to copy all of our files this should copy our package.json and it does the reason why i split it up into two different steps is a little bit of an optimization technique so let me explain how docker images actually work when you create an image from a docker file it takes each one of these steps and it it treats it as a layer of the image so you could think of an image as just basically these five steps or five layers so once you build all five layers you have the ultimate image or the final image so this first command creates one layer of the image this second command creates another layer of the image this third command creates the third layer the fourth layer and the fifth layer and they all kind of build on top of each other and what's important is that after each layer the docker docker actually caches the result of each layer and what i mean by that is when we run uh docker build when we actually build our image for the first time what's gonna happen is that it's gonna run this first step and it's gonna cache the result so it's gonna say hey look we uh downloaded the node image from docker hub and then we cache that result right we then set the working directory to slash app and we cache the result of that we then copy package.json we cop we cache the result we then npm install cache that result and then we copy all of our code and we cache that result and this is important because let's say we decide to uh rebuild the image again right if nothing changes docker is efficient it knows that nothing's changed in any of these layers and it just takes the final cache result of step five which is the last layer and it just gives that to you so if you run docker build which is the command to actually create the image the first time you run it it's going to take a long time because it's got to run all of these steps and especially the npm install if you have a lot of dependencies it's going to take quite a while but the second time you run it if nothing's changed you'll see it'll be done in less than a second and that's because it's cached all the results and the reason this is important and the reason why i split this up into two different steps is i want you to think about what happens during our development process right when we are actively working on our code what changes our package.json does not change very often right i mean we do occasionally add new dependencies that's normal but it's for the most part your source code changes but your package.json and your dependencies don't change very frequently and so by splitting this up into two different steps what happens is we cache each of these layers right and so we're going to cache uh the node image we're going to cache the working directory and in reality those two will never change right we're never really gonna change those two so uh we're always going to essentially catch the result from step two and onwards but the thing about docker is if any layer changes right say that layer three changes and what i mean by layer three changes is that if package.json ultimately changes uh where maybe we add a new dependency we have to rerun step three and all of the steps after that because we don't know how that's going to impact step four we don't know how it's gonna impact step five and so by caching by splitting these up into two different steps we can say that listen if package.json never changes then we're going to cache that result and since realistically when we're actually programming package.json is just not going to change so we're going to cache that result and since package.json is cached then we're going to also cache the result of npm install because nothing's really changing so we cache those results and so when we change any of our source code within our application the only step that really changes is layer five where we copy the rest of our code and so we only need to rerun step five however if we didn't have this split up into two different steps where we have a copy package.json and then copying the rest of our files uh what would happen is that anytime we changed our source code technically it would rerun everything including the npm install because it doesn't know that we only changed our source code it just sees that listen this step where we copy all of our files has changed we're going to have to rerun all of the steps after that so by doing this we know that package.json will always be the same so we can cache the result of these two steps and only make and only run step five which is the changing of our source code so it's a little bit of optimization if it didn't make sense i don't think i did that great of a job of explaining it but i'll show you guys this when we actually build our containers how it actually caches the results of each step and how it's a little bit of an optimization to actually do this and split this up into two different steps all right so the next thing that we want to do is uh we know our application is going to be listening on port 3000 so let's do um expose so we're going to say our container is going to expose port 3000 and then finally when we start our container we want to tell it what command to run right and since this is a node application and our entry point into our node application is this index.js we have to tell it to run index.js so we do cmd brackets and we're going to do node and then index.js all right so when we deploy our container it's going to run in index.js so this is at runtime and this is at build time so hopefully you guys understand this so this is when we're building the image this is the command that's going to be assigned to the container when we actually run the container and so that's all we really need we're going to go ahead and actually create our image now so let's go to our terminal down here and i'm going to stop our express server because remember we're no longer going to be developing on our local machine we'll be developing on the docker container so make sure you stop your local instance of your application all right and let's build our docker container oh sorry our docker image we're building the image right now not the container itself so we'll do a docker build and then we're going to specify uh the path to our docker file it's actually called the context it's not necessarily the path of the file um it has a little bit more of a meaning to it with but i don't want to spend too much time going i just think about it as the path to the docker file so this docker file is in the current directory so we're just going to do a dot so let's run that and i realized i forgot to save my file so let's save that i'm going to rerun that and i want you to pay attention to the output notice what's happened and i think this is kind of important when you're trying to understand what's happening uh you could see that on step one of five it says we're going to grab uh the node image from docker diode io so it's pulling the image from the uh from docker hub right and as i said each one of these is a separate step or a separate layer right if we go down we go to step two and it says working directory is set to slash app you can see that it says cached so you're not going to see it say cached on your machine that's because i ran this as practice before i recorded this video but it's not going to say that it's cached when you ultimately run this so so keep that in mind but if you run this again if you run it again right what should happen is that it should cache all of the results right and so now all the ways down to step five it's cached so if you run it again like i said there's an optimization where it actually caches the results and the second time you run it it's going to be much much faster so now what we're going to do is we're going to do a docker image ls and you can see the new image it created this is the one without a name because we didn't specify a name you also see the node image that it pulled from docker hub which is node 15. now i don't like the fact that we didn't give this a name so let's do a docker image rm this is going to delete the image that we just created i'm going to pass in that image id and if we do a docker image ls you can see that it's gone now so now we're going to go back to the docker build command that we ran but this time we're going to pass in a specific flag so we'll pass in the dash t flag so here we can give it a name i'm going to call this node dash app dash image all right so once that's complete we'll do a docker image ls and now you can see we've got our image that we just created so now that we have our image let's go ahead and run it and let's test it out see if everything works so we'll do a docker run and we'll do node dash app image so here we're just specifying the image that we want to create a container from which is this image that we just created but before you hit enter there's a couple of flags that we got to pass so first of all i want to give my docker container a name so that i have some kind of way to identify it so we can pass in the dash dash name option and we'll call this node app so keep in mind that last uh the last entry in my command is the name of the image that we're creating a container from this is the name of the container that we're creating and then finally there's one more flag i want to pass which is dash d so that means it's going to run detach mode because by default when you create a docker container from docker run you're going to be attached to the the cli or the console or whatever it's called but here i can run in detach mode so that my command line's still free and open so let's hit enter and it looks like it successfully created my container um i can do a docker ps and we should see that there's a container open at the moment all right so let's test this out and what i'm going to do is let's just go to my local host colon 3000 hit refresh and let's see what happens all right so it doesn't look good it's spinning which most likely means there's something broken and it looks like there is don't worry guys i know exactly what's wrong i perfectly did this so let's tackle exactly what's wrong with our docker container in the next section so we were unable to connect to our docker container on localhost colon 3000 now why exactly were we unable to do that well let's take a look at our docker file and if we go back here uh we can see that uh we do have this command expose 3000 and i think naturally most of us would assume hey look we're exposing port 3000 so we should be able to access that well not exactly this line does absolutely nothing this is really more for documentation purposes if you delete this command and create a brand new image it will not impact our image or container at all in any way shape or form it's just so that when you share your docker file with someone else they'll know hey look this image expects you to open up port 3000 for everything to work so this line doesn't actually open up port 3000 and the thing about docker containers is by default they can talk to the outside world so if a docker container wants to reach out to the internet or wants to reach out to any other devices in your host network uh it can do that however outside devices like the internet or your host machine or any other machine from the outside world by default cannot talk to a doc container this is almost like a built-in security mechanism right you don't want the outside world to be able to access your docker container but your docker container can outside can access them so how do we make it so that the outside world can talk to our docker container and keep in mind when i say outside world i don't just mean the internet i also mean our local host machine right and when i say local host machine i mean my windows machine right here right to actually uh talk to the container from my computer which is kind of seen as like an outside device we have to um poke a hole in our host machine uh and what i mean by that is that by default right our docker container nothing from the outside wheel can talk to our docker container so we have to basically say on our host machine hey if we receive traffic on a specific port we want to forward that traffic to our docker container and the way we do that is it's very easy first of all let's kill our container uh we don't need that anymore so i'm going to do a docker rm and then specify the name of our container we'll so we'll do node dash app and then i'm going to pass in the dash f flag so this is stands for force so by default usually you have to stop a container before you can delete it if you pass the dash f flag it'll allow you to delete a running container all right so now if i do a docker ps we should see an empty list so let's do docker let's rerun that command but here i'm going to pass in another another flag i'm going to pass in the dash p flag i'm going to specify uh this so let me explain what this is in a second so we've got port 3000 and then colon 3000 so what exactly does this mean we've got two different numbers we've got the 3000 to the left of the colon and 3000 to the right of the colon so the number to the right let's start off with this one is the um basically the port that we're going to send traffic to on our container and our container remember our application is listening on port 3000 so we want to send this to port 3000 right if this was set to 2000 then we would want to set this to 2000 so whatever our container is expecting traffic on the number to the right of the colon should be set to that value now the number to the left represents um it represents traffic that's going to be uh basically coming in from the outside world so if another device on your network uh or even your local host machine right my windows machine if we send traffic to local host port 3000 right we're going to take traffic that's coming in on port 3000 and sending it to port 3000 on our container but in this case even though the two numbers are the same they don't have to be so let's say we wanted to basically poke a hole so that anybody that sends traffic to our windows host machine here on port 4000 we should then forward it to our docker container in that case we would change this to a 4000 and we keep this to port 3000 because remember it's still listening on port 3000. however if this was 2 000 then we would change um this number to be 2000 here right so hopefully that makes sense i've set up a little quick diagram i don't know if you guys understood it at this point but hopefully the diagram makes it a little bit easier to understand so let me pull that up so here in this diagram i've got my host machine right which is this big blue box which is my windows machine and then i've got this node container in green right here and so what's going to happen is you know we've got those two numbers right basically what we want to do is when our host machine right our windows machine receives traffic on port 3000 what we want to do is we want to take that and forward it to port 3000 on our node container so that's why we have 3000 colon 3000 so the first 3000 represents the red arrow and then the second 3000 represents the yellow arrow and this also applies when we send traffic from our host machine to the local host ip so to ourselves so if we send a traffic to local host port 3000 it's going to take that traffic and it's going to forward it to port 3000 and once again like i said before we don't have to do three thousand to three thousand we could change this to uh four thousand and then we would send traffic to local host four thousand and it would forward it to traffic on port 3000 on our node container because once again our node container is listening on port 3000 because that's what our express server is listening on all right so hopefully that made sense i'm going to run my container now so i'll hit enter and i changed everything back to 3000 column 3000 because uh that's just a little bit simpler why not have both of those numbers match there's no need to unnecessarily complicate things let's do a docker ps all right and you'll see that we've got our container but we under this port section you can see that it looks a little different you can see that right here we've got basically 0.0.0.0 on port 3000 with an arrow to 3000 slash tcp so what this is saying is any traffic destined to your host machine uh for uh you know my windows machine right here on port 3000 is going to get forward to port 3000 on my container so now let's go back to their web page and let's do a refresh and you can see now it says hi there so we have successfully sent a request to our docker container on port 3000. before proceeding any further i do want to show you one thing real quick let's actually uh log into our docker container and take a look at the files in there so we can do that by typing in docker exec on it for interactive mode and then we'll specify the name of our docker container which is node app and then we want to pass in a new command instead of the usual node index.js we're going to passion bash so this is going to allow us to take a look at the file system of our container uh so here by default it's going to drop us in the slash app directory just because uh we set the working directory to be that uh and here i just want to type in ls so this is going to list all the files in that directory and so you're going to see all the files that are copied over so we've got our package.json we've got the package.lock we've got the node modules folder our index.js and we've got the docker file and you know the reason why i wanted to show you the file system is you may be wondering what is our docker file ultimately doing in our docker container right our docker file is there to create an image but we don't actually need it in our docker container and i also wanted to point out one more thing if you take a look at this copy command right here what it does is it copies everything in our current directory so every single file and it copies it into our container or our image and this is a bad thing because there are going to be files that you don't actually want copied into your container right just like our docker file that i mentioned we may also have an environment file that has a lot of our secrets that we don't actually want copied into our container potentially also on top of that we don't need to copy our node modules folder this is actually a waste of time because a lot of times this folder is actually fairly large and we don't need to do that because remember we're copying our package.json file and then we're doing an npm install so there is zero reason to ever have to copy this node modules folder into our container and on top of that we ultimately want to move away from developing on our local machine so moving forward we won't even have a node modules folder on our local machine it'll only ever exist within our docker container so why are we even copying it in the first place uh it could be stale we may not even have it so um we need to find a way to make it so that docker does not copy over files that we don't ultimately want copied over just like this docker file just like the node modules folder if we have git configured we definitely don't want that copied over uh and so we can do that by creating a docker ignore file right and that probably sounds a little familiar because if you work with git kit has a git ignore file for files that you don't want checked into your git repository same exact concept so let me exit out of my container so we can do exit to exit out of the file system and uh i'm going to kill that in that container so we'll do docker rm node app and then we'll do dash f for force and let's create a docker ignore file so i'll do a new file and i'm going to call this dot or period and then docker ignore and within our docker ignore file we're going to list out every single file and folder that we don't ever want copied into our docker container so the first thing is we don't want to copy our node modules folder because we're going to do an npm install from our package.json anyways there's really no need to ever copy it over we don't want to copy over our docker file now that we have a docker ignore file there's really no need to copy that into our docker container uh and then a few other things right if you have git you don't want to copy git you don't want to copy your git ignore uh for now i think that's good um you'll see later on in the video we'll add a couple more files but for now that's okay just do a save and now let's rebuild our image so let's find that build command so docker build dash t the name and then uh the path to the docker file so that's their current directory so i'll run that and just make sure i didn't change anything in my index.js if everything looks good so let's run that all right so that's done let's run our container from the new docker image that we just created so if we hit up for that docker run command let's see if i can find it here we go so docker run dash piece we're going to open up port 3000 run in detached mode we're going to give the container a name of node app and we're going to use the node app image that we just created all right so we did that let me just quickly double check to make sure i didn't break anything so hit refresh it looks like everything's working perfect now let's go into our docker container again so we can run that uh exec command and let's just make sure it didn't copy over any unnecessary files so let's do an ls and now it's perfect right we no longer see a docker file there's no docker ignore file i can't verify for you guys that we didn't copy over the node modules folder but just trust me this node modules folder is from running a uh an npm install on the fourth step and not because we copied it over from our local machine all right so let's exit out of that okay so now that we got our application working in a docker container and we can access it from our local machine uh let's see what happens when we change our code i'm gonna go back to my uh my index.js file and i'm going to just tweak something right here it says we're sending an h that says hi there i'm just going to add a couple of exclamation points we'll save that and i'm going to minimize this and let's hit refresh let's see what happens we hit refresh nothing happens we don't see the exclamation points so for some reason our code didn't get updated and i want you to think about why that is it's actually a really simple answer right uh basically what happens is first of all we have to take our docker file we have to build an image so we built an image and then we built a container from it now we changed our code to add the exclamation points but our image that we created from our docker file was run before we made these changes so the code in that image does not have the exclamation points and so basically our image has a stale version of our code which means our container which is running from that image has a stale version of our code and we can prove that if we do a docker exec and go into our code if i do an ls we can see our index.js file and i do a cat which is just going to print the contents of that file if i do an index.js you can see that there's no exclamation point so it's running a stale version of the code so how do we actually update that well it's actually very simple first of all make sure you change save all your changes and now what we're going to do is we're going to rebuild that image well first of all let's delete our container we don't need it anymore and let's rebuild the image so where's that build command so build right so now if you take a look uh you'll see that um because our source code changed it had to run step five once again uh so now if we do a docker image ls this new image which we named it is the same name as we had before now has the new exclamation points built into the image so if we deploy this image with a docker run command it's the same exact docker run command hit enter and now if we go back to our our web browser hit refresh we can now see the exclamation points so that explains why um our code didn't automatically get updated however i'm sure you're thinking well this is kind of a strenuous process uh for when you update your code right every time i make a change i don't want to have to uh rebuild an image and redeploy a container that's a very slow process that's going to slow down your development time uh and what i'm going to do is i'm going to show you guys how we can work around that because that's obviously not um sustainable you can't be rebuilding an image and re-running a container every time you make one tiny uh change in your code so what we're going to do is we're going to make use of something uh called we're going to make use of volumes so within docker we have volumes which allows us to have persistent data in our containers but there's a very specific type of volume called a bind mount in docker and this is a special this is special volume because what it allows us to do is allows us to sync a folder in our local host machine on our in my windows machine in this case it allows me to sync a folder or a file system to a folder within our docker container so what i can do is i can take all of these files and sync them into the slash app directory of our container so that we don't have to continuously rebuild the image and redeploy a container every time we make a change it'll automatically sync those two for us to really speed up the development process so let me show you guys how we can do that so we're going to delete our container and what i'm going to do is we don't need to rebuild our image the image is just fine but i'm going to hit up a few times so we can get to this run command so we're going to use the same exact run command and we're going to pass in a new flag it doesn't matter where you put it and it's going to be the dash v flag so this stands for a volume there's a couple of different volumes or different types of volumes but remember we're using the bind mount which is a special volume that allows you allows you to sync a folder from your local machine to a folder in your docker container uh and so the syntax for this is you do dash v and then you specify um the local folder or the path to the folder on your local machine so i'll just say path to folder on local machine on local and then we do colon and then we do path to folder on container okay so kind of like pseudo code just uh so you guys understand so this is going to be the location of this folder right because this is the folder that has all my source code and i want to sync that to a folder within our docker container and that's going to be in the slash app directory because that's where we're going to store all of our source code so let's hard code those values uh and so here unfortunately i can't just do a dot right here um it's not going to register that it's not going to work you have to actually pass in the whole path so if you're using vs code like i am you can right click here and then just select copy path and then you can right click and it's going to grab the entire path in my host machine to this folder obviously i'm going to delete the docker file section we just need to get into the node docker which is the name of the folder that houses all of my code and then we do call in and then we do the path to the folder in the container so what folder do we want to copy it to easy we want to copy it to slash app right and that's so that's all you have to do you hit enter and it's going to sync your code however i do want to show you a couple of shortcuts because that does look a little messy having to type all of this out and so what we can do is we can make use of um variables and so i'm going to delete this i'm going to show you guys what you can do instead instead of having to type out that whole nonsense and it's going to be different based off your operating system so if you're using windows and you're using the command shell then what we can do is we can type in percent cd percent so that's going to grab the current working directory so that way i don't have to copy that entire path and that only works on windows command shell if you're using windows powershell then you're going to have to type in dollar curly braces pwd closing curly braces that's going to grab the current working directory and if you're on a mac or a linux then you can type in dollar parentheses pwd uh and then close parentheses so that's just a shortcut or you could type out the entire path whatever is easiest for you feel free to do that so i'm just going to use my percent cd percent all right and so let's hit enter and uh you know depending on you know what uh operating system using if you're using windows anytime you're doing file sharing um you might get this warning there's a couple of optimizations that you can make i usually just ignore it for now all right so now theoretically it should be syncing this entire folder with the slash app directory in our container uh and so uh let's minimize this and let me just refresh this so you can see right now we've got the four exclamation points let's go back to our code and i'm going to delete the exclamation points all right and then after we delete it let's save it and let's see if i refresh this page does the changes take effect so let's hit refresh and it looks like it didn't so do you guys know why it didn't take effect well let's take a look right because theoretically this command uh this flag right here should sync the folder so we should see uh this file gets synced to our container so let's drop into our container and take a look at what the file looks like in the container to see if it actually updated all right because maybe i was lying to you guys and this does absolutely nothing and i wasted your time so we log in let's do an ls so we've got our index.js and let's print out the contents of the file by typing in cat and then index.js and if we take a look at that we can see that hey look it did actually sync our code it deleted the four exclamation points so why exactly did we not see the update in our web browser well this is easy for anyone that's ever worked with express applications i'm sure you might have an idea as to what exactly caused this problem remember anytime we make changes to code in any node or express application we have to restart the node process we did not restart the node process we just changed the code and we hoped that it would automatically work but we had to restart the node process right and um you know we could go in we can kill the node process start it again but obviously that's inefficient right we already have a solution that we already know is going to work and that is we're going to make use of nodemon right nodemon will always look at your code and if any changes take place it's going to restart the node process so that the changes are updated in real time so let's get that set up and installed i'm going to exit out here and we need to update our package.json file so let's get nodemod installed as a dev dependency and i'm going to do this on my local machine just so that we can have it set up in this file so i'm going to do an npm install nodemon save dev so this is going to be a dev dependency just because we don't need it to run when we actually deploy to production and remember i'm just doing this on my local machine right now just so that we can update my package.json file all right so we've got our dev dependency now let's go to my package well i'm already in my package.json but let's set up a few scripts so we'll do a start and this will just be the usual node index.js and then we'll have a dev which is going to be whoops which is going to be a nodemon index.js so by running nodemon in dev mode it's going to automatically restart uh index. it's going to restart the node process anytime there's any changes to our source code now as a heads up when i was uh doing a dry run of this demo i did run into some issues on specifically it looks like windows machines so if you're on a windows machine and for some reason later on in this video uh you run into some issues with nodemod not actually restarting you may need to pass in the dash l flag uh so that that kind of fixed most of the issues uh if you do run into the issue just try and try the l flag uh if you want to read up on it just just google the error message that you get or just google no not restarting on windows for docker and they'll give you an explanation for why you need to pass in that flag but i'm going to keep that in there because i'm running a windows machine and i did run into that issue so let's save all of that and let's uh let me kill the the docker container that we have so i think there should be one running so we'll do a docker rm node app dash f all right uh so now that we made changes to our package.json we're gonna have to rebuild our image now to do a docker let me see if i have that command cache someplace here we go build so we'll do the docker build and notice how it's taking a little bit longer this time and that's because our package.json file changed so it had to rerun step three where we copy package.json and then rerun step four and then we run step five because we have to run all the steps after that because we don't know if changes to this file change to any of the cache results so that's why it took a little bit longer this time but hopefully by now you guys get an understanding of how all the caching works in docker all right so now let's redeploy actually before we redeploy there's a couple of things that we have to change i realize i forgot to do this so um back in our docker file right we're not going to run node index.js anymore so in the development mode we're actually going to run if you take a look at our package.json we're going to run npm run dev so we can run node mod so let's go back to our docker file we'll do npm run and then dev save that sorry about that guys we're gonna have to rebuild our image again so let's uh rebuild it all right uh and so now let's run a container from that image uh and this time we want to do it with the bind mount again let's hit enter we've got our docker container let's quickly test this out okay so the exclamations are gone which is fine and let's make a quick change to our code i'm going to re-add the exclamation points save it all right and if i hit refresh look at that so it looks like nodemon is doing its job and anytime we make changes to our code it's automatically restarting the node process and our bind mount is successfully syncing the code from our local machine to our docker container now i want to do a quick little test and i'm going to do this because i suspect depending on how you guys followed along to this video so far you may have run into an issue in the most recent step so let me delete my docker container so let's do a docker rm node app dash f and what i'm going to do is i'm going to take this node modules folder on my local machine which i don't need anymore because we're not developing on my local machine and i'm just going to delete it all right so now that it's gone i'm going to redeploy the container i'm going to show you that we're going to break our application so if i it's now running and if i go to my web browser hit refresh you can see it spins and it's eventually going to crash let's give it a second there you go so what exactly happened well let's take a look so if i do a docker ps let's see if my container is running and look that's the first issue why is our docker container not even showing up on this well when you do a docker ps it's only going to show you running containers so let's do a docker i think it's ps minus af yep so this is going to show you all containers started or stopped and you could see our most recent container our node app container and it said it exited 30 seconds ago which means usually if it automatically exit it usually means something crashed so if you want to take a look at the logs to see why something crashed we can always do a docker logs and then you specify the name of the container so it's going to give you all the logs for that and this is going to show us some node or nodemon logs and you'll see right here it says nodemon not found so what exactly is happening we know for a fact that nodemon should be installed because we had everything working before the only change we made was we deleted the local node modules folder why should that impact anything because it was working before well let me tell you what happened so what happened was um you know we we create our docker image right where we copy our package.json file and then we run an npm install so at this point when we run mp install it should install nodemon for us and it is in there but then we copy um all of our files which once again not an issue actually i don't know why i kind of made it seem like it was but we copy all our files all of our source code uh and then um the command specified for the container is npm run dev now when we go back to our docker command that we used to actually create our container we created a bind mount so the bind mount syncs this folder with the slash app folder and this is where the issue occurred because it's syncing this folder since there's no more node modules folder in this folder it syncs that with the slash app folder so it ends up overwriting the slash app folder and deleting the node modules folder in the slash app folder of our container because it doesn't exist in our local our local directory and since we have a bind mount it's going to sync those two directories together that's the problem right because once we deleted the node modules folder from our local machine it will also delete it from our docker container and then without the node modules folder that container has no idea what the hell nodemon is so how do we get around this issue how do we prevent our local directory our local folder from overwriting the slash app directory and deleting the node modules folder well there's a simple little hack that we can do and that is we're going to create a new volume and we're going to create a volume that's called there's a couple different volumes like i said in docker a bind mounts one we also have an anonymous volume and volumes work based off of specificity so we've got a volume on our container for the slash app directory but we want to make sure that we preserve the slash app slash node modules so we want to make sure this bind mount doesn't override the slash node modules folder within the app directory and the way we can do that is we could just specify another um another uh volume so first of all let me delete our broken container all right and then we'll run that same command but i'm going to pass in another v flag for another volume and i'm going to say this volume which is going to be an anonymous volume is going to be that for the slash app slash node underscore modules this is a little hack that you can do to prevent the bind mount from overwriting the slash app slash node module folder because all volumes in docker containers are are based off of specificity so even though this bind mount should sync with the slash app directory we can see that we have another volume that uh that references the slash app slash node modules folder and you can see that since this is a longer path that's basically more specific so that's going to prevent this bind mount from deleting the node module folder basically this extra line is going to say hey don't touch this folder since it's a more specific more uh it's a longer path it's more specific so it overrides the bind mount the bind will still sync all of the other files it just cannot touch the node modules folder all right so now if we hit enter let's do a docker ps and it should stay running let's just make sure it didn't crash and it looks like it didn't so now if we go to the website let's hit refresh it's there let's make a few changes just to make sure nothing else broke we'll delete the exclamation points hit save and then hit refresh and it looks like everything's working everything looks perfect so far now there's one thing i do want to point out so you'll notice that we do a copy where we copy all of our files into our container uh at the build stage and you might be wondering well do we really need to do that if we have our bind mount and the thing is the answer is yes because the bind mount is really just for our development process uh we only use the bind mount when we're developing because that's when we're changing our code when we go to actually deploy in production there obviously isn't going to be a mind mount because why are we changing our code in production uh so we do we still need this copy command for when we deploy into production because there is no bind mount and we have to make sure all of our source code gets copied into the image for our production container all right guys so when it comes to docker volumes and bind mods i want to show you one last thing we're going to make one slight change it's not required but it's kind of best practice so what i want to do is i have a i have my container still running if you don't go ahead and just run this command again where you have the bind mount and the anonymous volume and i want to drop into bash so that we can take a look at the file system so docker exec dash it app and then bash all right so we're in our container and let's do an ls and so remember since we have the bind mount this directory is going to sync with the directory in our container however it's a two-way street so if i make changes here it's going to get updated here right if i do a new file i'll just say my file and i do an ls here right we can see my file however if i create a file within my container it's going to add it to my local machine as well so if you want to create a file uh just for demonstration purposes you can type in the command touch it's going to create an empty file and i'll just say test file so if i do an ls we created our test file and you can see the file showed up on my local machine i want you to think about a potential issue with that why is our docker container changing our our files do we ever need is there ever a scenario where you want your docker container to actually be making changes to your source code or any of the files associated with the source code probably not right it seems like almost like a security issue for it to even allow it to do that right there may be certain instances where your application actually creates files on the local machine and in that case you might want to allow it but for the most part you don't want your docker container being able to touch any of your files or make any changes to it because there's really no need to and so what we can do is uh we can take our bind mount that we created and we can make it a read-only bind mount which means the docker container will be able to read any of the files but it can't touch any files and it can't create any of the files right it's read only so let's get started on that we'll exit out of here and i'm going to kill this container and to make this a read-only bind mount it's very easy so let's run this command uh where'd it go there we go let's run this and all we have to do is specify uh colon at the end of slash app we do colon r o and that implies read only so we'll hit enter hopefully it's running uh and uh we're gonna go and drop into bash to our container all right and so now here let's create a file so we'll do touch new file and look at that it says this is a read-only file system it cannot make any changes it cannot create any new files it cannot edit any files everything is read only so this is a little bit of a an enhancement that we can make so that uh it protects our source code and it doesn't allow our docker container to do any kind of funny business with any of our source code all right so let's exit out of here and i'm just gonna do a little cleanup i don't need these files all right and now what i want to do is um i want to show you guys how we can start making use of environment variables within our docker container so if you go back to our index.js file and you remember our express app the port is going to listen on is going to be based off of an environment variable called port that we pass in uh if this variable is not set it's going to default to a value of 3000. so how do we make use of environment variables within docker containers first of all let's go to our docker file and we're going to specify a default value for our part variable so after our copy command it doesn't technically matter where you put this but we can say env so this is referencing environment variables we're going to create one called port and we're going to say the default value for this environment various port 3000 and then we want to expose remember this is just merely for documentation purposes this command doesn't really do anything um instead of having to hard code 3000 what we can say is we can reference this port variable by passing in a dollar sign and the name of the variable support so if this gets updated this will automatically get updated as well so let's save that and what we want to do is uh let's see is do we have any containers running yep so let's just kill that all right and let's rebuild our image because we made a change to our docker file and we can do a docker build for that all right so now that those changes are made uh our application shouldn't really fundamentally change because now we're just setting our environment variable to be port 3000 um before it was defaulting into a value of 3000 but now since the environment variable is set to 3000 everything should theoretically work the same it's just now going through that environment variable but what i want to do is when we actually deploy the container we can specify what value we want that environment variable to be set because this is just the default value we can always override it so let's deploy a new container with the same exact command with both of our volumes but we can pass in an environment variable by passing in dash dash env or you can just do a single dash and the letter e so whichever you prefer i don't know why i prefer the double dash emv but uh whatever you prefer uh and then you pass in the name of the environment variable equals and then whatever value you want to be set to so let's say we want our express server to listen on port 4000 now it's going to change to 4000 however before we hit enter and actually create our container remember since our express application is listening on 4000 we have to change uh the port that we're sending traffic to because right now we're sending traffic to our container on port 3000 but our express app is listening on port 4000 so we have to change this to 4000 or then our application is going to break uh we don't need to change um the port that we uh have to hit on our local machine we could technically change it to 4000 but it doesn't really matter uh you can pick any value really here so let's hit enter and let me just make sure it's running all right so it's running uh so now if i go to the web browser hit refresh it looks like it's working just to double check everything's working fine let's just make a few changes to add the exclamation points back save hit refresh it looks like everything's working uh just to double check i do want to make sure that the environment variable did get set so we can drop back into that container again like we always do where's that command docker exec so in a linux machine if you want to see the environment variables you just type in print env and so here we can see that the environment variable of port equals 4000 was set and so that confirms that when we ran our docker run command and passed in the dash dash env flag we were successfully able to overwrite the port variable or the port environment variable that was specified in our docker file now when it comes to your application you may have more than one environment variable actually you most certainly will and if you have a lot of environment variables uh you know we you can pass in the dash dash env flag as many times as you want so if you wanted to you can say where where'd it go here we go so if you wanted to pass in another one you can just do env and then whatever that variable is however if you've got like 10 20 environment variables that's kind of a little bit of an exhausting process and it's a little bit of a pain and so what you can do instead is we can actually create a file that stores all of our environment variables so here i'm going to call this you can call whatever you want but standard standard convention is dot env and here we can just specify port equals 4000 right and so that's going to essentially do the same thing in here you could just provide a list of all of your environment variables and let's save that and i'm going to kill my docker container real quick and so now if you want to load uh environment variables from a file instead of having to pass each one line by line uh let's go to that docker run command and we can remove the dash dash env and we can pass in dash dash uh whoops dash dash env file and then the path to our environment fireball so from our local directory we do dot slash and then dot env and so that's going to grab this environment variable file and then all the environment variables stored in here i think i saved it yep and let's hit enter hopefully this works let's go docker ps alright it's running i'm going to log into the container and do a print nv let's just make sure that it's set and it looks like it's set so those are the two different ways to specify an environment variable and to set environment variables for your docker container so that your application can get the necessary data that it needs now one thing i want to point out is uh as you've been creating docker containers and deleting them if we do a uh docker ps uh you'll see that we just have one container running if you do a docker volume ls this is gonna list all the volumes that you have and you can see that we've kind of built up a couple of different volumes and you might be wondering what are these from and why are they building up as you keep creating containers and deleting containers they're going to slowly build up over and over and you'll eventually end up with hundreds uh and the reason for that is if you take a look at the command that we're running for our docker container this uh this volume that we specified right here for the slash app slash node modules hack uh this is anonymous volume so every time you delete your container it's going to preserve uh that node modules folder in here and uh we don't actually need to preserve it right because we're going to be deleting and creating new containers all the time so uh you can go in and manually delete the volumes right you can always do a docker volume rm and then specify the volume name or you can do a docker volume prune that should remove all unnecessary volumes but if you want to make sure that these volumes don't build up usually what i like to do is when you do the docker rm command um it's not going to delete the volumes associated with that container so if you want to delete the volumes which in our case we do there's obviously plenty of instances where you don't want to delete the volumes because the whole idea behind a volume is that it's persistent data you want to preserve it so like if you have if you have a postgres database or a sql database right uh you want to preserve uh all your database records so you would never want to delete that but in our case we just have an anonymous volume so that we can get around that limitation that we ran into before so when you delete a container just pass in the dash v flag when you pass in the dash v flag it'll make sure to delete the volume that's associated with that container so that it doesn't build up uh so for now i'm just gonna do a docker volume i think prune should work it's gonna say hit yes let's see if i do a docker volume ls uh you can see that it's deleted all but one and this is the volume that's associated with the container still running so if you want to do the docker that little trick i just showed you with the running container where is that here we go dash fv it's going to delete the container and it's also going to delete the volume as well so moving forward to do the dash f uh and then v so that you can delete the volume as well so now when it comes to um creating our container we've kind of set up a nice little quick workflow for developing a node or express application in a docker container however the command to run the docker container this command right here is kind of long and you know i don't want to have to rerun this command every single time i want to get my container up and running although i'm sure you're thinking well you can just hit the up arrow key so it's not a big deal and that is 100 true however keep in mind when you're actually developing uh you know like an express application or some kind of node application you're probably going to have more than one docker container right right now we're just building the uh the express server but in a full-blown application you might have a container for your database you might have an elasticsearch container you might have another container for redus you're going to have multiple containers right and each one of those containers you're going to have to run a command that's this long or potentially as long and at that point it starts to become a real hassle of getting your entire development environment up and running and even getting your production environment up and running because you're gonna have to run five or six docker commands you have to make sure there's no typos or anything like that so what i'm gonna show you guys is a way we can kind of automate all of these steps so that we don't have to run this monstrosity of command and we're gonna use a feature called docker compose where we can create a file that has all the steps and all of the configuration settings we want for each docker container so we can say like hey i want to create a node container using the image that i created and i want to create a volume uh for the bind mount and i want to create an anonymous volume i want to pass in the environment files and i want to open up these ports so you can pass in all these steps into a file and then you can just run one very simple command to bring up you know as many containers as you want so if you have like six or seven different containers in your development environment you can bring up all six or seven all at once with one command and bring them all down with one command so let me show you guys how to do that uh so what we're gonna do is we're gonna create a docker compose file and so we're going to do is we're going to do a new file we're going to call this docker compose dot yml so that stands for yaml uh it's a certain type of syntax that you use so what we want to do is with your docker compose file the first thing we have to do is specify the version that we're going to use now if you go to this website right here it's going to show you all the different versions of docker compose and the features that they support now we're not gonna do anything crazy so i'm just gonna use version three but if there's a specific feature that you need then you're gonna have to make sure you grab the specific version this is like a this web page has a list of all the features that each version supports so you can just take a look at this page and see what's the minimum version that you need to actually run all the specific features that you want but i just defaulted version three so we'll say version colon and then three now the next thing we want to do is we want to specify all of the containers that we want to create and so within our docker compose file each container is referred to as a service so we do services and then we just specify all of our services now this is very important with yaml files uh spacing matters okay so uh we're going under services and we're gonna provide a list of all the different services that we want so i want you to hit tab just once and then here we're going to provide our container our first container in our example we just have one container which is our node app and we want to give this container a specific name you can call it whatever you want we can say like oh my node app or we can call this node project whatever you want just give it a name i'm going to call this node app because that's what it is and then colon and then we're going to add in a specific configuration settings for that container uh so because we're gonna do configurations for that container i want you to hit one tab and then i want you to start adding in the the different um the different configuration settings so the spacing matters unfortunately so if i if i start moving things around you know it's going to break things so you want to do one space for each level and keep in mind if you have multiple containers let's say you have a postfish container you would add a postgres service if you had a redis reader service you'd add one here so this is how you add more containers or more services within a docker compose file we just have one so i'm going to delete these now under node app we have to specify um a build setting so what image are we going to use well we have to build the current docker file in our current directory so we can say build right and then we pass in a path to our docker file so it's going to be our current our current directory or whatever directory this docker compose file is so this is just um automating the the docker build command so that we don't actually have to do it doc compose will do it for us we just have to pass in the path to the docker file a couple other settings let me actually just hit up the up arrow keys to see all of the different options that we have so we do need to expose a port so let's open up a port so we can pass in the ports option so under ports one tab remember and here we can provide a list of ports we want to open so for our container we've only been opening up one port but theoretically you can open as many ports as you want so you do a dash because it's going to be a list of ports and then here we're just going to do 3000 colon 3000 you already know what that means i'm not going to rehash that if you wanted to add another port or open up another port you can do that so you can do like 4000 colon 4000 as well but we're just going to open up one port so i'll delete that now i'm going to hit backspace again so we're lined up with built-in ports because once again we're still under the node app service and here we want to pass in all of our volumes so we'll do a volumes and we're going to pass in our two volumes and once again this is going to be a list so i want you to hit tab just once and then we're going to pass in a dash so the dash signifies a list so the first one is going to be um our um our bind mount and the great part about this is that when you use a docker compose file we can just do the dot syntax we don't need to use this variables that i mentioned before so we just do dot slash colon and then slash app and i think you can pass an ro if you want if you want to be read only i don't really care right and then we need to pass in our anonymous volume right which is uh this one right here and that's that little hack that we did to make sure that we didn't override our node modules folder so we'll do slash app slash node underscore modules and then last but not least i'm going to add my environment variable it doesn't really matter where you put it so once again line it up with build ports and volume so we do environment and we say dash and then here you provide a list of environment variables so we can do port equals 3 000. all right keep in mind in this case this would be like the equivalent of running um the environment variables one at a time uh so let me see if i can find an example so like this however we can pass in a file like we did down here if you want so that we can use the dot env file and the way to do that would be let me see you can go down here we can say uh env underscore file colon and then we can say dash you can provide a list of files and then the path to the dot env file so whichever syntax you prefer i'm just going to comment this out i'm just going to use this because we just have one environment variable so there's no need to import it in from an environment variable file all right so let's hit save this has all of the settings that we need for our uh node app service uh and once again you know if you're building a full-blown project you're gonna have multiple services so you're gonna see how this kind of really simplifies the entire process of getting your entire development set up uh and up and running and as well as tearing it down all within one command so make sure you save that and what we want to do is we're going to run the command docker compose so we do docker dash compose this is important right don't do docker space compose it's a different command we want docker dash compose and we want up so that's going to bring up everything that's in our compose file and then one important flag is if we do help let's see what options we have we do have a d flag right if you remember when we run our containers we have to pass in the slash d flag or then we'll automatically attach to our containers which we generally don't want so we can pass in the same thing for our docker compose so we can do docker compose up dash d so let's see if that works uh so first thing you're seeing is that it's actually building our image and so it's running uh oop looks like i ran into wait up that's just a warning don't worry about that i think that's a yeah new patch so that's just a vulnerability message don't worry about that uh so it built our image if we do a docker image ls you'll see that this is the image that i built uh and notice the naming convention what it does is it grabs the project directory which i called node docker and then it passes underscore and then node slash app so the note slash app is from the service name so it took the project folder did underscore and then the service name if we had one for postgres it'd be underscore postgres or whatever we called it all right so it built the image and then it also started our container so if we do a docker ps right you can now see that we have one container running and it called it once again take a look at the name node docker which is the project name underscore uh then the name of the service and then there's an underscore one i think if you have multiple if you spin up multiple node app services i think it goes like one two and three i think that's why the one gets appended um but let's test this out let's just see if everything works um so going back here if i hit refresh looks like it works and uh let's change our code and delete the exclamation points just to make sure it updates hopefully it works and it looks it looks like that guys everything works perfectly so hopefully you guys can see how easy it is now to actually bring up our entire docker environment which is one simple command and bringing it up is just as easy as bringing it down so now if you want to tear down everything we can do uh let's see we just do docker dash compose instead of up i'm sure you can guess what the command is it's just down and just like when it comes to deleting docker containers by default it will not delete those uh anonymous volumes so if you want to delete the anonymous volumes with the docker compose down we can do a dash v and that's going to delete all the unnecessary volumes that it creates so do dash v and you can see it's stopping the docker container it's then removing it technically when you run docker compose it creates a brand new network uh for all of your services don't worry about that it's kind of outside of the scope of this um of this video but it does automatically create a net us its own separate network so that it doesn't interfere with any of the other docker containers and you do get some extra features and perks when it comes to having a custom network like dns so that you can reference names within your project but don't worry about that for now so now if we do a docker ps you can see that the container is deleted and everything's cleaned up for you that's right one command and you can start and stop theoretically hundreds of containers right now there is one thing i want to tell you guys uh when we run the docker compose up command again what do you think is going to happen right because if you take a look at the steps uh that took place when we ran it the first time you can see it builds the image right it builds the image and then it starts the container now if we run this again i want you to tell me what you think is going to happen right your natural guess is going to be that it's going to build the image again and then it's going to run the container well let's figure that out let's see what actually happens if i run it again look at this the result was much quicker and that's because it skipped the entire build process it didn't build a brand new image all it did was it created the network i did tell you created a network and then it started our container and the reason for that is that what docker compose does is it looks for an image docker so if i do docker image ls it looks for the image based off of that the syntax that i told you which is project directory and then the name of the service and if it sees that that image already exists it's not going to rebuild it however even if we make a change right let's say we change the default port to be four thousand oops right this theoretically is now a different um is now a different um it's a different image right we've changed something fundamentally in the docker file so it should rebuild the image if we run it again so let me tear it down again let's do a docker compose down all right and i think i saved it i can never remember if i do that and let's do a docker compose up so let's see if it rebuilt the image and despite the fact that we made changes it did not rebuild the image so now we're essentially running a stale image right why is it doing that like i said there's just a simple dumb check that docker compose does all it does is just look for an image named this so if we do a docker image ls we can see there's an image there it has no idea that this is a stale image and that there's been an update it doesn't know it's docker compose is pretty dumb it has no idea so you have to basically tell it like listen i've made a change i want you to rebuild the image so how do we do that well first of all let me let me tear things down again and let's go back to the docker compose up command and let's do a dash help and there should be an option that causes it to force a build and let me see if i can find it here we go dash dash build so this when you run the dash dash build flag it's going to tell docker compose to rebuild the image it has docker compose is not smart it does not know when it needs to rebuild the image you need to tell it to all right so let's rerun this again we'll do docker compose up dash d dash dash build this will force a brand new build and there you go so now we built a new image i now created everything and everything should be working now all right so we can tear that back down uh we can we can tear that back down change the default port to 3000 save that um just so that we don't break anything else and then if you want to you can rebuild it again with the dash build flag and so this will bring everything back up and rebuild it with the new default port and everything should be working so let's just double check and yeah everything's working perfect um but that's the idea behind docker compose there's nothing too fancy about it obviously and obviously you're gonna have to take a look at the documentation to see other things because eventually when you get a little bit more uh familiar with docker and there's other settings or options or flags that you want to pass in you're going to have to update the docker compose file to take in those parameters so i just covered the basic parameters but there's obviously plenty more within the docker universe now we're almost done however there's kind of one last thing this is kind of a big thing but you may have noticed that um we're running npm run dev right so how do we actually go into production right because right now when we run docker compose everything is with respect to our development environment because our docker compose it creates that bind mount which we would never want in production deployment right we don't need it to sync with anything it's our production deployment right and our production deployment might actually use a different variable or a different port uh that express listens on or could use the same one i don't actually know it's going to depend on your company or how you set up your project uh but mainly also within our docker file it's not going to run npm rom dev instead it's going to run either with my package.json it's going to run an npm start or we can just run nodeindex.js directly so in the next section i'm going to show you guys how we can set up our docker compose file so that we can have a separate set of commands for production and a separate set of commands for uh development all right guys so this is going to be the last section of the video and this is going to just round out the entire project i'm going to show you guys how you can set it up so that you can deploy your docker containers to both a development environment as well as a production environment because there are going to be some differences between those two environments and the easiest solution is you know you can obviously have a separate you can create multiple docker files there's no rule against it so you can have one docker file for development one docker file for um for production and then you can basically change out what you want so really the main change in our case is just the final command that we run npm run dev for development and npm start or node index.js for production depending on which one you want to use if you read online some people recommend not using the npm command within container because it's just another layer between node and the container so a lot of times they for production especially you may want to just run node index.js instead of running npm start um but i think different people have different opinions on that so we can create different docker files and on top of that we can also create different docker compose files so you might you could have one for production and you can have one for development uh there's also different differing opinions on on that some people like to condense as much into a single file and be able to kind of run both of them off of one file but it really comes down to personal preference so what i'm going to do is i'm going to show you guys how to um do everything as much in one file as possible so for we're going to use only one docker file but we are going to split up the code docker compose files into two different files um because um showing you how to do with two different docker files it's pretty easy right you just create two different docker files and then reference them when you actually run the build command and then so there's nothing really to that but i do want to show you how to do it with one file um just in case you want to know that because it was a little bit trickier we do create like a custom bash script that actually handles it so let me walk you through that so what we're going to do is i'm going to rename this docker compose file just for uh just so that we have this for reference but we're not going to use this anymore this is just i'm just going to rename it as backup or something dockercompose.backup.yaml and we're going to create a brand new dockerfile a brand new docker compose file and on top of that i'm going to create two more files so let's do a new file i'm going to call this one docker dash compose dot dev dot yaml so this is going to have the configuration specifically for our development environment and then we're going to create one more and i'm going to call this docker dash compose.prod.yaml uh so this is going to have all the configurations specific to our production environment and remember we're just going to have one docker file all right so we have three docker compose files and obviously if you have like a staging environment you can also create another one for that but sorry these are the three this is the backup just for reference if you guys want to take a look at that later but these are the three so the docker compose file now is going to have any configurations that are shared between both environments uh and what i mean by that is that uh like i said in an actual project you're gonna have you know six seven ten you might have a ton of containers so you'll see that a lot of the configurations for your containers are gonna be the same regardless of environment so there's no point in us copying and repeating all of those configurations across both of these files we're going to create a shared one for all the configs that will be shared between both environments so what i'm going to do is i'm going to do the same thing we're going to set the version like we normally do and then here services we've got our node app and i forgot to add that tab from spaces matter and yaml right and we're going to set the build to be the current directory like we did before and then for my production and for my development environment i'm just going to say they're both going to be listening on port 3000 however keep in mind that maybe in your environment they're different so if they're different you don't want to put in this file because this file is only for when things are the same between your production and your development if they're different you're going to want to put them in their respective files this is only for shared configurations where they're the same in both environments so ports we'll set that equal to 3000 colon 3000 like we always have and then we'll also set an environment variable to be um port 3000. all right so this is the only configuration that's shared between both right so our development so in our development our production environment basically we're saying that the the final image is going to be the same ultimately uh that we build from our docker file because both environments are going to use the same docker file the ports are going to be shared so we're going to use port 3000 and this environment variable that we're setting is going to be shared between both environments all right so now within our dev and our prod file we can actually go in into our services create a node app section and then overwrite anything that we wanted to so we could technically overwrite the ports we can add in extra configurations and so on so let's go to our dev environment and i'm actually going to go back to this and i'm just going to copy up to node app because it's going to be the same so we go into our dev and our node app and i'm going to set the volumes right because in our development environment we want our bind mounts as well as the extra anonymous volume for making sure our node modules folder doesn't get deleted so i'll do volume and we're going to do dot slash actually if i waste my time retyping that we can just copy this from here you just got to make sure the spacing's okay don't mess up the spacings uh and i think i messed it up hold on let's see so yeah one tab and one tab there we go all right and um since this is our development environment we're gonna pass in an environment variable did i spell that right that does not look right there we go and we'll say node underscore env so this is just common across node applications where in your development environment you're just going to set this to development and then in your production you would set it up you would set it equal to production all right and then the final thing is in our docker file i'm going to change this to default to um it doesn't really matter what we said here because we're going to overwrite it so i'll just set this to either npm start or index.nodeindex.js whatever you prefer i'm just going to set this to index.js by default and remember we can overwrite any of this in our docker compose file so in here we can override this that command with the command option and we can say npm well we do this on the same line npm run dev right because we have that script that's going to run node mod so that it restarts our code in our development environment let's save that or save everything and now let's move on to our compose prod file but copy the first three lines as usual now in our prod file what do we need to exactly change well let's take a look we don't in our development environment we had our volumes we don't actually need these the only thing i can think of is we need to change the environment variable to be production and we need to change the command to be either node index.js or npm start depending on what you prefer so let's add those in so we'll do environment and then we'll do node underscore env equals production and then our command is going to be set to node index.js once again you can do npm start whatever you prefer so that's pretty much what we need so let's test this out i'm assuming i've probably put in a couple of typos so we're probably going to have to do a little bit of debugging all right so what we want to do is the command's gonna be a little different so first of all uh do i have anything running yeah i do so let's uh let's do a docker compose down dash v to delete everything so docker ps docker images all right so um now how do we actually run this now that we are going to have to run two docker compose files right because when we want to run in production we're going to do the the base docker compose plus the dev and then when we want to work in production we do the base plus the prod well what we have to do is you do docker dash compose and then you pass in the flag for file and this is important the order actually does matter so the first file that we want to pass in is the base file so we do docker dash compose compose.yaml then we pass in the dash flag again to specify the second file so if we want to go into development we're going to pass in the docker dash compose.dev.yaml right and so that what's going to happen is it's going to load all the configurations from the base file and then it's going to load all the configuration from the dev file and then if it needs to it'll overwrite any of the configurations that it's been set to uh from the base and that's why we pass it in that order right and then we want to say we want to bring it up and then remember we want to run it in detached mode so let's test this out hopefully this works uh what did i mess up uh dockerdev.yaml what did i mess up uh must be a mapping not an array uh let's see oh yeah look i mean you can see i already messed the indentation the volume environment command need to be under the node app section so that's what broke let's tab everything up one section and now let's give that a shot all right looks like things are working so hopefully it looks yep everything looks good so let's just do a docker ps and we see our container running let's go to our application let's hit refresh looks like it's working let's just go to our code make a few changes to make sure that things are updating and that nodemon's doing its job so let's hit save let's go back hit refresh look at that so this is our development environment and it looks like everything's working perfectly and we can go ahead and shut that down so we'll do uh remember same thing we do down and we can pass in the dash v flag so we can delete those extra volumes and it should stop it uh now let's do the same thing uh we'll run that same up command but instead of running dockercompose.dev let's try the prod version now all right it should be the same exact command outside of specifying the yaml file so we hit enter perfect let's hit refresh all right so there's no exclamation that's just because we didn't rebuild the image um but we'll go over that but let's just try to change things well i guess there's no exclamation at the moment so let's hit save and let's see if it changes and it looks like it doesn't which is perfect all right we don't want any changes we add anything else here and then hit save remember we're in production so there is no bind mount and we shouldn't see any changes now just to make sure things are working i'm going to bring this down i'm going to do a down dash v and just like before right when we uh make changes to anything like our source code or anything else since we're in production environment and there's no bind mount anytime we make changes to our code we're gonna have to rebuild our image and we have to tell docker compose that we want to rebuild it so we'll do up so right now it's got all this nonsense in there so we do up dash d and then i think it's dash dash build it's gonna force a new build right because now we're changing our code there's no bind mount and so there so to actually see the update we have to rebuild the image right and so now if i hit refresh we see all of that nonsense and just as a double check let's delete the exclamations and let's delete all that nonsense right there hit save do we see any changes absolutely not because remember we are in production environment so this confirms that we now have set up a different docker compose file for our production environment and for our development environment to accommodate our specific needs for each environment now there is one last thing we got to do because uh there's a little bit of an issue and uh i'll show you why uh right now we what was the last commandment we're running in production mode right so we ran the docker compose.prod and i'm going to do a docker ps let's just quickly get the name of that docker image and i'm going to connect to this docker container so we'll do docker exec and copy that a name and then we'll do bash all right so here what i'm going to do is well first of all you'll notice that we copied a whole bunch of docker compose files and that's because in our docker ignore they're not in there so we can add those in there as well and we can just say docker dash compose star and that'll just ensure we don't copy anything uh or any file that starts with the docker dash compose so this is kind of a wild card for matching anything after that so we'll hit save on that but that wasn't really the main thing i wanted to address actually so if we go into our node modules folder this is kind of important if i do an ls this is going to show you all of the dependencies that we have all the packages and there's something very important if you look at this you can see that node mod is installed and you might be wondering why is that an issue and i want you to remember we are in production mode right and our in our package.json we can clearly see that nodemon is a dev dependency we don't need this when we run into production mode because we're never going to be using nodemod in production that's only for development so that it automatically restarts the note process when we are developing our project so how do we actually prevent nodemon and any other development dependency from getting installed because right now it's just taking up space and doing absolutely nothing well in our docker file you can see that we run an npm install if you want to actually deploy this to production right you would normally run a you would normally run i think it's a dash dash only equals production right and so that'll prevent any dev dependencies from getting installed um because you're running in production mode so what we have to do now is set up our docker file to be intelligent enough to know uh whether we are in development mode or production mode and then either run an npm install or an npm install dash dash only equals production depending on um if we are in our development or if we're in our production environment so how exactly do we do that well we're going to have to basically write an embedded bash script so here instead of this line right here what we're going to do is i'm just going to go under here and we're going to replace it with this i'm going to say run and we do an if statement and we're going to say if and then we're going to do brackets and this is important make sure you hit one space all right this this gave me all sorts of issues you want to make sure you put that space uh and then in quotations we'll do dollar sign node underscore env and then that equals development and this is also important hit one space afterwards i don't know why it required that but it did and i was troubleshooting that for a while so make sure you get the spaces just right uh so what we're saying is if we are in a development environment then we want to run an npm install however we're going to do an else if we're not in development so we're in production we're going to do npm install dash dash only equals production all right and then we end that if and we no longer need this run command okay so basically um you know we're referencing some kind of variable here called node env and then when it's set to development we'll do an npm install or else we'll do an npm install with dash dash only equals production now what exactly is this well this is an argument that we have to pass in so here we do arg node underscore env so this is an argument that gets passed into our docker file when it's building the docker image and we have to set this value in our docker compose file so under dockercompose.dev and dot prod we're going to have to pass that in so going to the dot dev file we are going to actually overwrite something in our um in our base docker compose file so instead of doing just build that we're going to have to change this up a little bit so here uh when we do the build command we're going to override that and instead of just doing dot uh instead of just doing colon dot we can actually break this down into a few more settings we can do build colon and then pass in two properties we've got the context and then we've got the args now the context remember when we did build dot and that's just specifying the location of the docker file that's what the context is so here we just specify the location of the docker file which is in the same directory so we just pass in dot once again and then here under args we pass in all the different arguments that we want to pass uh so here the only thing we care about right is the one that this docker file is using and it's called node underscore env so we do node underscore env i'm going to set this to development because we're in the development docker compose file and we're going to copy this and i'm going to do the same exact thing in my prod file and we're going to space that there we go i think that should be good yep and we're just going to change this to production and let's save everything and um let's just do i'm going to bring this down all right and let's just make sure we save everything again all right so now um it should theoretically you know run this if statement um when we want to do an npm install and it should be able to detect depending on what the arguments that's passed in so we're going to run a development fold first just to make sure everything's working and then we're going to run it in production mode after that just to make sure that that actually made the changes that we wanted so let's go back to my up command i'm going to start off with dev all right so it's building that remember i told it i passed in the dash dash bell flag because we made changes and docker compose is not an intelligent and it will not know that we need to actually rebuild it so i always pass in the dash build flag in that scenario and let's test this out so hit refresh just says hi there which is fine uh when we go to our index.js let's add some exclamation points hit save refresh perfect so just the fact that it restarted automatically and adopted those changes we know that nodemon was successfully installed and so we know that that if statement so far right here it ran in npm installed because it detected that we were in development mode so so far everything's looking good uh let's bring everything down with the with the dash v flag let's delete that volume uh and this time we're gonna bring it back up but i'm gonna do it in rod all right and let's just do a docker ps let's make sure everything's running perfect uh let's hit refresh perfect let me make changes to this code real quick just to make sure it doesn't adopt those changes so we'll hit save let's hit refresh no changes perfect the last thing that we wanted is let's log into the container and let's just make sure it did not install node mod just to ensure that it did successfully run the dash dash only production flag so we'll do docker exec i t and then bash right ls let's go into node modules also notice how our docker ignore file worked this time because it did not import any of the docker compose files but let's go into the node modules folder let's do an ls uh do you guys see anything with known mind it should be alphabetical right so if we go to m and uh see nothing with node mod so it successfully is in production mode and if you do a print nv uh we can see that uh i would have thought we would have set a node dmv set to production too so everything looks like it's working it's successfully only installed all of our um production dependencies and so guys that's all i wanted to show you it's just a matter of two commands uh whoops well looks like we're not actually gonna get out of the container but it's just two commands right so you do docker compose up docker compose down um and then if you're in production you pass in the prod if you're in development you pass in dev that's all you have to do you've got two different environments and we can easily spin up all of our containers and then also spin them back down with just two simple commands up until now we've only been working with one docker container and that is our node container which houses our express application however what i want to do is i want to add a second container because this course is ultimately a docker course i want to make sure that you guys are comfortable with adding in more than one container into your application so what we're going to do is we're going to add a database to our application this is going to make our app a little bit more of a real world type application because we'll finally be able to persist some data so let's head on over to docker hub and so here i already searched for mongodb but if i just search for again you'll see that the official image is going to be the first result so select that and this is going to have all of the instructions for working with the mongodb image and if we head on over to docker run example right here we can see that uh the name of the image is just so we can do and then the specific tag or version that we're looking for so let's go to our docker compose file and let's add in this new database and so first of all we have to figure out where we need to add it inside this docker compose file and so if you already forgot under services this is where we actually define all of our containers so each container is a different service so we have one service called node app which is our node container so logically if you want to add a mongodb container we're just going to create a new service so let's go here i'm going to do uh make sure it's just one tab from the base oh not one there you go so it's lined up with the node app and let's create uh our container so first of all we have to name our service we can call it anything we want we can call it database we can call it we can call it whatever we want i'm just going to call it because it makes sense it doesn't have to be though i just want to make sure you guys understand that the service is just for your reference and you'll see here that we have a the build argument and so in our node app right we're actually building our own custom image we're taking the uh the base node image and then we're copying our code into it however for the service right we're just going to use this built-in image this has everything we need we don't need to customize it so anytime you're just using another image we can use the image property so we call image and then we call in the name so that's going to grab this specific image and i don't really care about the version any versions fine so i'm just going to grab whatever the latest is and then in the documentation it's going to show us that we have to pass in some environment variables and so you can see here it looks like uh where is it it's going to be somewhere down here here we go so these are the two uh variables the environment variables that we have to pass in to make sure our container works properly so we have to provide the root username and the root password so i'm going to copy these and feel free to set it to whatever you want i'm just going to call this sanjeev and then let's grab the password as well and i'm just going to say my password so let's save this and then let's do a docker compose up we don't need to do a dash dash build all right so now we can see that it is now creating our container and if i do a docker ps we should now see two containers we have our node docker container as well as our node app as well so now that we have our container up and running what i want to do is i want to connect into the container and just poke around a bit so let's do a docker exec it then the name of the container and then we'll do bash so we can take a look at the file system and so here since we're connected to the container we can actually connect into so if i type in and then we get a pass in a couple of flags uh that's gonna be for your user and password so if i do dash u you pass in your username and so that's gonna come from that environment variable that you set and we have to pass in p for the password and so now we're uh we're logged into our uh instance and i want to run just a couple of commands if we type in db this is going to show us what database we're connected to and so right now we're connected into a test database i guess creates a test database so that we have some database to log into and we can create a brand new database uh with the use commands if i type in use and then the name of my new database so i'm just going to call this mydb you can see that it's switched to our newly created database and we can run the command show dbs to list all the databases and you can see that mydb is not listed on here and that's just because manga won't list this database until we have an a document or an entry within that database and that would probably explain why we don't see test in that list as well so let's create an entry and let's just say we're making like a an application like a library type application that's going to store a list of books so we can do db then the name of the collection which is called books and then we'll just do an insert so here we have to pass in uh the properties of that entry so we'll say name is going to be harry potter all right and so this means we successfully wrote to our database and if i type in db.books this is going to list out all of the uh documents within our books collection so here we've got one entry and we can see the name is set to harry potter perfect and if we do a show dbs now we can see my dv is now listed on there so let me log out of here and let me log out of here and i do want to show you guys one thing real quick um so if you remember if your goal is to get into the shell or the cli instead of having to do a docker exec it and then bash and then run where is this command dash u instead what we can do is we can skip the bash and just run dash u then the username and then the password right so just a quicker way to get there um but now what i want to do is i want to tear down our container so let's do a docker compose down and i'm going to use the dash v like we've been doing to make sure that we delete that anonymous volume and then i want to bring it up and i know you're thinking like why did we tear it down just to bring it back up it's obviously so i can teach you guys something so let's do up dash d and let's give it a few seconds to fully boot up and then what i want to do is i'm going to log back into the mango shell and let's do a show dbs right and right there something looks odd right our our database that we created called mydb is now gone and you might be wondering well what exactly happened well think about it we had a container our container we ran a docker compose down which then deletes the container then we ran a docker compose up which then creates a brand new container so this is a brand new container everything that was in the previous container has been deleted and this is a major problem because this is our database you know we don't want to lose that information i mean if you're doing you know running like node tests and things like that then yeah maybe you'd want your database to kind of start from a fresh state each time but you know in a production environment and even in a development environment we want to keep all of our database information so that we don't have to keep recreating those entries and especially in a production environment uh if you lost your database you know that's all of your uh that's all of your application data that's just gone right at that point you've pretty much broken your website or whatever application you're building so you don't ever want to lose that information and so how do we actually save that information and i'm sure you guys already know this right we use volumes you know if you look at our docker compose file actually let's go to the dev file and for our node app you remember there's two different volumes here so this helps us persist data so let's do the same thing with our container so let me exit out here and let's do a docker compose down and let's go to docker compose.yaml and let's add some volumes and uh you know if we go back to the dev actually to the dot dev yaml you'll see that there's two different volumes that we covered we covered the bind mount which syncs the data within the container to a folder on your local drive and then we have an anonymous volume so you know we could theoretically use either one if you wanted to be able to poke around on the on your database data on your local machine then you use a bind mount but however i don't really care about looking at that data you know i can just log into the client and actually just run commands to see what i need i don't care about the file system so it looks like anonymous volume is a better choice however here's the problem uh if you have an anonymous volume and i think i have a few left so if i do docker volume ls right you know these are what anonymous volumes are right just a bunch of random numbers uh just a random string or id i have no idea what these are for uh and so when you have an anonymous volume there's a good chance that you may accidentally delete it and so i don't feel comfortable using an anonymous volume for the scenario because this is our application data right i want to make sure i know which volume is storing that data so what we can do is we can create a name to volume named volume is exactly the same as an anonymous volume except we can give it a human readable name so let me show you guys how to do that and let's go under our service and let's create a volume and so here just like an anonymous volume we have to pass in a path uh within our container and so to get that information we have to look at the docs and let's take a look so here we go it's probably under this where to store data and so you can see they created a volume and here they used a bind mount so they stored it on their local directory and they synced it with slash data db so this is the folder in the container that we're interested in so we want to do slash data slash db and at this point this is a anonymous volume you can to convert this to a named volume all we have to do is just do a colon and then just give it a name so i'm going to call this db so it's going to save this volume with the name of mongo-db right and just to show you the difference right a bind mount you provide a path on your local machine to a path on the container an anonymous volume you just provide a path to the container directory that you're interested in and then for a named volume you do a name colon and then the path within the container but there's one more gotcha actually let's save this and i'll show you what happens if we try to run this as is so let's do a docker compose up right and it says named volume is used in a service but no declaration was found in the volume section right so it's saying that we have to declare something and when it comes to named volumes we do have to declare this volume in another portion of our compose in our docker compose file and that's because a named volume can be used acro by multiple services so you know if we had a um you know like another instance or another service or any other service they can attach to the same exact volume just like this service does so all we have to do is at the bottom we just provide volumes and so here we just provide a list of all of our named volumes so here we just call this mongo-db that's all you have to do now let's do a docker compose up and let's continue uh let's connect into our client right remember everything's gone so let's create a new database and let's just insert that same exact entry all right perfect so now let's exit out of here and let's tear down our uh all of our containers with the docker compose down and let's bring it back up and let's just verify that our information saved so let's do a docker compose down now this is where we run into another issue and that's why i wanted to show you guys this so remember we're using this dash v volume uh this dash v flag to automatically delete this anonymous volume um because we don't need it it's just there for that one little work around for our node application however the problem is that this will delete not only anonymous volumes but also named volumes so if we pass in this v flag it's going to also delete this database our database a volume uh and so we obviously don't want to do that because we just went through all of this hassle so that we could save our database data so we unfortunately cannot use the dash v flag anymore so what you're gonna have to do is remove the dash flee flag and just do it down and after that finishes running if you do a docker volume ls is going to list out all of your volumes you can see we have our node docker mongodb volume so you can see it's given a nice name so we know exactly what this is being used for but we've got all of these um anonymous volume so you'll see over time they start to build up uh and you just have to delete them yourselves and so there's a nice easy command called docker volume i believe prune but don't run it yet instead what i recommend that you do is start up your containers so bring this back up and then do a docker volume and then do a dash dash help and so we have this prune command which removes all unused local volumes so all of the volumes that are being used right now by the running containers will not get deleted when we run the prune only the ones we don't need so as long as you start up your application then your mongodb and then whatever anonymous volume is associated with your application at the moment will not get deleted and we can just clean up all the rest of the data that we don't care about so if i do a docker volume prune we should be good to go and so now if i do a docker volume ls you'll see we've got significantly fewer volumes um these are just the ones being used by either running or stopped containers so just make sure you uh i believe you should start your containers but i could be wrong maybe it also saves uh stopped containers as well so you might want to double check on that within the documentation but i do want to highlight you know just make sure that only that you only delete stuff that you don't need all right so now let's uh let's do a docker ps we have our container and let's connect into that container again and let's just do show dbs and we can see that our data is still there and if i do a db.books.find oh i forgot to switch databases so we have to use mydb and then now we do this and there we go so we've now got persistent data for our database so now that our database is up and running let's set up our express application to connect to our database and when it comes to interacting with our database we're going to use a library called so it's going to make it a little bit easier to talk to our database and so here if we pull up the documentation for mongoose we can see to install it we just do npm install mongoose so let's do that right now all right and so once that's done first of all we installed a new package so we have to tear everything down remember no more dash v because we have our database so let's do down and now let's do an up again and we want a dash dash build all right and now going back to the documentation the first thing we have to do is we have to import mongoose so let's copy that line we'll paste that in there and then we have to connect to our database so here we just call the mongoose.connect method and then we have to pass in our url as well as some config options uh and so the full url if you pull up the actual documentation it's going to look something like this we do mongodb and then colon slash then your username your password the ip address of the host the port and then some options as well so under here we'll do mongoose.connect mongodb slash and then here you pass in your username so mine's sanjeev and then password's gonna be my password at and then here we have to give the ip address right and so this is probably where most of you guys are gonna get stuck because we have to figure out you know what is our ip address how does ip addressing work with docker containers well here's the thing you know docker makes it really easy to work with containers and it automatically assigns your containers an ip address so if you ever want to figure out what the ip address of a container is first of all do a docker ps uh get all your docker containers that are running and then here you can do a docker network actually sorry docker inspect this is going to give us more detailed information about a container and we can grab our container name so here i'm just going to grab our node app first just to take a look and so here you're going to get a ton of information and if we go all the way to the top let's take a look at what's up there a lot of a lot of random information that we don't really care about and i believe what we're interested in is going to be all the way at the bottom so let's scroll on down to the bottom and here there's a section called network settings so this is probably where we want to look and so if we keep going down you can see there's something called networks and so there's a concept of uh there's a concept within docker called networks where you can create uh more than one network and then put different containers within those networks so that only the containers within a network can talk to one another and they can't talk to containers in other networks so it looks like there's a container called node docker underscore default so you know this is this represents our uh our directory name so this looks like it was created by docker compose and it actually was so docker compose does create a brand new network just for your application so that all of the containers and services within your docker compose file will get placed into that network and you'll see here we have an ip address so this is the ip address of our node application and then here you can see its default gateway and so we want to grab the ip address of our container so let's do the same thing for our container and let's do a docker inspect and then grab the name of our container once again it's using that same exact network that was created and we can see here this is the 172.25.0.2 so this is the ip address and i'm just going to copy that we can paste it in here and then we want to put the port that we that's going to run on that mongo's running on so it's going to be running on the default port as long as you didn't change any of the default configs so 27017 and then we're going to pass this one property auth source equals admin all right let's save that and then here we're going to call uh dot then so here we're going to pass in an error function and we're just going to say if we successfully connect to our database i just want to do a console.log and we'll just say successfully connected to database and if this failed we'll just do a dot catch and we'll say first of all we'll pass in the error and we'll just console.log error all right let's save that and let's see what happens so uh if we do a docker ps and then we're going to do a docker logs and we'll connect to that node application so here we can see that it said successfully connected to database so it looks like we've successfully connected to the database and everything's working however there's something i don't like right right now we had to go into docker inspect to get the ip address of our container and then put it into our code however you know if we stop and start our containers or if we do a docker compose down and then back up right first of all there's no guarantee that we get the same ip address and even if we could guarantee the same exact ip address the first time we run it we'd have to go in we'd have to get the ip address and then update our code and that's just a really sloppy way of doing things and so docker actually has a nice feature that allows us to make it easy to talk between containers right and that's and this feature only exists when it comes to custom networks that get created so if i do a docker network ls you'll see there's a couple of networks that we have we've got the bridge and host network so these are the two default networks that come bundled with docker and then i've got a couple other ones you may not have these but you'll see that we have one for our node docker default so this is the one docker compose created this is the custom one that created just for our application and when you have a custom network this only happens with the custom networks the ones that you create not one of the two default ones when you have a custom network we have dns so when one docker container wants to talk to another docker container we can use the name of that container or the name of that service to talk to that container and so if we go back to our docker dash compose file you'll see that the service for my node app is called node app and the service for my container is called so i can refer to this container's ip address based off of this service name so if i call within my node app it's going to automatically grab the ip address of our container so if i go back to our index.js i can change this to and then here if we do a docker logs and let me just do a pass in a dash f i think it's dash f for follow actually let me just do a help real quick uh yeah dash f follow and here if i save this you can see we still successfully connected to the database so because of dns we're able to resolve this name uh this host name to be you know whatever our container is and just to show you guys exactly how that works let's actually log into my node application container so if i do docker exec actually first of all do docker ps and we'll do docker exec it and here we'll drop into bash let's ping let's see what happens look at that right it automatically uses dns to resolve the name of and it got the ip address of 172 25.0.2 which is our container so that's how this whole dns process works so anytime you want one of your containers to talk to another container all you have to do is refer to its service name and it'll automatically be able to resolve it because dns is built into docker and keep in mind this is only applicable to networks that you create it does not work with the default bridged network okay and if you want to take a look at your networks we can actually do a docker first of all we'll do a dot or network ls and we can do a docker network inspect well first of all i have to grab the specific network i want so the one that's specifically my docker compose created and then we can do inspect and i messed up the order sorry about that it's going to give us some more information about this specific network so you can see here the subnet that all of our containers are going to use are going to use the 172.25 16. we can see what the default gateway is and then we can see under the container section all of the containers we have so we've got our container and we can see the ip address as well as the mac address of this container and then we can also see the container for our node application and so this has also got an ip address and a mac address and i believe and and don't quote me on this but it looks like yeah actually that's all i wanted to show you guys from here so i think that's going to wrap up this network section so in the next section we're going to make a few changes to our application so that it's a little bit easier to work with environment variables and we can kind of store them all in this same area and section all right so you know one thing i don't like in our application is that first of all we're hard coding the url into our application you never want to do that instead what i would rather do is have this url stored as an environment variable and so that way you know when we move to production you know there's nothing that we need to change we can just pull the environment variables that we set either in docker compose or on the host machine so what i want to do is uh within our base directory i'm going to create a new folder and i'm going to call this config and within here i'm going to create a new file called config.js so this is going to store basically a variable that holds all of our environment variables and so here i'm just going to do a module dot exports equals and then here i'm going to store all of our environment variables so if we go back to our url there's a couple of things we need to pull out here we need the username for our mongodatabase the password we also need the ip address uh we know with docker we can always use so you know whether you're in development or environment for the ip address you can always use so technically we don't even need to save that as an environment variable but you know down the road you know you definitely want to think about the future there may be a time where you decided you know what i don't want to keep my database as a docker container maybe you want to use some kind of managed service so in that case we can no longer use dns because it's no longer running as a container so if you ever do decide to maybe move your database to outside of the docker world and then have it hosted by aws or some some other hosting platform or cloud platform uh then you would need to pass in a the ip address as an environment variable so i like to just store everything as environment variables just so that we can plan for the future so we need those three in the port because who knows right the port could change in the future so let's go back to our config.js and i'm going to define a property called underscore ip and then here this is going to grab process dot env dot underscore ip so we're going to make sure that our docker containers pass this environment variable in however if it's not set then we're going to default to right so that's what the the double pipes mean so if this is set then we're going to use this value and ip is going to be stored to the value of this environment variable however if this is not set then this variable is going to be set to right and so the reason i'm doing that is because you know we can always default to as our ip uh if if we don't pass anything in the next thing that i want to do is we'll grab the the manga port so i'll call this underscore port and we'll say process dot env dot underscore port and then here we're gonna pass in uh the default value of two seven zero one seven uh then we want the manga user and we'll pass in the value uh of the environment variable of underscore user and we don't need to default that and then we need password all right so now just make sure that we're exporting it and what i'm going to do is in our index dot js file we can then import those environment variables so here this is what i'm going to do is i'm going to change this to a uh to the template string and then we can then grab those values so here this is going to be the username so we'll just say dahlin and then we're going to grab in underscore user right and then make sure we let vs code import it or manually do it yourself in the password we want to do the same thing then here we also want to pass in the ip address and then grab the port as well right and make sure to let vs code import all of these for you and that should be about it technically we could do the same thing right here for port i just like to kind of have a config file right here that holds all of my environment variables so i can know exactly where to look if i ever need to change anything and it's just kind of nice to have all of these in a central location but you know this section this part of the the video uh completely optional all right let's save all and then let's so now that we saved it let's go do a docker logs and it looks like we got an error so what happened here it looks like we got an authentication failed so we clearly messed something up let's just make sure we save this and right it's failing because well first of all we haven't passed in any of these uh environment variables so uh we don't have a user or a password right now so we have to pass that into docker compose okay and so here right now we've been using the base docker compose file for everything uh and that's just because i just wanted to start off with something simple but uh i think it's time we started kind of splitting things up between our dev and prod for so right now we're just working on our dev environment so let's uh copy all of the related stuff that's for our dev environment and move it into the dev.yaml so that we're not cluttering up the shared configs so for the environment variables let's copy those actually i can copy all of this for now and go into our dev and then here we can remove image because that's not going to change whether it's production or development we'll set these environment variables and then we also need to set the new ones as well so what is this underscore underscore user this is going to equal same thing as this in this case and actually i'm making a mistake so this is going to go under our node app right this is an environment variable for our node application we'll set that to sanjeev and then here we'll set this password equal to my password and that's all we should need um because the rest uh can default to what we're already using so we don't need to pass those in and then now i think we should still be tailing this and we actually have to rebuild the containers because we pass the new environment variables so let's stop this and we're gonna have to do a docker compose down and let's bring it back up and i realized it connected to the wrong container we want our node application all right perfect so now we can see we've successfully connected to the database uh and once again guys this part of the video was purely optional but i just kind of like having everything in a centralized location and i just want to make sure that we kind of think about what our application is going to look like in the future and make sure that we can handle making any changes to where our database is actually stored all right if we take a look at the logs right here you'll notice that we've got a couple of warning messages so to clean up these warning messages as well as maybe kind of clean up our index.js file what i'm going to do is i'm going to actually store our url into a variable and so here i'm going to do const and then we'll call this url and i'm just going to store this url up here and then in the connect method i can just call url then to get rid of those warning messages i'm going to pass in a few properties don't worry too much about these i'm just it's not really going to affect the functionality of our application it's just going to make sure that we don't see those annoying warnings all right and so that's all the changes i wanted to make in this case i just wanted to clean it up just a little bit so let's save that let's make sure that we successfully connected and we should be good to go now when it comes to starting up our docker containers especially using docker compose we can run into some potential issues and that is when we spin up both our node container as well as our container we don't actually know the exact order that these will get spun up on right docker is just going to bring them up at the same time or relatively close to the same time and that can lead to issues because if our node container spins up first it's going to run this code right here to try and connect to our database however if our database is not up it's going to throw an error and then crash our application so we need a way to kind of tell docker to load up our instance our container first so that we can ensure that when it's up and running only then does our node container connect to it and docker compose has a depends on field that we can use so if we go into our docker compose.yaml we'll use the shared one in this case because we would want the same behavior whether it's in our production or our development environment and under our node app service we'll say uh depends on depends underscore on and then we have to pass in the name of the service that we depend on so we'll do slash or dash and then the name of the service so in this case and so what this is saying is that because our node app service depends on we are going to start our container first all right so that kind of helps us so let's tear everything down and then let's bring everything back up all right now we can see that um our container was started first and our node app was started second and uh keep in mind uh you know if you run this you know enough times you can confirm that it's always going to be the container first because it sees that our node app is dependent on our service however this still does not technically fix our issue because the only thing docker does is it spins up this container first it has no idea whether has fully initialized it has no idea if the database is actually up and running it just spins up the container but it doesn't do any checks to verify that our database is up and listening for connections so despite the fact that we have depends on it doesn't necessarily solve our issue it helps a little bit but once again our application um you know we could end up catching it where the container is up and running but itself is still down and hasn't initialized and our node app is ready to connect to it right and then at that point our application crashes and so ultimately there's nothing docker can really do in this case or nothing specifically that docker compose can do maybe if you have an orchestrator you can kind of work something out but at the end they you shouldn't rely on docker or your orchestrator to handle that instead you want to implement some sort of logic in your application to handle this scenario where your database isn't up and running before your application starts and so usually that involves you know if you try and connect and you're unable to connect to it you want to keep retrying until you're able to successfully connect to it now mongoose in this case will actually try for 30 seconds automatically for you after 30 seconds you'll crash out but for 30 seconds it will just keep trying and trying and trying and that's what we want so it's great that mongoose has this out of the box but i just want to make sure that you guys understand that ultimately you need to implement some sort of logic in your applications to ensure that you can handle this scenario i'm going to show you a you know as an example of what something that you could do and i'm not saying this is best practice it most certainly is not it's probably not the best way to handle this but i just want to show you how we could somehow implement some sort of logic in our application to keep retrying until is up and running so let's go back to our index.js and what i'm going to do is i'm going to create a function i'm going to call this connect with retry i'm going to take this mongoose method right here i'm going to drag it right into my function and then under the catch section right here i'm going to remove this first of all actually i'll keep the console.log i don't know why i removed that but then if we error out for whatever reason i mean ideally we should check to see if it's because we could not connect to the server but let's just assume because it's trying to connect that any error we get is because we can connect to it we'll say set timeout and then we'll call the same exact function so we'll do connect with retry and then we'll just say after five seconds so what's going to happen is we're going to call this function when we start our application and then it's going to run it's going to try and connect and if we can't connect to it what we'll do is we'll wait five seconds so that's the purpose of the set timeout we'll wait five seconds and then we'll just call connect with retry so we'll just call this function again and then we'll try and connect and then we'll do the same thing we'll wait five seconds and just keep trying this so this is gonna loop forever until we can finally hit this then statement right which is when we successfully connect to it and then we can break out of this function uh so that's just an example of how you would implement something within your application i'm not saying it's a best practice i'm sure there's something there's some negative aspect as to the way i've implemented this and maybe it's not best practice i'm just here to try and kind of sell home the point that you need to make sure your application handles the logic don't rely on an orchestrator don't rely on docker or docker compose because none of them can truly guarantee you that your database is fully up and running uh before your application starts make sure your application is intelligent enough to handle that scenario and so the last thing that we got to do is we got to call that function so here we just do connect with retry let's save that and now to actually test this out uh first of all let's do a docker first of all let's tear everything down and now i'm going to show you a command that we have or an option that we have with our docker compose up so if we run up again with the dash v if we just run this like this it's going to start all of our container all of our services however we can tell docker compose to only start up specific services so in this case we would want to bring up our we would want to bring up just our node application so if i do a dash dash help you can see at the top we can just provide our service names uh where is it i think it's somewhere here it's listed somewhere if you check it but it'll list out uh you can specify just the services you want to start so if i do uh and first of all that shouldn't be dash v that should be dash d sorry so here i can type in node app right and so that's just coming from our service name and so this should start just our node application so if i hit that we see a little bit of an issue right it started our container so why exactly did it start our manga container well that ultimately comes down to the fact that we use this depends on flag so because this service depends on right it's going to start no matter what so let's tear this back down and i'll show you how we can start just our node application now here we do up dash d and then node app and let's do a dash dash help and let me do that before the name of our service so here and there should be a specific flag and that is no depth right here so that says don't start linked services or it's basically saying you don't need to start the dependencies so when we start up our node application despite the fact that we depend on it will not start up all of any of our dependencies so that's the exact flag that we want so let's hit an up arrow remove that and then the dash dash i already forgot what it was no no deps and then we want to call our service name which is no dash app all right so now it's going to start just our node application let me do a docker ps just to confirm perfect and then let's do a docker logs and then we'll call this and then dash f so let's take a look at our application and let's see what happens and i can't remember if i did a save all i mean let's just do a save there we go okay so we can see that tried to connect right and it said connection timed out all right and so uh you know by default i think it waits like 30 seconds again afterwards or something like that so let's see uh if manga if my for loop actually wasn't a four lift but if my repeating function works so we should ideally see the same exact error message when it tries to reconnect in a few seconds and there we go so i don't know if you guys saw that flash before you but uh it spitted out the error once again so this confirms that uh my application is continuously trying to connect to so let's bring up our container now so we can do a docker compose up and then here we can remove all of these flags and just bring up our service and so now if i run the the docker logs again for our node application when it tries to retry once again it should then successfully connect and there we go so now we can see that we've successfully connected and this confirms that our node application is intelligent enough to handle a scenario where our database is not up and running at a specific moment in time so it will just continuously retry over and over and over and over again until the database is finally up and running so now that our node application can successfully talk to our mongodb instance i think it's time we started to build out a demo crud application i was trying to think of what would be the best example project and i and i realized that uh you know searching through youtube i could not find a single a tutorial that covered how to build a to do application so that's exactly what we're going to build i'm just kidding i would never build the most annoying application instead what i'm going to do is i'm going to build the second most annoying application which is a blog application so let's get started now keep in mind when we start building out the express side of things i'm going to move a little bit quickly just because i want to make sure this video focuses more on the docker side of things i'm going to expect you guys to have a little bit of background when it comes to express already so i'll move quickly if you have trouble keeping up you know i would recommend watching another tutorial on how express works and then coming back to this but i want to make sure that anybody watching this whether they're interested in express or node that they can follow along because the idea behind all of this is all about the docker side of things and how we can build a development to production workflow so let's start off by creating a couple of folders so the first folder we need is one for our models this is going to store our mongoose models i will create a new folder for our controllers as well and we'll create a new folder for our routes and so let's start off by building our models and i'm going to create a new file and we'll call this um our post model so this is a blog application so we need something to represent our blog posts and from here we want to import mongoose and we'll do const post schema and here let's think about the properties we want to give it so it's got to have a title and we'll say this is going to be a type of string and then we're going to say this is required and we'll set that to be true and if they don't include a title we'll say we'll throw an error and say post must have title uh the next next property you should have would be a body so this is going to be the content of the post so once again there's going to be a type of string and we'll say required as well and we'll say uh post must oops must have body alright so this is going to be our blog model fairly straightforward uh and then here let's just make sure we export it and now let's create our controllers so that we can handle creating reading updating and deleting our posts we'll call this post controller and so first thing we want to do is we want to import our post model so that we can actually you know interact with our database and create posts and then we'll do export and then we'll define our controller for retrieving all posts we'll do get all posts and this is going to have a request response and next as well though that's optional for a route all right and the way to retrieve all posts with mongoose is we can just say const posts equals post dot find so that's going to connect to our database and retrieve all of our posts based off of this model however there's a couple things we have to do first of all this is um an asynchronous method so we have to do async await sorry that should be a wait and then this function needs to be an asynchronous function and then anytime you're working with anything that could potentially error out we need to throw it in a try catch block so we'll do try and i'm just going to move this into the try statement and if it's successful we want to make sure that we send a response and we'll say status 200 and here we'll say first of all status of success and we'll say results actually we'll do data and we'll just pass in posts and then also uh anytime we return an array of any kind i usually like to include a results count so we'll say uh posts dot length so however many posts we retrieve we also return that as well and then if there's an error let's just send a status 400 i probably not the correct error code but remember this the point of this video is not about the express side of things i just need to get something up and running just to show you guys how all of this integrates together and we'll say status fail and that's all right so we've got the logic for retrieving all posts let's get the logic for [Music] retrieving an individual post is also going to be an asynchronous method they're all going to be asynchronous and i'm going to just copy and paste this and we're going to just change a few things but for the most part all of this is going to be fairly similar and then here the only thing that we have to change is post dot find by id and then we need rec dot params dot id so uh you know when you're retrieving a post what we're gonna do is we're gonna have the user go to uh localhost you know colon 3000 or whatever and then say you know api v1 i'll skip that for now and we'll say they want to go under the posts and then here they would pass in uh whatever id so if they want the post with an id of five they would pass that and to retrieve that value we just do rec.params.id and you know within our route we're actually going to just do call and id so that we can pass whatever value the request is into the params.id so we retrieve that we don't need the results because it's not going to be an array and don't have to do this but we're going to only return an individual post so we'll just say post and that should be all so then the next thing we want to do is for creating a post and actually instead of writing this out let's just copy this exactly and we'll call this create post and then we'll remove this and we'll just say post.create and we want to just pass in rec.body so uh the title and the body that the that the front end sends it's going to be attached to our body property so that should be all that we need we can return the same stuff all of that looks good all of that looks good and then we just need two more we need update and delete and we're going to copy the get one for the update so this will be update post and the method we're going to use is find by id and update and so first of all we have to get we have to pass in what the id is so just like we did for uh get one post we can just pass in rec.params.id and then we have to pass in the body so rect.body which is going to have the content of our post and then a couple of other things that are optional so i forget what these do just pass it in i know run validators is going to ensure that even when you update it's going to um it's going to make sure that you know like we go back to the models even when we update it's going to check to make sure that we have a title uh as well as a body as well so it's just going to do all of the mongoose schema validation even on an update which it doesn't do by default and i believe this is to return the new post that gets created but i could be wrong and then lastly we want to do our delete so let's just copy this and we'll change this to delete post and all we have to do is let's delete all of this and we're going to call find by id and delete and we just pass in rec.params.id and in this case there's no data so we can just pass in null or just not even include that actually all right so we've got all of our crud methods done our controllers are set uh the next thing that we have to do is just define our routes so let's go into our routes and let's create a file called uh post routes dot js and in here we want to import express and let's import our post controller as well now let's create a new router right and then let's start defining our routes so we do router dot route and then the specific url so this is just going to be the slash url the slash path and then now we can chain in what we want for our get method and then what we want for our um [Music] our post method as well so get and post remember they're always going to be if we actually take a look at the url it's going to be you know localhost 3000 and then if you go to slash get then it's going to call this specific route and if you go to slash post it's going to create a new a new post so that's how that's going to work so let's uh add the controllers into here so the get method is going to call the um the post controller uh get all posts so post controller dot get all posts and then for the post method this is going to create a post so we'll do post controller dot create post then let's go to our router instance again and do route and then here the route is going to be actually slash colon id and so anytime you pass the id you're usually going to do a either an update or a delete or get one post or an individual post so here we'll do get and then we'll pass in our post controller dot uh get one post all right and then we'll also do a dot update no sorry not update patch and we'll call post controller dot and then we also want a delete which is going to be postcontroller.delete and then we'll do module.exports equals router and now let's go back to our index.js file and let's wire that router up so here we'll call it post router which equals require and then our path two routes and then post routes and then uh right under here we'll say app.use and then we want to pass in the url so here we can say slash posts and then post router so what is this what's actually what's actually happening here so uh basically if someone sends a request uh and it has uh and it looks like uh you know localhost call colin 3000 slash posts so if that first keyword after 3000 uh is posts it's going to send it to our post router and then that's going to go to here so this is where our post router is defined and so it's going to strip off that posts now and then we're just gonna be left with either uh colon three thousand slash or colon three thousand slash id so then it's gonna match one of these so that's all i'm trying to do however i usually like to do uh slash api slash v1 so here you pass an api so that you know that this request is for your api in case you're hosting your front end and your back end within the same domain and then i like to specify the version of our api so this way at least it keeps your different versions independent so you can start a second version and they can run side by side and so now basically if there's a request to api v1 slash posts it's going to go to our post router and let's save everything so looks like nothing's broken but let's test this out i'm going to bring up postman and let's just say api v1 posts and let's do a send and look at that so it looks like things are working so we can see it's a success we got no results because we haven't created anything uh so that works let's now try to create an entry so we'll do post and then go into our body and then let's do uh raw and then json and then here let's change this so we need a title i'll call this my first post and then we need a body and we'll say i don't know body of first post whatever let's send it looks like we got an error so let's see what happened now we went to post routes and under actually let's go to our controller where we create a post and then here let's just do a console.log e so that we can see exactly what's happening and it says oh post must have a body it does have a body and i realize i know exactly what happened so um to actually attach the body of a request onto our request actually i worded that weird um but for express to actually take the body of the actual request and attach it to that request object that our controllers have access to we actually have to pass in a middleware so let's define that middleware real quick under our index.js right here we'll just say app.usexpress.json so that's going to ensure that the body gets attached to the request object and now if i hit send we can see that it successfully created the post we got the id back from mongoose so that worked if i go back to the get and then get all of our posts we should see that show up perfect let's update now let's update that post so i'm going to do slash and then we got to copy the id of this post and i'm going to change this to my first post updated let's hit send and we can see that the title got changed to updated and if i do a get and remove that id my first post updated so we've successfully updated a post uh let's try to get an individual post so let's send that we got the individual post and then let's delete that post as well let's delete it success we do a get now nothing perfect uh let's just add a few entries just so that we can have something in our database so i'm going to go to post let's just create a couple so got one and change this to second post third post and then let's go back to our get method right here and let's send and we should get three entries perfect so now we've got a basic crud application and i think that's a good stopping point for this section okay so we got our basic crud functionality going with our blog posts however i want to start to implement a user sign up and login functionality and the reason i want to do this is because i want to introduce one more container i want to introduce a redis container so we're going to use redis for authentication but to do that we have to implement the whole user sign up and login uh flow so that we can actually get that wired up to our our docker application so let's quickly get started on that i'm going to try to blitz through it as quickly as possible once again so that i can show you how we can wire up a redis container and so you know just like we did with our posts we're going to create a user model we'll import mongoose and then let's define our schema so we'll do const user schema and there's going to be just two properties the username and password so we'll set user name is going to be a type of string and this is going to be required so we'll set require to be true and then if they don't provide it we'll give it an error of user must have a username then we have to pass in another property which is unique so we can't have two users with the same exact username so this is going to do a little bit of validation ensure that uh if we're creating a new user that that username is not already taken i'm going to copy this and for the second property it's going to be the password so i'm just going to change this to be password type string we don't need it to be unique required and we'll just say user must have a password so here we'll say const user equals mongoose.model user and then user schema and we'll just say module.exports equals user we've got a model let's actually set up the controllers now so we'll call this auth controller and let's import our user model and let's set up our controller for signing up and then within our try catch block let's uh let's do user dot create and we can just call in rec.body which should have the username and body and then we'll await this and we'll set that you to new user and then here we'll just do res status 201 json and we'll say status as success and will return the new user and if this fails we'll just do a res dot status 400 and we'll say status fail so let's try this out well actually first of all we have to wire this route up so let's go to our routes let's create a new route we'll call this user routes and we'll say const express equals require express so that we can get that router object we'll do router equals express dot router and we'll say router.post and this will be for signup we get our auth controller so we have to import our auth controller and we'll call up the sign up method and then we'll export that and then we need to wire it up into our index.js so here we'll do const user router and just like we did before we're going to do app.use here let's specify the url that should get routed to so we'll go to slash api v1 slash uh we'll just say users and then we'll pass in that user router and let's save all files and let me just make sure that there aren't any errors so it looks like everything's good and let's try this out now i'm going to create a new request it's going to be a post this is one that's going to go to users slash sign up and then we need to pass in our body it's going to be json say user name is set to sanjeev password is set to password let's try this out and it looks like it worked it's perfect a couple of issues though obviously first of all uh you know i don't want to return back the entire user but really the bigger issue is is that first of all we're just storing this in plain text or password into plain text so let's fix that and so to do that we need to install a new library and that's going to be the bcraft library so that we can hash our password so i'm going to stop this for now i'm going to do an npm install bcrypt js and we got to do a docker compose down and then back up and we've got to do a rebuild as well of the image we'll do up dash d dash dash build all right so everything's back up and running so let's uh hash our password so if we go back up to the auth controller under sign up uh what i'm going to do is first of all i'm going to grab the username and property from the body with a little bit of destructuring and let's import bcrypt and then here we'll do const hash password equals and then we'll just do an await and then do bcrypt.hash and then here we're going to hash the password and then we have to pass in a value so this is going to be the strength of the hash we're just going to pass in a a value of 12 i think that's a standard number that people use and then when we do new user we have to change this now so we'll pass an object and the username will be set to username and then the password it's going to be set to a hash password let's try that out now so now if we sign up i'm just going to put a 1 here we can see now that it has a hash password so perfect now let's implement the login functionality so we're going to define a controller for login and once again we're going to destructure out the username and password and i realized first of all back in our sign up let's make sure we get this in our try catch block because this could fail as well and here we're going to find our try catch block as well actually i'm going to copy and paste it let's save us some time so first things first is let's delete this and what we want to do is we want to find uh you know we want to check our database to see if we have a user with that username so let's do const user equals await user.find1 with a property of username and then we'll do an if statement to see if user was found actually we'll say if user was not found then we'll just send a res.status 400 well technically it would be a 404 it doesn't really matter json and then we'll just say status whoops fail and we'll just say message user not found uh however if we did find a user actually we want to do a return uh but if we did find a user then we want to say we want to first of all check to see if the password's correct so when you hash a password what we have to do is we have the hash password stored in the database and then we have a the password that the user is trying to uh log in with so what we have to do is we have to hash the password the user tried to log in with and compare that hash with the hash that's stored in our database and if they equal the same then that means the user should be able to log in so we'll say bcrypt dot compare and we pass in the password that the user tried to log in with and then we pass in uh from our user object which it represents the entry in our database we'll say user and then grab the hash password within the database and we'll take this we'll do an await and then we want to store the result with into a variable called maybe is correct so that means his password is uh good and then we'll say if is correct we'll do a wreck res dot status 200 dot json and we'll say status success however if it's not correct then we'll just send a response status 400 again json and we'll say status fail with the message incorrect username or password and we'll remove this we don't need this anymore all right and let's save that and now let's go back to here so we did a sign up let's do a login and actually we have to define our routes so you can see here we just have a route for sign up let's copy this and let's create one for login as well it's going to be pretty much the same thing login it's also going to be a post method and then in this case there's going to be a login so we created a user with this username and this password so we should be able to just change the url to login and this should work so let's try this out and we get a status of success if i put in a different password incorrect username or password change it to the correct password and then uh change the username to something that doesn't exist and we can see user not found perfect all right so we've got our user we've got the user sign up and login working relatively speaking but the next thing that we want to do is we want to actually handle the authentication side of things so when the user logs in how do we actually store that state within our application and we're going to use sessions to do that so we'll tackle that in the next video all right so now let's actually go ahead and implement authentication in our application because right now a user can sign up and it can log in but how do we actually make it so that to you know retrieve posts maybe modify posts a user has to log in and authenticate first well we're going to use something called express session so there's really two different ways of handling authentication we can use sessions or we can use json web tokens i decided to use sessions because uh really i went through all of this process just to show you that that we can add in a redus database so we can use a readers database to store our sessions and you'll see that uh wiring up an express session to work with readers is dead simple uh if you actually scroll to the bottom it actually shows you uh all the other compatible session stores so if you want to store it within the database that we're already using you can do that if you want to store it within a postgres database if you want to store it in memory you can but what we're going to do is we're going to do it with rita so that i can show you how to deploy one more container so let's just search for redus and here you can see connect readers and this will walk you through the whole process of getting express sessions wired up with a readers database now what we're going to do is before we do that let's go ahead and actually get ourselves a reader's database so let's go to our images in our docker hub and i'm gonna search for reedus and there's the official image is gonna be the first result so let's add this so the name of the image is going to be redus so let's go to our docker compose dot yaml and let's wire this up so under under that service let's create a new one and give it any name you want but i think redus makes sense and then here we want to pass in the image and that's going to be read us and once again i did this in the shared file because both in our production and our development environment we're going to need a readers database now at this point you know right now if you take a look at my setup and i do docker ps you can see everything's running so uh you know normally you think that you would have to do a down and then and then an up right afterwards but there's a shortcut uh what we can do is since we made a change to docker compose.yaml we can do an up again even though everything's already up and running and docker compose is smart enough to know to detect any of the changes that we've made and spin up the necessary uh spin up the necessary services that we've defined so if we do up and then once again do dash d what's going to happen is it's going to see that we added that readers database and it's going to spin us a spin a spin up a reader's database all right and so you can see both of these are already up to date so it was able to tell that nothing's changed there but we did add the reader so it's going to go ahead and pull that up so you'll see moving forward i'm just going to do i'm just going to run the up command uh just to get make any changes take effect uh instead of having to do it down and then and up because that's just too long of a process all right so we've got our redish database uh now let's go back to here and let's see how we can wire up this connect we just express session so we have to do an npm install and then we have to install these three libraries so we have to install how redis because we are interacting with the reader's data space we do have to install express sessions because we're using the sessions functionality and then to wire those two up together we need the connect readers library all right so let's do a npm install i already forgot what libraries i need to copy this i'll install those and then now uh you know like i said we can do it down uh docker compose down and then do a docker compose up with the dash dash build because we did install new dependencies so we have to rebuild our node image however what we can do is just do an up dash d dash dash build but and that's going to you know rerun everything for us so we don't have to bring it all down however there's one more issue so if i do a dash dash help uh you're going to see that there's this renew anonymous volumes so when you have a a database sorry not a database when you have your containers already up and running and then you do another up and you want to rebuild the image what's going to happen is that the already running container for our node application is going to grab the old anonymous volume and the old anonymous volume has all of our old dependencies and packages that we've installed but we've installed some new dependencies like uh redus and so we need to force docker to renew a new anonymous volume so instead of using the old one we needed to create a new one and not use the old node modules folder that doesn't have redus or express sessions so you can just do a down and then an up with the dash dash build like you normally can or you can do just an up again with the dash dash build and then make sure you pass in the dash capital v to ensure that we create a brand new anonymous volume all right so we've got all of that let's take a look at the example you'll see it's pretty easy um we have to uh import radius uh sorry not radius redus express sessions we have to create a redis store and so you just it's literally just copy and paste up to here uh and then here under readers under our create client method we have to specify how to access our readers database and then we just pass in this specific middleware that we create so let's get to it so let's go back here and let's go to our index.js and we're going to import sessions first so we'll do a const session equals fire express that session then we need to import redus and then we have to define our vita store so we'll do uh let in this case so do let beat us store equals require and then we need connect dash redus and then we pass in session and then let's define our reader's client so we'll do let fetus client equals require sorry not require we want read us dot create client and then here we have to pass in two things we have to pass in uh the uh the url the host url as well as the port that the redis server is going to be listening on all right so let's um let's go to our config.js and let's define that here as an environment variable so we'll say uh redus underscore url when i say url this is just going to be the i p address so i'll just say process dot env dot redus underscore url and then if that's not set to anything we're going to default to redis right remember we have the dns uh at our disposal so uh you know anytime any one of our containers wants to talk to our readers database and it needs to know the ip address we can just reference redus so if i go back to config.js i'm just going to default to read us i'm you know in production and in development i'm never actually going to pass this url in it's just there so that in the future if i do decide to have a reader's database that's not a docker container and that i can't actually resolve using redus then i can just pass it as an environment variable and then i can connect to like maybe a managed avetis server so back here we'll pass in host as bdis underscore url and then we also have to pass in the port so what is we're going to use the default port for everything but let's define a environment variable for that so we'll call this redus underscore port and this is going to be set to process.env.redis underscore port and we're going to define we're going to default to whatever the default port is for redus which is 6379 all right and then right down here before our first middleware here i'm going to define a brand new middleware for our sessions so here we'll then pass in session and then we have to pass in an object so the first thing that we do is we have to pass in our store so here we'll call it new reader store and then we have to pass in our client that we created so it's going to be client and then we're going to reference our readers client right here all right then the next thing that we have to pass in is a secret so this is just a random secret that we store on our express server uh that we use uh when we are handling the sessions so this can be any string so what i'm gonna do is i'm gonna create an environment variable for that as well so we'll go to back to our config and i'm going to create one and i'm going to call this a session underscore secret and we're going to grab this from process dot env session secret and so this is going to be session secret make sure you import that and then we have to pass in some properties for our cookie that we send back to the user and so if you want to take a look at the properties that we're going to pass in go to the original express session page and then here under the options for cookie you'll see the different options that we have so we've got uh expires so actually we don't even want that we want max age so i think it's somewhere here anyways i'm just going to pass in a couple of the ones that i'm going to use and then you know if you guys want to read up on that feel free to but it's not really that important from a docker perspective so we're going to do secure i'm going to just set that to false just to simplify our application resave set to false save initialized http only is going to be set to true and then max age this is going to be set to uh so this is set in milliseconds so i just want this cookie to last 30 seconds it's gonna be a little bit i want it to be that short just because it's easier to demonstrate how these cookies work i'm gonna do 30 000 seconds sorry 30 000 milliseconds which equates to 30 seconds and i know http only this is just used for scenarios where uh your your javascript on the browser will not be able to access it so http only means that javascript can't access it all right so we've defined a couple of new environment variables so let's go back to our um docker.com docker compose file and uh well first of all let's go to dev anyways uh so this is going to be the the environment variables for our development environment so let's go down to redus and let's set our environment variables and once again i made a mistake these aren't set for the redis server this is going to be set for our node app and the only thing we need to pass in is our session secret so we'll do session underscore secret and then just pass in some string so i'm just going to call this secret why not it's just an arbitrary arbitrary string just think of it as like a password for your for your sessions and so now let's do a docker compose up however if we just do a docker compose up you'll see that nothing happens because well actually something did happen this is actually perfect so it recreated the container just because we changed a few things uh we changed our environment variable cell it was able to start that and let's do a docker ps we'll do a docker logs and then where's our node app right here and then we'll just do dash f and it looks like i forgot to import reader's url so if i go under index.js you know this was never imported well it actually is imported i just imported it down here so we just have to cut that out and then move it below this line and then on port 18 i never actually imported so this is going to be set to port and let's import actually is that defined here we need to make sure yep we didn't we never oh it's regis underscore port okay import that so make sure you import it there and i think this should fix our issues uh looks like things are good so far so let's uh well actually technically nothing's done yet but all right so we've got our sessions wired up the next thing that we have to do is we have to create a session whenever a user logs in all right so now that we've got our sessions wired up let's try to log in again and see if anything's changed so i'm going to do a post request to our login route and i'm going to pass in the credentials to a user that's already been created and then we'll hit send we get a status success and you'll notice that under this cookies tab there's a one so this implies that we received a cookie with the value of one and so this is what our cookie looks like uh you'll see the domain is set to localhost because that's what our server is running on and then you'll see our expires section which is going to expire in 30 seconds and then some of the other properties like http only set to true and then secure secures um basically if you have set secure to true that means it will only work with https um i'm not going to go over how to set up ssl and https and all of that for this video but uh you know in a production environment you definitely want this set to true and then usually in development you just leave it set to false so let's log in what i want to do is i want to actually log in to our redis database and just show you what that looks like what that session looks like within the database so i'm going to uh we'll control c out of this and then let's just do a docker exec well first of all let's do a docker ps let's get the name of that container so read us and we'll do a docker exec it and we'll drop into bash and from here we can just type in redus or radius cli and so that's going to drop us into the into our regis database however once again just like we did with manga we can kind of shorten that and just do redus cli and so now we're in redus and to see all of the entries within our our readers database all we have to do is just type in keys and then star and you'll see that it returned an empty array and you might be wondering why they return an empty array we have a session well if you recall where i set some properties on my cookies and my sessions is that the that this is only going to last 30 seconds so the session dies after 30 seconds so what i'm going to do is i'm going to re-login this should create a new session and then now let's quickly run the same command and you can see we have a session right there and if you want to see the details for a session you can type in get and then the key for that so here we just copy that and i forgot the other quotes and there you go so this is the details of that session it's got some information about the cookie and a few other things but with this session we can add any information that we want into this session so what we ideally want to do is when the user logs in we want to store the user information within this session and so if that user information is in that session then we know he's logged in if it's not that means he's not logged in and the nice part about doing this is that we can store any information we want in the session even you know information that's uh should be private to the user because the user never gets to see the session this session resides in our readers database it never gets sent out to the web browser the user is trying to connect from so to do this let's go to our auth controller and it's very simple so let's go under our login section and right before we actually implement the logic for logging in so right under is correct what we can do is we can say rec dot session so this is how you um access this session object it's going to be attached to the request object and we can add in a new property called user we can create any property we want and we'll just set that to uh let's see where is the user we'll set it to user and so that's going to take the user object that we found from our database and only if our password our login is correct will we then log or we will assign this user object to our session so let's save this should restart our app and let's log in again and now i'm going to do keys star we have our session object and then i'm going to do a get and now take a look at this so here starting at this section right here this is our user object we've got the mongodb id that assigned it we've got the username and the password so this is how we tell that a user is logged in and then after 30 seconds you'll see that it goes away and so if we do a keys star it's gone now so now that you have an idea of how the sessions work let's go back into our index.js and just change this value because obviously 30 seconds is way too short uh we can change so i mean just add whatever you want i just added a couple of zeros however long you want a user to be logged in this is the value you set in there remember we use milliseconds of course and uh before we move on a couple other things so after a user signs up we also want to do the same thing so after he signs up we want to make sure that we log him in by doing rec.sessions.user and set that equal to new user and let's test that up so i'm going to go to sign in or sign up and we'll just do sanjeev five all right that worked we got a cookie let's do that and let's get the details for that session and we can see it did not work because i do not see any information about my user so let's take a look and see what we might have broke and i already see what i broke so it shouldn't be sessions it should be session and so let's sign up with a six this time we have a new user and so there we go so now we can see username sanjeev6 so now whether we log in or sign up it's going to assign the user uh to our session and so now we can access that user whenever we want to access posts so now that we have our sessions tracking where their users logged in let's set up the logic to make sure that for a user to either create or delete or update a post or even get post depending on how your application works they have to be logged in and the way we can accomplish that is by using express middleware and a middleware is nothing more than a function that runs before your controller this function is going to have a little bit of logic and all it's going to do is it's going to check that sessions object to see if there's a user property attached to it and if there is a user property to it attached to it then it will then forward the request onto the controller so the controller can handle that logic however if there is no user object attached to it then it's going to return an error saying you know you're unauthorized to access that you must log in so let's create a new folder for our middleware and i'm going to just create a file called auth middleware and here we're going to create our middleware i'm going to call this protect because it's going to protect a route and ensure that the user is logged in to actually access that endpoint and with the middleware you get the same thing as any other controller you get a request response and then you also get the next object and so here what we're going to do is we're going to destructure out user from our session and we're going to say if user does not exist which means you know the user is not logged in because if there's no user attached to the session object then we know the user is not logged in we're just going to return a response that says first of all going to set the status to 41 and then we'll do json and then here we'll say status fail and then what we're going to do is we're going to send a message that's going to say unauthorized however if the user is logged in then we're just going to say next so when you call the next uh function then or the next method it's going to then just send it to the controller or the next middleware in the stack and one optional thing that you can do and what i like to do is instead of having all of the rest of our uh routes get the user off of rec.session.user i'd rather have it attached directly to the rec object so i'm going to say rec.user equals user so now if we ever want to get the information regarding the user we can just do rec.user instead of having to go to rec.sessions.user uh then we want to make sure we export this all right and so now under our post routes which is the routes that we want to protect let's import our protect middleware and to protect a specific route or endpoint let's grab the post method right here so this is going to be when a user wants to create a new post and all we have to do is just pass in protect here so what's going to happen is when a user hits this endpoint we're going to run our middleware function and our middleware function is going to verify if the user is logged in if he is logged in then we just call that next method which then goes straight to postcontroller.createpost and then and then all the logic for that gets run however if he's not logged in well our middleware is set to respond and send a response back and we call a return which means we don't go through the rest of the middleware or the or the controller at the end we just kill the signal and we send a response back so that's how authentication works uh and so the last thing i want to do is for index.js first of all i'm going to change this back to 30 seconds you can pick 60 seconds too actually let's do let's just do 60 seconds and let's save everything all right and what i want to do is first of all i'm going to log in let's delete all of our previous cookies just to make sure we don't have some kind of weird stale state and then let's log in so we'll log in and you'll see that this is set to expire in one minute that's in gmt i'm in est so it's gonna expire in one minute but we're logged in so let's actually create a new post and let's hit send and it looks like we are successfully able to create a post however if we wait one minute for our session to end let's then try to see if we can create a post and ideally we should not be able to so i'll see you guys back in one minute all right so it's been about a minute now let's test to see if we can still create a post so if i hit send again we should see that it failed and it says we're unauthorized and that's because our session ended and basically once your session ends you're essentially logged out so if we log back in it's going to create a new session we're going to be logged in for one minute we can then create another post all right so we've got our authentication set up we can just decide on what routes we want to protect so you can use the same middleware uh across your entire application so for uh deleting or updating we can add in protect as well actually let's just add let's just add it in for everything so even retrieving post you have to be logged in and you know for a real world application you ideally want to bump this up to something significantly higher um you know maybe a couple of hours or something like that or even a couple days i'm going to keep this actually at 30 seconds just you know for testing purposes so as we keep going with our application i want to make sure that authentication doesn't break for whatever reason and so from a express point of view we're kind of done building an application i know it's not like a full-fledged application it was never meant to be i just wanted to have enough of an application so that i can show you from a docker perspective how everything works so uh this is all we're going to do i know we don't have like a logic to assign you know post to a specific user right now any user can create a post edit any post and so it's just one big global list of posts but you know remember the idea of this this tutorial series is not about the express application it's about docker so we finished the express application side of things we're going to get back to the docker side of things uh in the next video so we still got a ton of things to learn and we're also going to eventually move on to getting all of this deployed to a production setup and then show you guys some of the challenges we face when moving to a production environment all right guys so before we proceed any further i want to do a quick review of the architecture of our current application and then i want to show you guys what i ultimately want it to look like once it's done so here i've got a little diagram we've got our in the blue so this big blue box this represents our host machine so in this case this is my windows machine and so here we've got our express application that's listening on port 3000 and then we've got our database which our express application can talk to on port 27017 and if we need to actually send a request to our express application then we just send a a request to port 3000 to our local machine it'll then get mapped to port 3000 of our express application and so that's the current architecture and you know one of the things i wanted to point out especially when we started to add the database into our application is that we never opened up a port for our database right so just like we opened up port 3000 for our express server so that the outside world can talk to it we never did that for our database and i actually did that on purpose because you know we definitely could open up a port so that we can talk directly to the database so we could open up you know port 27017 on our local machine or really any port really and then map it to port 27017 uh to our container and that would be perfectly fine uh if you needed to talk to their manga database however i want you to think about what that would ultimately mean because now we're letting the outside world talk to our database right the only thing that actually needs to talk to our database is our express application so there isn't really a need to open up that port and it's also a little bit of a security vulnerability because your database holds all of your critical application data it's got all of your user information it's got all of their emails it could have potentially other sensitive information like social security number passwords and other things like that so generally it's best not to make the container accessible to the outside world and i love how docker by default you know if we don't open up any ports it already isolates the container so the outside world can't talk to it so you can see that just by running with docker we've already added a little bit of security to our application because only our express application and our containers within that container within that network that docker compose makes can talk to that database no one else can so once again just to reiterate we aren't going to open up any ports to our database uh you know just like in our docker compose file right here you can see we open up the ports for our node app but there's no ports opened up for so we're not going to open up any ports we're going to make it so that only our application our express app our express container can talk to our database and so like i said you know we're not going to publish a specific port for our database just for security purposes and there's really no reason to so we're going to actually remove that and so now what i want to talk about is scaling up our node containers so you know we talked about passing in that scale flag so that we can increase the number of node containers that we have so that we can handle an increased load in traffic so what we did was we would spin up another node express container which would then connect to our database using the same exact port and to be able to talk to this container what we would have to do is publish a different port so the first node container you can see that if we send a request to port 3000 it would get to map to port 3000 of the first container and then we'd have to grab a different port on our local machine like 3001 and so any traffic that gets sent to our local host on port 3001 we get mapped 2.3 000 on our second node container and if we wanted a third one we'd have to open up another port like 3002 and so on so if we had 50 containers 50 node apps we would need to open up 50 different ports and you know like i said that's not a scalable solution you know our front end shouldn't have to be aware of the number of node containers that we're running on our back end so what we're going to ultimately do is we're going to add a load balancer so there's a couple of different options that we have uh you have things like hi proxy you've got traffic and then you got nginx so i'm going to walk you through how we can do this with nginx and you'll see it's really simple and it's a good skill set to have because you'll use nginx in other scenarios outside of docker as well it's a great web server as well so ultimately what our final architecture is going to look like is we're going to have a nginx container and this nginx container is going to be the entrance into our application so we're no longer going to publish any ports on our two node instances so we're no longer going to open up port 3000.3001 on our local machine instead we're going to publish one port for our nginx container and that port can be anything so we can continue to use 3000 like we have or we can pick any other port and you'll see that you know when we get to production we're just going to use port 80 because that's the default port for http as well as port 443 which is the port for https so we'll open up you know the port of our choice on our local machine and we're going to map it to port 80. reason we map it to port 80 is because that's the default port that nginx listens on technically that's fully customizable so we can tell nginx to listen on a different port but there's no need for the extra configuration i'd rather just leave it to the default port so you know 3000 port 3000 gonna get mapped to port 80. and then what our engine is going to do is it's going to act as a load balancer so every request that it receives it's going to load balance it to our two express instances and if we have four five one or a thousand instances nginx will be able to load balance all of those requests across all of our node instances and so this is a much cleaner elegant solution because first of all we only have to publish one port and then nginx which is you know highly efficient is going to be able to ensure that all of our node instances are adequately um balanced with regards to the number of requests that they receive all right and so that's all i wanted to cover in this section so uh in the next video we'll get started on adding that nginx container if you search for nginx on docker hub you'll see the official nginx image as the first result so this is the one that we're going to use and so let's get started on configuring this first thing that we need to do is i'm going to create a separate folder for our nginx configuration i'm going to call this nginx and we're going to create one file and that's going to be the default.com file so this is just going to be a basic configuration for our nginx server and within here we have to define a server block and so this is all just nginx specific configs nothing related to docker and here we'll just say our nginx server is going to listen on port 80. and then now this is where we actually set it up to redirect traffic to our express or our node containers so we say location and then we provide a a url so this is going to be the url of the request this nginx server receives uh and so here we could just do a slash and then put in all of our configs and then here we can say the most important one is proxy underscore pass and then here for the proxy pass field we specify the url of the servers that we want to uh you know proxy this traffic to so we want to send this traffic to our express application or our node containers so because our nginx server is also a docker container that's going to be running it has access to dns so what we can do is we can type in http colon slash and then we can say node dash app because remember we have that uh custom network that was created by docker compose and so within our docker compose file we can refer to any one of these services by their name so if i call node app it's going to load balance between all of the node app containers that we have and then we have to make sure that we send it on port 3000 because that's what our express servers are listening on now there's a couple of other properties that we need to set now because nginx is acting as a proxy when we actually proxy the original request to our express application the nginx server is going to strip off a few details and these details may actually be important depending on what your application is doing and one of the things that nginx does is uh you'll lose the original ip address of the sender so you know what was the ip address that originated that request so we can tell nginx to make sure that we forward that along to our node applications now our node application isn't actually making use of that but uh if you're doing any kind of like rate limiting per ip address these are all things that you want to need so it's always a best practice to configure this and so to ensure that we pass on the original sender's ip we do proxy underscore set underscore header and we do x dash real ip and then we do dollar remote underscore addr all right and then another thing that we want to do is uh we're going to pass in another uh another setting or flag that's going to provide us a list containing the ip addresses that every server the client has been proxied through so this is another thing that's just best practice i i definitely recommend you read up on nginx there's a lot of things that you can do and configure but i'm just trying to get you guys up and running with the base configuration and so i'm just going to copy this it's a little bit of a long line all right and so that's going to make sure all of those um proxy server ips are attached to the headers and then we're going to add in just a few other fields so we'll do proxy underscore set underscore header host and dollar sign http underscore host and then we're going to copy this again and so that's all the configurations we need however there's one minor tweak that i want to do in this case um basically all requests are going to get forward to our node app now you know for what we're doing we're just building a back end however if you wanted this nginx server to also handle serving your front-end assets what you would ultimately want to do is in your api and we've already kind of set this up is that for all of your routes you want to make sure that they are listening on api v1 something so that way we know that the nginx server can actually specify that any request that starts with api is meant for our backend and then any request that's meant for a url that does not have the api um that's meant for our front end so since all of these requests are listening for uh api first well except for this one but we can add that real quick uh what we can do is we can go back to that configuration file and we can say slash api so in this case uh whatever is uh whatever url is passed for location this is going to specify uh what the request needs to look like for us to forward it to our node application so any request that comes in starting with slash api we'll send it to our node app and then anything that doesn't have slash api right now it's just going to drop but in the future we could configure it so that it can handle um you know redirect that traffic to our nginx sorry not our engine but like a react application or whatever our front end application is right now let's go ahead and go to our docker compose file and let's add our nginx service we can do nginx and then the image uh this is going to be nginx and then we can let me put a space nginx and then i'm going to grab the stable alpine version all right and so now um first of all we no longer have to publish ports for our node application so we can remove that actually and let's actually go into our devonprod make sure we've removed any of the ports being opened there as well and doesn't look like we have anything and prod looks okay and so let's go back to our docker compose and then here let's open up
Original Description
Learn the core fundamentals of Docker by building a Node/Express app with a Mongo & Redis database.
We'll start off by keeping things simple with a single container, and gradually add more complexity to our app by integrating a Mongo container, and then finally adding in a redis database for authentication.
We'll learn how to do things manually with the cli, then move on to docker compose. We'll focus on the challenges of moving from a development environment to a production environment.
We'll deploy and Ubuntu VM as our production server, and utilize a container orchestrator like docker swarm to handle rolling updates.
✏️ Course developed by Sanjeev Thiyagarajan. Check out his channel: https://www.youtube.com/channel/UC2sYgV-NV6S5_-pqLGChoNQ
⭐️ Course Contents ⭐️
0:00:14 Intro & demo express app
0:04:18 Custom Images with Dockerfile
0:10:34 Docker image layers & caching
0:20:26 Docker networking opening ports
0:26:36 Dockerignore file
0:31:46 Syncing source code with bind mounts
0:45:30 Anonymous Volumes hack
0:51:58 Read-Only Bind Mounts
0:54:58 Environment variables
0:59:16 loading environment variables from file
1:01:31 Deleting stale volumes
1:04:01 Docker Compose
1:21:36 Development vs Production configs
Part 02: Working with multiple containers
1:44:47 Adding a Mongo Container
2:01:48 Communicating between containers
2:12:00 Express Config file
2:21:45 Container bootup order
2:32:26 Building a CRUD application
2:51:27 Sign up and Login
3:06:57 Authentication with sessions & Redis
3:34:36 Architecture Review
3:40:48 Nginx for Load balancing to multiple node containers
3:54:33 Express CORS
Part 03: Moving to Prod
3:57:44 Installing docker on Ubuntu(Digital Ocean)
4:03:21 Setup Git
4:05:37 Environment Variables on Ubuntu
4:14:12 Deploying app to production server
4:18:57 Pushing changes the hard way
4:25:58 Rebuilding Containers
4:27:32 Dev to Prod workflow review
4:30:50 Improved Dockerhub workflow
4:46:10 Automating with watchtower
4:56:06 Why we nee
Watch on YouTube ↗
(saves to browser)
Sign in to unlock AI tutor explanation · ⚡30
Playlist
Uploads from freeCodeCamp.org · freeCodeCamp.org · 0 of 60
← Previous
Next →
1
 2
2
 3
3
 4
4
 5
5
 6
6
 7
7
 8
8
 9
9
 10
10
 11
11
 12
12
 13
13
 14
14
 15
15
 16
16
 17
17
 18
18
 19
19
 20
20
 21
21
 22
22
 23
23
 24
24
 25
25
 26
26
 27
27
 28
28
 29
29
 30
30
 31
31
 32
32
 33
33
 34
34
 35
35
 36
36
 37
37
 38
38
 39
39
 40
40
 41
41
 42
42
 43
43
 44
44
 45
45
 46
46
 47
47
 48
48
 49
49
 50
50
 51
51
 52
52
 53
53
 54
54
 55
55
 56
56
 57
57
 58
58
 59
59
 60
60

React: Production Server Setup Part 2 - Live Coding with Jesse
freeCodeCamp.org
cookies vs localStorage vs sessionStorage - Beau teaches JavaScript
freeCodeCamp.org
Browser history tutorial - Beau teaches JavaScript
freeCodeCamp.org
Graph Data Structure Intro (inc. adjacency list, adjacency matrix, incidence matrix)
freeCodeCamp.org
React: Parameterized Routing with Next.js - Live Coding with Jesse
freeCodeCamp.org
React: Dealing with jQuery Issues - Live Coding with Jesse
freeCodeCamp.org
setInterval and setTimeout: timing events - Beau teaches JavaScript
freeCodeCamp.org
Browser and Device Testing - Live Coding with Jesse
freeCodeCamp.org
Last Minute Updates - Live Coding with Jesse
freeCodeCamp.org
Post Launch Updates - Live Coding with Jesse
freeCodeCamp.org
React: Setting Up Google Analytics - Live Coding with Jesse
freeCodeCamp.org
React: Masonry Layout - Live Coding with Jesse
freeCodeCamp.org
Load Balancing Digital Ocean Droplets - Live Coding with Jesse
freeCodeCamp.org
try, catch, finally, throw - error handling in JavaScript
freeCodeCamp.org
Load Balancing: SSL Passthrough Setup - Live Coding with Jesse
freeCodeCamp.org
Graphs: breadth-first search - Beau teaches JavaScript
freeCodeCamp.org
React: Masonry Layout Part 2 - Live Coding with Jesse
freeCodeCamp.org
React: WordPress API Live Search - Live Coding with Jesse
freeCodeCamp.org
Creating WordPress Custom Post Types - Live Coding With Jesse
freeCodeCamp.org
Dates - Beau teaches JavaScript
freeCodeCamp.org
Miscellaneous Front End Updates - Live Coding with Jesse
freeCodeCamp.org
Merging a Pull Request from GitHub - Live Coding with Jesse
freeCodeCamp.org
React + Prettier + Standard JS - Live Coding with Jesse
freeCodeCamp.org
React: Sortable Responsive Table - Live Coding with Jesse
freeCodeCamp.org
Geolocation Sorting by Distance - Live Coding with Jesse
freeCodeCamp.org
Tradeoff Matrix - Agile Software Development
freeCodeCamp.org
The Definition of Ready - Agile Software Development
freeCodeCamp.org
Getting first React job without experience - Ask Preethi
freeCodeCamp.org
React: Google Analytics Click Tracking - Live Coding with Jesse
freeCodeCamp.org
Submitting a PR to an Open Source Project - Live Coding with Jesse
freeCodeCamp.org
Should I go back to school to get CS degree? - Ask Preethi
freeCodeCamp.org
Hero Section CSS Changes - Live Coding with Jesse
freeCodeCamp.org
Working Agreement - Agile Software Development
freeCodeCamp.org
A day at Pennybox with Co-Founder Reji Eapen
freeCodeCamp.org
React: Sorting and Filtering Data - Live Coding with Jesse
freeCodeCamp.org
React: Sorting and Filtering Data Part 2 - Live Coding with Jesse
freeCodeCamp.org
React: Building a New UI - Live Coding with Jesse
freeCodeCamp.org
Definition of Done - Agile Software Development
freeCodeCamp.org
Getting started with jQuery (tutorial) - Beau teaches JavaScript
freeCodeCamp.org
Making a React Blog with WordPress Content - Live Coding with Jesse
freeCodeCamp.org
React, NextJS, CSS - Live Coding with Jesse
freeCodeCamp.org
jQuery events - Beau teaches JavaScript
freeCodeCamp.org
React/NextJS Routing and WordPress API Custom Types - Live Coding with Jesse
freeCodeCamp.org
React: Working with API Data - Live Coding with Jesse
freeCodeCamp.org
React: Refactoring Components - Live Streaming with Jesse
freeCodeCamp.org
jQuery effects - Beau teaches JavaScript
freeCodeCamp.org
More React Refactoring - Live Coding with Jesse
freeCodeCamp.org
animate in jQuery - Beau teaches JavaScript
freeCodeCamp.org
"Finishing" My React Site - Live Coding with Jesse
freeCodeCamp.org
Starting a New React Project (P2D1) - Live Coding with Jesse
freeCodeCamp.org
React Project 2 Day 2: Learning Material UI - Live Coding with Jesse
freeCodeCamp.org
The Agile Manifesto - Agile Software Development
freeCodeCamp.org
jQuery: get and set with http, text, val, and attr - Beau teaches JavaScript
freeCodeCamp.org
React Project 2 Day 3 - Live Coding with Jesse
freeCodeCamp.org
The INVEST approach to product backlog items
freeCodeCamp.org
React Project 2 Day 4 - Live Coding with Jesse
freeCodeCamp.org
Chickens and Pigs - Agile Software Development
freeCodeCamp.org
React Project 2 Day 5 - Live Coding with Jesse
freeCodeCamp.org
jQuery: add and remove DOM elements - Beau teaches JavaScript
freeCodeCamp.org
React Project 2 Day 6 - Live Coding with Jesse
freeCodeCamp.org
More on: Docker & Containers
View skill →





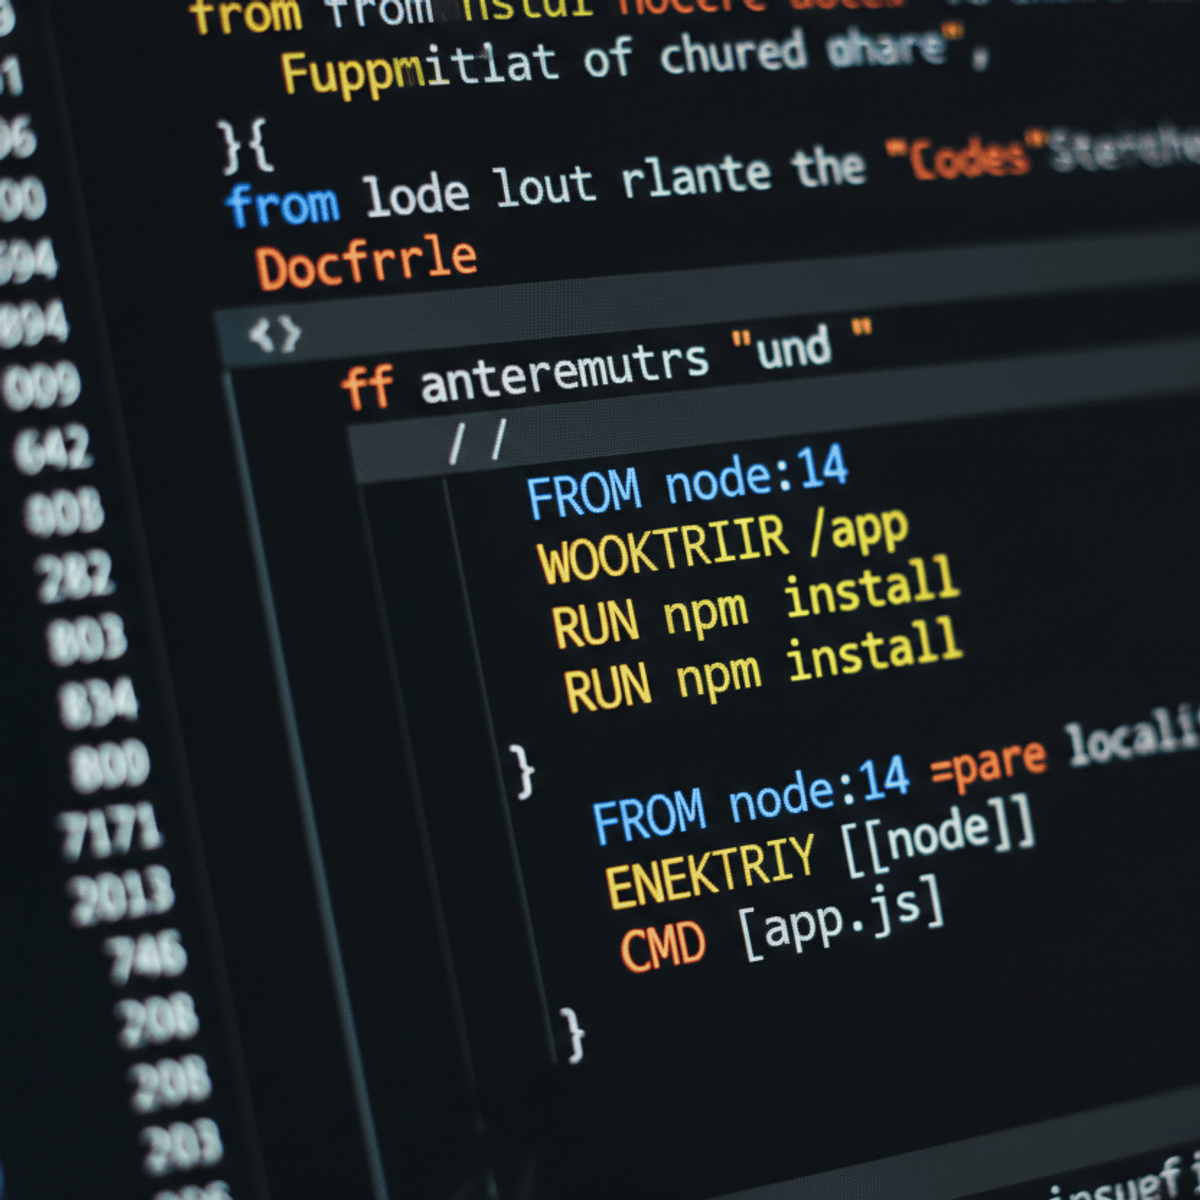
Related Reads
Chapters (33)
0:14
Intro & demo express app
4:18
Custom Images with Dockerfile
10:34
Docker image layers & caching
20:26
Docker networking opening ports
26:36
Dockerignore file
31:46
Syncing source code with bind mounts
45:30
Anonymous Volumes hack
51:58
Read-Only Bind Mounts
54:58
Environment variables
59:16
loading environment variables from file
1:01:31
Deleting stale volumes
1:04:01
Docker Compose
1:21:36
Development vs Production configs
1:44:47
Adding a Mongo Container
2:01:48
Communicating between containers
2:12:00
Express Config file
2:21:45
Container bootup order
2:32:26
Building a CRUD application
2:51:27
Sign up and Login
3:06:57
Authentication with sessions & Redis
3:34:36
Architecture Review
3:40:48
Nginx for Load balancing to multiple node containers
3:54:33
Express CORS
3:57:44
Installing docker on Ubuntu(Digital Ocean)
4:03:21
Setup Git
4:05:37
Environment Variables on Ubuntu
4:14:12
Deploying app to production server
4:18:57
Pushing changes the hard way
4:25:58
Rebuilding Containers
4:27:32
Dev to Prod workflow review
4:30:50
Improved Dockerhub workflow
4:46:10
Automating with watchtower
4:56:06
Why we nee
🎓
Tutor Explanation

 DeepCamp AI