Docker Full Course 2026
Skills:
Docker & Containers90%
Key Takeaways
Covers Docker containerization for scaling software applications
Full Transcript
Ever wondered how a tech giants like Spotify and Netflix scale their software so fast? The secret is containerization with Docker as the essential tool at its core. This structured hands-on Docker course will take you from absolute beginner to job ready, providing the practical skills needed to build, test, and deploy containerized applications reliably. Isa from Dolphin Ed created this course. >> Have you ever wondered how tech giants like Spotify, Amazon, and Netflix, they ship software faster and they scale instantly? The secret is containerization and Docker at the heart of it. In today's IT world, Docker is everywhere from startups to tech giants and Inc. 500 companies, and it is the core tool or the containerization is the core tool behind cloud, DevOps, software development, modern security roles, and modern application architectures. Docker has become the gold standard when it comes to shipping and deploying applications that run efficiently and reliably in the cloud or on premises. The industry is shifting so fast. Companies are containerizing all the applications or the legacy applications that they can and maybe shifting that also to the cloud and Docker has become a primary skill in that revolution. Learning Docker now means you're not just keeping up, but you're getting ahead. And also learning Docker now is going to pave the way for you to learn Kubernetes, the gold standard when it comes to orchestration and management of containers at scale. Whether you are an IT fresher, switching into IT, or an existing IT professional upskilling, this course is your complete, structured, step-by-step practical guide to mastering Docker. And the course will take you from the absolute scratch to becoming job ready using Docker in deploying applications and services. The course will start from the very basics, from comparing virtual machines to containers. Why do we need containers? And how Docker transforms the way we build and deploy applications. Then, we'll dive deeper into Docker by learning what is a Dockerfile and how we can create an image from a Dockerfile and how we can deal with Docker Hub and build repos where we can ship the created images. And then understanding and working with Docker networking, storage, and volumes. And then deploying multi-container applications using Docker Compose. And it doesn't stop there, but it will take you further to introduce what Docker Swarm is, which is an orchestration management for Docker containerized applications by Docker. The course is hands-on, practical, learn-by-doing basically. Creating Dockerfiles and images and containers and applications and browsing to them and Docker Compose and writing YAML files and much more. By doing all of this with quizzes and assignments in the respective modules and real-world projects at the end, this is all what you need to go from zero to hero in Docker. By the end of this course, you will walk away confident to build, test, and deploy containerized applications using Docker and Docker Compose and will be ready to deploy these real-world skills in any IT role that requires these skills. My name is Eissa Abu Sharif and I have been in IT for more than 25 years now. I am an AWS certified instructor and I am a Cisco certified instructor since 2005. I hold many IT certifications and infrastructure certifications as well, including the Cisco certified Internetwork Expert. I have been teaching for more than 21 years now as a certified instructor and I have taught networking and I have taught management and I have taught uh infrastructure, cloud, and automation, and DevOps courses. And in addition to that, I have also been in the IT industry myself as an architect, as a consultant at IBM in the US and at Cisco and other companies. So, I have blended all of that experience to explain to you in layman terms very easily from the ground up what containerization is, why do we need it, and how we can work with it. So, that at the end of the course, you will be able to work confidently with Docker and that would be the a stepping stone for you to learn Kubernetes, which is orchestration and management for containerized applications at scale. So, you will not be bored and you will be entertained throughout the course. It's going to be engaging and not boring, I promise. And at the end, you will be proud of the time you have invested in this course. This course would never be possible without your support. In order to support us develop more free content that is high quality at no price to you like this one, consider buying the full package of this course on www.dolfined.com. It can be found at this address www.dolfined.com/courses/docker. Very easy URL to follow. And for a price of a lunch or even less with the inflation that we are living in right now, you can support us develop more free and quality content like this one to help you throughout your learning journey and to help the masses as well across the globe. If you buy the full VIP package as I like to call it. You are going to have lifetime access to the content and its updates. It's going to be split into video lectures, so you don't have to be overwhelmed with seven or eight hours or even 15 hours a single video. You can have that divided into separate lectures for theory and hands-on. You are going to have access to the full 15 hours version of this course, and you are going also to have additional hands-on labs on the topics that we have covered but at a at a deeper level. You'll have a second real-world capstone project that will deepen your real-world experience with Docker. And also, you will have a community access to that community for faster Q&A support. And of course, the ability on our platform to have quizzes and assignments is going to be there as well. And also, you'll have access to the scripts for all the hands-on labs and the 330-page PDF guide that includes all the slides of this course. We appreciate your support if you can, and that would definitely be a good return on investment to yourself as well through more free content that we can generate through your support. In this course, we are going to cover the following topics. We're going to introduce what Docker is and why do we need containers and how they are different from physical servers and virtual machines. Then I'm going to take you to set up Docker on a free virtual machine, Linux virtual machine on AWS. So, I will teach you how to create the AWS account, and whatever you are going to do is going to be free. So, you don't have to bother about installing on your laptop or creating virtual machines on your laptop, and at the same time, you will be practicing what you will do in the real job if you like to practice Docker with confidence. Then I'm going to take you to what Docker is and the architecture of Docker. Then we are going to move on and start to learn Docker commands and how to use that to create containers of different use cases with different base images. Then I will explain to you how we can create a container from an image. I'll take you to Docker Hub and explain to you that there is a repository of free available images that you can just download and create containers from. And I will also teach you what if you have an application that doesn't have an image. And you'd like to run it in container. So how you can containerize that through Docker files. From there we're going to jump into Docker registries. So now in your corporate, if you are the master of Docker and you are creating containers for your company, now where do you store them? What's the repo repository or the registry as we call it in Docker that you can upload your images to and it's up to you. You can make them public so anyone can benefit from them or you can make them in a private registry where only the corporate members that have access to that repo will be able to login, authenticate, and download that to create containers from. Then we are going to introduce the Docker networking and how can that be used? How you can access the containers from the outside? And we are going to look at Docker Compose and how we can automate the process instead of doing that manually, we're going to get into how we can write YAML configuration files for Compose where you can do that automatically through Compose. Then we're going to look at persisting data in your containers. What if the container dies? It's just a software process as we learn. What if it dies? I lose all the data? What if it was a database and it has very critical data? What do I do? Then how we can persist the data by mounting volumes or bind mounts outside the container. So if the container dies, I can create another one that attaches the same data or I can make the data available to multiple containers at the same time. From there, we are going to work on a project, real world project, where you will you are going to deploy what you have learned, and you are going to understand better how this works, how this containerization of application or microservices happens. And from there, we are going to wrap up, and I assure you that you'll be confident at the end, and you are going to use Docker with comfort. So, whether you are a fresher into IT, or someone changing career into IT, or you are already into IT, but you don't know Docker, you have to learn it now. So, without further ado, let's get started. Why do we need to learn Docker? And why Docker? Why is what is so special about Docker that we need to learn it? So, Stack Overflow in 2024 did a survey and asking the contributor or those who contributed to the survey, what are the most popular developer tools that they are commonly using or they prefer to use. And as you can see over here, that Docker was at the top with a 50 plus percent. And this is number one. Like, this was voted the tool number one by 53.something of the contributors or the respondents to the survey. Now, if we think, what about if we send out a survey, and we get the feedback, which are the top three tools? Do you think the ones that will include Docker as number one or two or three are going to jump to maybe 70-80%? And I truly believe it might be even higher than that. One might ask, okay, but these are developers, uh machine learning ops engineer, or maybe I'm an AI engineer, maybe I'm a data scientist or data analyst, or maybe I'm a cloud engineer. You might think this is not relevant to me. We just picked developers. Actually, Docker applies to all IT professions nowadays from the simple automation all the way to hosting applications at a large scale. So, containers are in the heart of that. Of course, Kubernetes when we are talking about a very large scale deployment would be the right thing to do. But, Docker and Docker-based applications and environments and clusters are very common as well if the scale is not that large and the complexity required or desired is not high as well. So, why Docker? What is so special about it? Why are developers loving it and why do everyone have to learn it? It has a lot of features, but among these the top four are environment reproducibility. >> [snorts] >> So, you can recreate what you do on your laptop. If you follow the same steps, you can recreate it in production, in development, in testing, in the cloud, or on your laptop, or on premises. Same result if you follow the same instructions and the same steps, you get exactly the same result, which is excellent and amazing because last thing you want to do is developers work on an environment. When you try to recreate that environment, then you have differences. And then when you test, then you get problems, but the developer will tell you, "It works on my machine." That is why Docker was invented. We don't want to listen to, "It works on my machine." Then it should be your problem. Then you take it from testing into production, and then you have more issues. So, reproducibility in Docker is top-notch. Second one is dependency management. You have multiple things on the virtual machine or the server, multiple applications, and some tool requires Python version 2.7. Whereas, the application that is built by Flask needs Python 3.8 or 3.9. Then now we might start to get into conflicts. And dependency management is a very important thing when we are developing software and tools and applications. So dependency management is very easy in Docker and we're going to explain why. Portability is very easy when you are dealing with containers and with Docker as an example. And that is very important because today I'm on AWS, tomorrow I'm going to be on premises or maybe I'm going to move to Azure. Or maybe I need to replicate my environment in Google Cloud. Then in that case portability is very key and hopefully the size of the data that has to do with my application is not very large so I can just transfer it maybe in 10-15 minutes and start working on it or maybe I ship it somewhere on the cloud and pull it from the other side. So portability is key and this is very very important when it comes to working with applications and modern applications to be more specific. Last but not least on the top four reasons why Docker is very popular is the fact that when you deal with Docker configurations are scripted in text files. So it's very easy to track them. It's very easy to have them on GitHub and then you can track the different versions and what changed between every minor version to the next or maybe every minor to a major release and why were the changes done? We added this database, we updated to Engine X version X and Y and Z. We did Ubuntu version 20.04. So you can track the changes and it's very easy to roll back if needed or to go back in history and find out, okay, so why do we have an issue now and we didn't have that before? So version control is is key. So these are the four top reasons why you need to learn Docker and you need to do it right now. Where the technology started and we'll go back into the physical servers era and then we'll take it through virtualization. Why are we doing this? Because if you are a newcomer into IT or shifting into IT or you haven't dealt with servers and virtual machines and all that before, it makes a lot of sense to give you a brief of what used to happen and why did we get into containers. So, this is going to be your introduction into that. If you are a well-seasoned professional and you know what virtual machines are and what physical servers and data centers and all that, then you can skip this section and move to the next one. So, let's start by finding out what is common between the different computing devices. And when we talk about computing device, it could be a server, could be a laptop, could be an iPad, could be your phone, it could be any digital device that is functioning at your home or in the office or maybe in the malls and so on. Any compute device components will have a number of components. Any computing Any computing device will have a number of components, but the most common ones are it will have a CPU. It will have the engine that can process everything that comes to it, instructions, programs, applications, Microsoft Word, Excel, and so on. So, the CPU is the central processing unit or you can say that it is the one that does the work. Then we have random access memory and that's called the RAM. We have it in your laptops when you when we tell you that your laptop has eight or 16 or 32 gigs of RAM. So, random access memory is where the applications are open, are executed while you are using them. So, if you are running, let's say Facebook for example or Instagram, actually, that is a program that will be executed when you open it in your device's random access memory, and as long as you are using it before you shut it down or close it, it's going to be in the RAM. Then we have the hard disk drives. This is where the storage is. When you switch off your phone and then you start it again, the images, the photos, the videos, and the contacts are still there. How come? They were not in the RAM when they are executed, they are in the RAM, but when they are in storage, when you shut it down, it's going to be in the hard drive, and that could be multiple types, SSDs or HDDs. And then we have, how can we communicate with the outside world? Even if it is your phone, how are you getting on the internet from your phone? There has to be some transmission and reception device on your phone. So, when we talk about servers and all that, we have what we call the NIC cards or the network interface cards, and they could be Wi-Fi ones or they could be wired. A cable connects from here. So, this is going to be inside your device, inside your server or laptop or computer or desktop, and then a cable will connect it to the network, and that's how it communicates with the outside, or it could be wireless where it just connected to a Wi-Fi network and so on. Then we have what we call GP G CPUs or graphic central processing units or GPUs, and these are the ones that will do the heavy work when it comes to rendering videos or processing, enhancing the processing time, and so on. So, think of them as additional CPUs that can do specialized functions, and that will speed up what you do on your computer. So, any computing device will have these components among other ones, battery and plugs and all that, but interested in these for our discussion. All right. So, I have a laptop and you have a desktop and you have an iPad, but what is a server? Why do we talk about servers when we talk about applications and the internet and the cloud and so on? Because your laptop despite it could be 2025 model, but it's not powerful enough to serve a thousand or ten thousand or a hundred thousand users that would like to get into your e-commerce website and buy stuff from you. So, hosting your e-commerce website on your laptop will not scale. And that's why we talk about servers and this is where we put the applications. Of course, it could be rack mountable like the one that you see on the screen right now, but they could be desktop servers as well. So, with a box like a desktop computer, but the main difference between the laptop and a server is how powerful the server is. The muscles, how many CPUs, how many how much memory it has and so on. So, server components are like any computing device. So, it has as we mentioned, it has a CPU, has a memory, it has a disk drive whether it is HDD or SSD, it has network card or network cards and it has GCPUs. But it's much more powerful. It has a lot of these quantities. It could have 16 terabytes of RAM, 64 terabytes of RAM, way more than what your laptop would have. The number of CPUs, the number of GPUs, the number of disk drives, the number of network interfaces. So, you can think of it as a big muscle compute device basically. That's what the server is and this is where amazon.com and cnn.com and eBay and all the big top notch and the big companies are hosting their applications and services. And of course, as your laptop, which is maybe a Mac or maybe it's a Windows one or a Linux one, it will have an operating system. The operating system is the one that uses the hardware, the RAM, and the disk, and the memory, and so on. So, that's the orchestrator on how these work. And that will be the mediator between your applications and tools and the hardware. So, this is the translator or the brain at the end is the software. And of course, it it depends on how you want to do it. You can have multiple applications on your server. So, we have the operating system, on top of which we can install tools and applications, and so on. All right. So, okay, fine. I'm going to buy a server. I'm going to have that. But as the number of users increases, maybe that server is going to be really exhausted, overwhelmed to a point where it may slow down or just break apart. It cannot serve 1 million users who are trying to come because it has so much memory, but it has been exhausted. It has so much CPUs, but the users have been using them, and the operating system is unable to handle that 2 million requests per minute that are coming in. So, in that case, we need to add more servers. And that is called scaling servers. So, in that case, uh two more, four more, five more, six more. Of course, there is a process and a logic behind how many you would increase, and that is physical servers. But when it comes to the cloud, they're going to be logical and auto scaling configuration. As the number of servers increases, we cannot keep them under my desk in my office. I have to move them into a secure place. And this is where the talk about data centers started about 20 years ago. They used to call them server farms before. So, data centers are massive locations, real estate location that is air conditioned, secured, monitored, and prepared. And as you can see in the picture, it has cabinets where this is one server, for example, in that. So, this is a second server, and so on. So, each one of these is a server, and then from the backside, they're going to be cabled and connected to the network, and this could be part of Facebook or Instagram or Google or one of the data centers, one of the big data centers. Okay? When the cloud started, data centers are now becoming hosted by providers, like AWS, like Azure, like GCP, like Alibaba, and so on. But in essence, a data center is a data center. So, number of racks, there could be thousand of racks, and they are built in rows in a very clean place that is air-conditioned, monitored, powered, secured, with surveillance, with access control, and so on, to host the applications on servers. All right. So, we have the server, we bought the most powerful one, and we spent $200,000 on that P server platform, and life is good. Now, it can handle 2 million requests. And then we needed more because our business is growing, and we added more servers, and so on. Now, when you have one server, and you start installing different applications, let's say 3 4 5 10 20, we are just dumping applications on the servers, and then we realized we started to have issues. Why? Because I have multiple applications written in Python, but they need different versions of Python. Some of them are old, some of them are new, and now they need different runtimes. Or maybe Java, and they need different versions and runtimes. Similarly, we are running MySQL version 8 and MySQL version 5, and all dumped on the same server. Now, someone comes to troubleshoot a problem for application A, and then looks at it and You "Hmm, Python 3.8. No, that's wrong. Delete the file. Let's download Python 2.7, and that's the right one." Then that breaks another application that was using that file. So, dependencies and versions and all that is an issue when you start dumping applications on the same server. One would say, "Okay, so why do we have more than one application? Why don't we have one application per server?" Yep, that's easy, but the server is very costly. And you would like to use or to utilize the resources within the server as much as you can. But doing so and putting more applications ended up being dependency issues and troubleshooting and errors and all that. So, drawbacks include resource contention and inefficiency, dependency conflicts for different versions, lack of strong isolations. The admin of one application can see the files for the other application, and he has or she has no clue about what that is, and they start deleting and changing things. So, you have security risk if one application is compromised, everything else in the server is also compromised because of the lack of isolation. And I want to scale app one because it's in high demand and all that, but app two and app three are okay. So, what do we do? We add more servers, and we only dedicate them to app one? How about the resource utilization on the additional servers because app two and app three, they don't need that. They have enough power on that one or two servers. So, adding more, that means it's going to be waste of money because the resources are going to be very well utilized. And of course, deployment and maintenance hell. And add to that, what if you want to move it to another data center? I want to move that application. We are now growing, so we bought a new facility, a new headquarter, and we would like to move our stuff. So, now we need to move the physical servers, not just take a backup and then move the backup on the other side. So, it becomes a painful thing with physical servers, and that's why they said, "Okay, why don't we just go into virtualization, which is the next step?" And of course, lack of portability, as I mentioned. So, that had led to a solution called virtualization. Why don't you split your physical server, the one that has the biggest muscles on Earth, and split that into multiple virtual servers? And you have this much disk space, and you have this much RAM, and you have this much CPU. Why don't you virtually split that among the virtual servers? And that will give you the isolation you were looking for. That will give you the best utilization for your server resources. And that will also give you the portability if there is a way I can take a backup of each one of these virtual servers, which is going to be much less than a physical server, and then move it into the other location. And scalability now, put up one into a virtual machine, put up two in a different virtual machine, and so on. So, this is how it looks like. So, in virtualization, so as you can see, here and here, they are identical operating system. They could be identical. Both are Windows or Mac or Linux. But then we introduce an emulation layer, on top of which we start creating what we call virtual machines. So, we start to create the virtual machines or the virtual servers, and we put up one in one server, up two in another, up three in another database, uh MySQL in a fourth one, database Redis in a fifth one, and so on. So, we did that. So, the hypervisor would make each virtual machine feel that it has all the required disk, memory, GPU, CPU, network cards, and so on, that it needs for the operating system to function and for the applications to function. So, this could be a virtual machine with a Linux, let's say real Red Hat Enterprise Linux. This could be a Windows server, and this could be a Linux Ubuntu based, for example. So, now we can have different operating systems. They are isolated from one another, and I can deal with each one of them as a one app virtual machine. So, now isolation and conflicts and dependencies and all that disappear, and I have better portability. So, this introduced us to the concept of virtualization, which has been ongoing since 2003-2004 time. So, virtualization allows us to run more than one virtual machine, multiple operating systems and application on a single physical server, which is a good thing. They are isolated, and we can take a backup of each virtual machine, but of course the backup is going to be a good size because it does have a full operating system. So, full operating system plus the apps and so on, this is going to be in the tens of gigabytes in size. And a VM is going to be a set of files, obviously. So, what are the resources that the hypervisor facilitated access to for each virtual machine? So, it will grant it or provide it with a VCPU, V memory, V disk, and V network card, VGC PU, and so on. So, why do we say V? Because this is a virtual machine, and this is not a physical CPU. This is an allocation of the actual CPUs on the physical server. So, that's why we call it VCPUs, V memory or V RAM, and V disk, and V NIC, and and so on. So, each virtual machine will be given what it needs for its operating system, we call it the guest OS, and the applications to be installed successfully and to perform successfully on the virtual machine. That's why we have the V neck, we have the V desk, and we have the V RAM, and the V CPU for each virtual machine. What are popular hypervisor providers? We have VMware vSphere, we have Zen, we have Microsoft Hyper-V, and we have Linux KVM, we have Oracle VM VirtualBox, and we have VMware Workstation. Virtual machines, despite they are much better than physical servers for the reasons we have mentioned, but they have issues as well. So, first one is they are heavyweight. Each one of them has a full operating system and the applications and so on. So, they are slow to start. They could take minutes to start depending on how many apps and packages are installed. So, limited scalability because the physical server has so much memory and so much disks and all that. So, it I can go maybe to 5, 10, 15, 60 virtual machines, but then what? I have to spin another physical server and so on. And the problem with the reproducibility is an issue. So, a developer is working on the app, works perfect on his machine or virtual machine on the server, but now ships the image to the testing team, but the testing team, when they are starting the application, there is a lot of errors. But then he would say, "Oh, but it works on my machine. It's your problem. There is something missing, maybe dependencies, maybe you have the wrong versions. You need to make sure that everything is exactly like the long list I have." Boom. Go ahead and build the same machine, or you know what? Come and take my physical server, ship it to your location, and work on it. Of course, that's stupid to do. So, reproducibility will be a problem with virtual machines, and we have multiple operating system. Each virtual machine requires its own operating system. So, let's say I have three virtual machines and they're all Windows, but then I have I need the license for the first one, the second one, and the third one. I need to install a complete Windows on each one of them. I need to start that. I need to take the resources and the disk space and the memory for each one of them. So, that's a waste of resources or inefficient use of resources. Image management, the virtual machine image management is not as easy, specially because of the size and because of the lack of reproducibility perfection that we talked about. And portability, of course, is going to be an issue based on what we have discussed. So, what was the reason or what were the drivers of looking into containers if we had virtual machines? So, this section is going to take us from the virtualization to containers and what was the background. What was the reason that we moved or technology moved into containers? We still have virtual machines, but the more popular or the one that is getting more attraction is the containerized, the cloud native, and the containerization, Docker, Kubernetes, and all that. So, before we delve into this, let's find out or let's understand what is a Linux software process or what's a software process in general if we are talking about Linux or Microsoft Windows and so on. So, the process in Linux terms is a running instance. So, an execution of a program. So, let's say, for example, Engine X or Telnet or ping or anything any program. So, any tool or any program that when it is executed it has its own memory, it has its own CPU resources and system resources, but it is managed by the operating system kernel or the Linux kernel. So, if I have Apache, for example, or Nginx, or Tomcat, or whatever is the program that I'm running, or maybe a calculator on Linux, or Python, and then I run it, then it's going to be run as a separate process, kind of isolated from what is around it. So, when we run any program in Linux, like Bash, Nginx, Python, Apache, and all that, so what would the Linux kernel do? It will load the program code into memory. We're talking about RAM, the random access memory. It will allocate it a unique process ID or PID, and it will create a process to execute the code. So, these are the three things that will happen each time we run a program. So, each time you run a program or a tool that you have in Linux, there will be a process generated based on that. Why did we mention that? Because containers, when they run into Linux or or Windows, they run as lightweight isolated process that is in a shared operating system. As we'll see throughout the lab that we're going to run all of that on Ubuntu Linux. So, each time when you run a container, it's going to be a small size, lightweight, like a small size. It doesn't need a full operating system. We're going to get into that. And everything that container, let's say the container is for Apache or Nginx, anything that it needs in order to run, in terms of code, libraries, environment variables, runtime, configuration files, they're all going to be within that process. So, let's take a simple example, Python calculator written in Python. In order for Python to run, it needs to have the runtime. So, basically the interpreter that will take the Python commands and tell the machine or tell the hardware and software what to do with it. So, that with any tools or configuration files and with the code in Python itself and with any environment variables, usernames, passwords, and so on, all will be encapsulated into what we call the lightweight isolated process, which is the container. And this is why we brought into attention the Linux process or what is the Linux process. If you put that in a visual format, let's say that the container is this box. Um we are just trying to visualize it. This is not We don't have boxes in operating systems. So, the code in Python, in my example, the runtime, the interpreter, the Python 3 that will run this, and any configuration files required, and any binaries or dependencies or libraries that are required, for example, if I'm running deep math, there is a lot of libraries I can load in Python that would help me with that. If I'm doing data analysis, machine learning, AI, data science, analytics, then there will be a lot of libraries I can load that will help me. All of that is going all together be put into the container, and the container will be considered the program that when I run, it will run in an isolated process. Think of shipping containers. So, let's say the container on the top, if I ship that container and I put all my furniture and my appliances and all that inside the container and it is closed, now, if I decide to send it to Latin America, when I go there, I'm going to find exactly the same. Well, if they I decide to move to Australia, the same container, then it will be shipped to Australia. When I travel to Australia, I'll find exactly the same content inside that container. So, that's exactly the concept of containers and it was derived or it was inspired by the shipping containers. And of course, we can run applications inside containers because the code we are talking about here will be more or less to do a specific program, a specific function, or to solve a problem, or maybe be part of an application. The features of containers and the reason why we getting into that because we are going to take a step back afterwards and contrast that to the issues or limitations we discussed with virtual machines. So, the features in containers that they don't need a full operating system and we're going to explain how. Each one runs into a process that is isolated, self-contained, and it has everything that it needs. It is much faster because it doesn't have a full OS and it is lightweight, it's much faster to create, start, and tear down. It's repeatable. The same one, reproducible basically. The same container, if you run it here or if you run it in Hawaii or if you run it on AWS or on premises, it's going to be the same thing, reproducible. And definitely like shipping containers in shipping industry, it is portable. And it's easily scalable. Lightweight software process then we can scale very easily. All right, so that's all great, but how can a container run without an operating system? That's what I mentioned and there has to be a way to do it, right? In order to build, ship, and run containers, there has to be some magic that happens on the host. If it is a program software process, it has to be running on a computing device, on a server. So, how can that happen? How can we run containers? Let's say this is container one and container two. How can we run this on this server that has an operating system there has to be something that would allow the container to feel that it has an operating system. So, it will lean on the operating system of the host. So, basically they are going to share the kernel of the operating system, be it Linux or Windows or Mac OS, we don't care. That operating system is going to serve all the containers. The kernel is going to serve all the containers that are in the same host. And that emulation or that mediator is called the containerization engine or the container engine. Or if it is Docker, then it's the Docker engine. So, now we have the dotted line that represents a container. It has the application code, configuration, dependencies, binaries, libraries, anything that it needs to run. And it is a self-contained entity that will run as an isolated process. So, without the container engine, we cannot run containers. And notice that we don't have a hypervisor here. We don't need a hypervisor. So, now we are sharing or we are allowing the operating system to be served by the engine, the container engine, to serve all the containers. And this is how the containers don't need their own operating system. Containerized applications, as we mentioned, they run into separate processes isolated. And Docker is the most popular container engine, and it has been out for about I don't know, 12, 14 years now. Docker is available as a community edition, which is free. And it's also available as a paid edition, which is enterprise edition or EE. All right. So, Docker containers from the Docker file to an application. How can we start a container? We looked at the previous slide that there was an existing container. But where does it come from? How do I start it? How do I write or what do I need to do in order to configure a container and allow the operating system to find out that there is a container. So, we start from what we call a Dockerfile, a script text that you write down. Of course, it has syntax and there is some understanding and knowledge behind it. Once you have that Dockerfile, then it it will be used to create what we call a container image. And the container image can be used to run containers across different environments. If you look at how this happens, we have the Dockerfile. And here is an example. It's a text file. Remember when we said one of the advantages of containerization is the fact you can do version control. At that time, I mentioned that version control is possible because it is more or less text files. So, from the Dockerfile, we need to create or build what we call an image. And as we'll see shortly that there is a command called Docker build. It can take up a Dockerfile and build the image. So, what's the image? That's the template from which you can create containers. Think about it like the virtual machine ISO file, for example, that from which you can build virtual machines. Now, we can do a Docker run command and then we end up with the running applications inside containers. And of course, this is reusable. So, the image can be used hundreds, thousands, tens of thousands, millions of times without any issues. Let's put them side by side and do a contrast. Virtual machines and containers. So, on this side, the hardware is exactly the same. The operates operating system could be the same. And then we have here the hypervisor. The purpose of the hypervisors was to emulate or let each each virtual machine, let's say this is VM2 and And was VM1. So, let's every virtual machine think that it has the right hardware that it needs. They were not leaning on the operating system because each one of them had its own operating system. Full operating system, be it Windows, Mac, or Linux, or whatever. On this side, we don't have the hypervisor the hypervisor, but we have the container engine, Docker engine. And then, we have the containers running on top sharing the kernel or the operating system. So, the way they share the kernel is through the Docker engine. Now, a question. Can we run containers on virtual machines? So, here it's obvious that we can run it on physical servers. This is a physical server. There is no hypervisor. So, that is absolutely a physical server. Now, can I run it on a virtual machine? And the answer is absolutely, you can. And if we put both together in one drawing, it will be exactly like what we see now. So, we have the hardware, the operating system. This is the physical server. And then, I have the hypervisor, which can create VM1 and VM2. In one of the virtual machines, which has a full operating system, I'm going to install Docker engine, a container engine. And the container engine will allow containers to share the guest OS in this time. So, they don't have anything to do with the external operating system on the physical server. And on top of that, as long as I have the Docker engine, and I have the operating system, then I can run containers. That will be container one, here I'm talking about the internal one, and container two, like the arrows show. So, I have virtual machines. I can pick one of the virtual machines and make it a container host by installing the Docker engine or the container engine, and then they can start working together. Side-by-side the comparison or why the containers, how did we get the containers from virtual machines? Because we had the fact or the issue or the limitation that virtual machines are heavyweight, slow to start. And that's why containers are lightweight and they start in milliseconds. Virtual machines have limited scalability because of the physical host's limitations. Containers, they have much faster scaling and they don't take much time and they don't take much space as well or resources. Virtual machines are low in portability because of the reproducibility limitations. Whereas containers are have excellent portability. Virtual machines, I have one operating system in each one of them. So, that's more resources consumed by the requirements of the operating system. Whereas in containers, they share the operating system of the host. Here we have inefficient image management. Part of it is the size and the variations between the different environments. Whereas here, it's efficient image management and we will find out later about Docker Hub and repositories where or registries where you can ship your built images and then they can be pulled for whatever reason in whichever location. This one has poor development tested production. Basically, environment parity will be poor. Whereas in containers, since they have everything within, they are excellent for different environments and for CI/CD applications as well. So, what are examples of the popular container engines and runtimes? We have Docker, of course, that is going to be the course. And then we have Linux containers and these are more low-level containers. That was before uh Docker, the LXC LXC or Linux containers, and they're system-level containerization framework. Then we have containerd, which is geared more towards Kubernetes. And then we have CRI-O, which also is geared towards Kubernetes deployments. Let's talk about Docker architecture. What are the components that make up what we call a Docker host at the end? What are the different software components that play within the container engine or Docker engine in order to allow us to perform or to use Docker and create containers and tear them down and so on. So, Docker is a software platform. The Docker engine that we discussed is a software. It's not a hardware thing. That simplifies creating or building, running, tearing down, and while it is running, managing the containers or applications in containers at a scale. It is developed by Docker Incorporation, and it's an open-source software, and it virtualizes, as we mentioned, or allows the sharing of the kernel, the host operating system. And the applications running in containers, they will be running in isolated environments, the processes that we discussed. And Docker can be a community edition, which is free. Anyone can play with. And there is an enterprise edition that has additional features, but you have to pay for that. So, what are the components within uh Docker host that in order to be able to use it efficiently? Number one is the Docker client. That's the interface. When you type anything, any command that starts with the keyword docker, then that client is going to understand what you want, and that is going to send in the request to the next component. So, it enables developers, users to interact with docker. That's the interface that you have. And we can run commands like docker pull, docker run, docker build. Don't worry about that, we're going to find about it later on. And we use command line interface to do this. So, when we use the docker commands, what happens is the client is going to understand what you want. It will validate it, and then it will send it to what we call the docker service or the docker daemon or docker D. We're going to talk about this next. The next component is the docker host. That client, where does it exist? I need a host. I need either a virtual machine or a server in order to install the docker engine, and then I will have the CLI. So, that thing is called the host. The virtual machine or the server where the docker engine is installed is called the host. And as we mentioned, it can be a physical machine, physical server, or a virtual machine. Then we have the docker daemon, or the name is docker D, which is the heart of docker. That's the brain of docker. Then we have docker images. So, we start with a docker file, we create the images, and then we create the containers. So, the images are the templates. These are read-only binary templates, and we can use them to build containers, and they are reusable. I can build 1 million containers from the same image, and it's not going to vanish or expire or be depleted or anything. So, the templates, they define the application code, where to get it or download it from, any libraries required, any dependencies, any configuration files, any environment variables. They are all going to be in the image and obviously they must have been in the Dockerfile which was transformed into an image and now we can run the application that this code is building inside containers. So inside the host we have the demon and then we have images. So we I can have multiple images on my host. Okay, let's zoom into the Docker demon to find out that heart of Docker. What exactly does it do? So the Docker demon is going to wait for API requests coming from the client. We mentioned that the client what as you type commands it will validate and then it will send in requests to the demon. And then it will create containers and it will manage them. It will create images, networks, and volumes. Okay? So the demon is going to be the heart of all this. Is it itself going to create that? Hold on. We're going to come to which component exactly within Docker that is going to do the actual creation and management of containers. Also the Docker demon will build container images as requested by the client. When you do the Docker build command, it's going to build images from the Docker files you are pointing to. And it interfaces with the Docker registries. So it is the middleman between the client, the registries, and what happens on the host. So when it interfaces with the registries, it's either to publish, we have created an image, let's put it on the registry, so people can benefit from that, or to pull an image that doesn't exist but I need it. So as requested by the client, the Docker demon will be able to do all of this. And it will manage the life cycle of the containers from starting, stopping, deletion or removal, all of that is also managed by the demon. So if we have the image and we have the demon which are inside the Docker host, then we can start building containers. So, containers are nothing more than encapsulated environment which you can use to run applications. A container runs as a process in an isolated environment. We know this. It packages the container packages the application and its dependencies in a single executable unit, the program or the process that runs at the end. All right. So, since we talked about the demon and the client and the host and we talked about the images and the containers, then we need to also highlight the registries where we can host and store Docker images. So, if I have an image, then I can if I create the image then I can ship it into the registry. So, it will be safe. If my laptop crashes, then it is in a safe place. I can provide the link or the URL for others to download that image and use it. And it I can make it public if it is something unique that it doesn't have to do with my corporate and I'm building and giving back to the community, then it can be published as public and everyone can benefit from that. Docker Hub is the public registry that anyone can use. So, that's the most famous registry that is available to date. When needed, we can pull images to the host from the registry. So, this is going to be within the host and then we can pull images if we need them. For example, this is a brand new host and I would like to start an Ubuntu container. So, then I need an Ubuntu image or Nginx or Apache or whatever. And users can also push their created images to the configured registry. So, again, I'm pushing from the host out or I'm pulling into the host. So, pushing and pulling images. We put all of that in one page, so it becomes easier for us to deal with. Then we have the client, we have the host with the Docker daemon, we have the registry where we have all the images that we need. If it was Docker Hub, or it could be a private registry for the corporate, so we have all the images we need for the corporate. So, most probably we have built them, and now we are using them. So, if I have a Docker pull command issued by the client, the request will go to the daemon. The daemon will head to the registry. If it is not available on the host, then it will head to the registry to see if we can find it. Let's say, for example, I wanted Docker pull, I wanted to get an Ubuntu and a Postgres uh database. Then the Docker pull will bring in these images, and they are going to be on my host. Download them on my host. Now, since I have them, then I want to start building the container. So, I can do Docker run, and Docker run will go through the daemon again from the client, and will use the images that we have downloaded to create uh an Ubuntu container and a Postgres container. And of course, if you have the Docker files, we can build our own images as well. So, that is something also we can do, and the request will go to the daemon. The daemon will know which Docker file, will pull it, and then we'll create an image, and then I can push the image into the registry, as you might have guessed it. All right, let's find out how Docker works inside the host. Remember when we said that the Docker daemon is how it manages, or is the entity that is supposed to manage, create the images, push the images, deal with the registries, understand what's coming from the client, and manage networks and containers and volumes and and so on. Within the host. So, does it have any assistance? Let's find out. So, understanding how Docker's works inside a host. So, the CLI will communicate with a Docker daemon or the Docker server, which is abbreviated Docker D. Then, what would Docker D do? Docker D will process the API requests coming from the client, and it will utilize container D functionality. So, there is a component within the daemon that is container D to manage the containers life cycle. Then, it does container D itself create and kill the containers? So, the container D will manage the containers, will manage the storage, and will manage the networking relevant to the containers, and it pushes and pulls images. So, the container D will function within the daemon in order to push pull messages, manage containers, storage, and networking. Then, we have something called runC, and that is like lower, closer to the container, which will create and run the containers. So, now we have the CLI, we have Docker D, we have container D, and we have runC. All together are going to be within the Docker engine inside the host, and these are the components that work together behind the scenes. I don't see that in order to make sure that our requests to build images are fulfilled, our requests to push or pull images are fulfilled, our requests to build containers, to stop them, to terminate them, or to build volumes and storage or networking are all understood, and they are fulfilled, as well. So, let's go ahead and set up the environment that we are going to use. And we are going to do it in AWS. I know a lot of you are going to push back and say, "Why not on my laptop? I can do this virtual machine. I can do VirtualBox. I can do this. I can do that." I have my reasons, so let's discuss that first, and then at the end it's up to you. All I need is a virtual machine that will be the Docker host, and we're going to do all of our labs on that host. Now, why AWS? Why do I prefer to do it in the cloud? If you If you want to do it in Azure, if you want to do it in GCP, that's fine as well. My point is, let's do it in the cloud. Let's do it in the environment where you are going to be interviewed and asked question about. And also, that when you defend the fact that maybe you don't have actual experience in Docker or in cloud or in DevOps, then you can at least say that I have created these projects in the cloud. So, you know how to deal with the cloud. If they ask you about AWS or Azure or Google Cloud, then you know, and you have dealt with it. It's not a black box for you. So, let's go through why I think working in the cloud is way better than an isolated environment or a sandbox. First of all, you are practicing in real-world environments, environments that you are going to see and touch when you work in your actual job after you get it. It's much faster and much cleaner to set up and delete. So, let's say you bring up a virtual machine, that will be your Docker host. Whatever happens and that virtual machine is trashed, then you can in 2 minutes launch another one. You can build confidence, personal confidence, technical confidence in working remotely and collaboratively as well. In today's IT, you could be working with the team in your corporate, but they are in Japan, for example, and you are doing something for them in the cloud in Japan, and you are in the US, or you are in Europe. Then, the confidence of working remotely and connecting to your infrastructure remotely and building that remotely is going to be gained as opposed to "This is my Windows laptop. I'm going to do stack work stack overflow and find out how to do a VM." But, then the mouse doesn't work. I cannot copy. I cannot do this. I cannot do that. And we have left through hell through other courses with other instructors in our academy about VirtualBox and the compatibility for the different and the resources and the M1 on MacBooks and all that stuff. And then, you are going to master the glue between tools. When you do anything, the cloud is going to be there. In today's IT, in I would say 70-80% of the cases, the cloud is going to be there. Some are on premises still. So, when that happens, then you will be already using the cloud, using the pipelines, using other tools in the cloud, and this is not new to you. Linux operating system, you are going to be practicing on Linux operating system all the way throughout the course. And again, you can defend your project and your GitHub por- portfolio for the projects you have done when you are asked, "Yeah, but you don't have practical experience." Then, you can reply back and say, "Yes, but I have done that in the cloud, and I have done that with real environment, and these were not sandboxes or isolated or following a dumb script. I have worked myself from scratch on my projects, and I have done everything from the ground up." And most importantly, because this is why a lot of people they push back on any environments in the cloud is cost and it is free. Whatever we are going to do throughout this course. If you have a brand new AWS account, you will get the resources that we are going to use in this course for 12 months for free and I'm going to tell you exactly what are the free tier services you are going to enjoy for 12 months without having to pay a penny to AWS as long as you don't cross the monthly limits that I will explain in a different video. All right? So, hopefully that has convinced you to start doing this. All you need is a credit card and in the next video, I'm going to tell you how to create the AWS account. What about if you cannot or you do not want to create an AWS account? You don't have a credit card. You don't want to use your credit card. You don't trust me. You think that they're going to charge you. You want to do it on your laptop because you just bought it and it's new and you're happy with it and you would like to get a return on investment on what you have just paid off. Whatever the reason is, there are alternatives, although you will be missing on all of these points except for the Linux OS. But other than that, it's not going to be real world environment. It's not going to be fast to implement. You may run into issues. And it doesn't have to do with real world environment. So, it's up to you at the end. So, what are the alternatives? The alternatives are Docker Desktop Personal and this works for for Windows, Mac and Linux. And if we click on this link, it's going to take us there. So, you have the number one containerization software developers and terms and if you want to choose plan, of course we are not going to pay for that because there is one that is free. The Docker Personal is free, as you can see. And you can get started and then you can follow, fill in your information, whether it is personal or work related, fill in your profile or maybe log in with GitHub or Google and then you will follow that to download it and install it on your machine. Let me know if you need any help with that. I can help you with that as well. Why I did not include a video for that? Because I am opposing that direction, but it's your freedom. Do whatever you want. Let me know if you need help, and I can post a video about how to install it. So, this was the first alternative. The second one is on your laptop, you can also do a VM, a virtual machine. So, you have a Windows laptop or Mac or whatever, you can carve some of the hard drive, and then you can download Oracle VirtualBox, and you can start con- creating containers. And this is from Oracle, and this is where you get it from. So, Oracle VirtualBox, and then you can download based on which platform you're going to use it for. You can even do it on Ubuntu and other Linux distros as well. So, choose the one, download, follow the steps, and then you will install it. This one is a little bit tricky for the mouse and copying and all that, but definitely, you can at the end get it done. Again, I'm not opposing, but I'm recommending don't waste your time on that. You need to learn Docker, not how to set up virtual boxes, which you are not going to do in real life. And it is free on on the cloud, on Azure, on AWS, on Google Cloud. Choose the cloud that you want. It's up to you. So, what are the options we have? We have the virtual machine from VMware Workstation, and that works on Windows and Linux. And again, if you click on this, you will go to the website where you can start downloading Fusion or Workstation, depending on the platform that you're going to use. So, this one is uh Fusion Pro for Mac, and you have VMware Workstation Pro for PC. So, choose depending on your device, and you can follow the steps and install it again to your liking. But what I guarantee you in all of these cases is it's going to waste time. It's going to take time. Maybe if you are in IT and you are proficient about about this, maybe half an hour, 20 minutes, 1 hour. And if you are not, maybe it will take you days and it will stop you from proceeding with learning. So, again, I go back to the benefits of using it in the cloud for free. All right. Now, since we are going to do most of our hands-on lab and practice in AWS in the cloud, we're going to do work extensively in the cloud in this course. And that will be a great opportunity for you to learn the cloud as well while you are learning the IT fundamentals. So, what we'll do is we are going to create an AWS account. Free, don't worry. You will not have to pay anything. And that will make it easier if you have an old laptop, if your laptop is busy or not performing, it's um full, the disk is full, you don't have to upgrade to another laptop, just continue to use it in the cloud. That's it. So, what do we need to do? We need to go to aws.amazon.com. aws.amazon.com. And you will get a page like this one where you click on create account. So, we need to open an account. We have to have an account in order to use AWS services. So, I'm going to click on create. And this is a free account from here. Get started for free. And this will tell you about the the options you have. You have a free plan, you have a paid plan. What's the difference between the two? The free plan is an account. It doesn't give you access to all AWS services. So, there will be some services that you will not be able to use. And scaling of services is going to be capped. So, when you are working and you are trying to scale and do like advanced stuff. It will not scale accordingly because there are some thresholds based on the credits. So, these are the disadvantages and the account is going to be closed after 6 months from creation. You will receive $100 as soon as you open the account. So, you can use AWS services worth $100. If you use them in 1 month, that's it. The account is unusable. You cannot add credits unless you change it, upgrade it into a paid plan. And there are some activities that if you do, exploring some AWS services, and if you do them within the 6 months, you will get another $100 credit. So, you'll have $200 credit and that's a lot of money for someone who's learning AWS. I mean, that could easily help you do a lot of AWS stuff that would take a year to to work on. And you you'll have free usage of select services and there's no charges whatsoever. So, if you are worried about incurring any charges, that will be the account. But of course, you have limitations. You can always upgrade within the 6 months to the paid plan. And in the paid plan, the same thing. You get 100 credits and another 100 if you do the AWS services exploration, includes free usage. You can scale and all that, but you are going to be charged if you go beyond the thresholds. Workloads can scale beyond credit thresholds because it's paid, you will pay for it. And you have access to all AWS services. If you need to know more about the differences, there is a an FAQ. So, these are services that are available in both and you can keep exploring which services and you can always click on show more and it will tell you if this is available in both or not. And you will get an Yeah, this is the FAQs. And in the FAQs, they will tell you about So, here the free plan accounts, paid plan accounts, earning additional credits, what you need to do exactly, and what are the activities that you need to do in order to explore that. How do I earn additional free credits? And you go through this console home walk-through and dashboard, and you can find out what needs to be done. So, you have everything you need, and you can find it by yourself without having to ask me for any questions regarding these accounts. All right, let's go back to creating the account. You need to write an email that is going to be the communication between AWS and you for bills and for updates and so on, and a nickname of your choice for the account. So, once you have entered the email and the nickname, click on verify email. So, what they will do is they will send you a verification email to ensure that this email is an active email and you have access to it. And once you verify, you'll be taken to the next step. So, once you enter the email and the name, you will get into this CAPTCHA where you have to do the security verification. So, go ahead and do it, and then click on submit. Once you do the CAPTCHA, enter a code that was sent to the email that you have specified. So, you need to get that code from the email and enter it here, and then click verify. And as you can see, the email has been verified now. Now Now, you need to configure the root user password. Basically, the username will be the email that you entered, and this will be the password, and this is the most powerful user in your account. So, you have to be very careful, and it's better to use a password phrase, not an easy-to-guess password. And the conditions are available here. It has to be at least eight eight letters uh long, at least three of And it includes three of the following. Upper case, lower case, numbers, and non-alphanumeric characters. So, go ahead, create your password and confirm it, and click on continue. You have the two options that we talked about, the free and paid. It's up to you. If you don't want to be charged under no circumstances, but you're okay that you you will bump across some services that you're not going to be able to use. And of course, for this course, the free plan is more than enough. I would go with the free plan for now. Now, you need to select what will be the use of this account. So, I'm going to click on personal. Put all the details. Your personal details. It has to be accurate. The phone number has to be accurate. The country and all that has to be accurate because they are going to send you a code to your phone, and you will need to verify it. So, now they have verified the email, they will need to verify the phone number as well. So, fill this, and after you do, then tick this box and click on agree and continue. Now, you will need to enter credit card information. You might be wondering, why is AWS asking me for a credit card if this is a free plan? Simply, they need to verify your identity in three different ways. Email was one, phone was another, and now credit card information, that means they know you, they can verify, and there is no way you can have wrong information entered here because they will check, and probably they will hold like a dollar, 1 euro, or a small amount on your hold, they are not going to charge it and it will be released in a few days, but this makes them sure that there is a payment method just in case in the account. And if you upgrade to a paid plan, then any extra charges are going to be charged to this credit card. If you are on the free plan, they will not charge you. So, you don't worry about that, but you have to enter this information. There is no way out of this. So, fill this information and click on continue and I'll see you in the next page. Now is the sign up for AWS. You need to confirm your identity and now they have given you an option. They can either call you and give you a code or you can receive a text message. So, both of them are used to verify that this phone is yours. So, go ahead, fill in the information and click on send SMS or you can have a voice call if they want to call you and give you the code. Either way, fill in the number, click on send, and then they will text you or they are going to call you depending on your choice. Go ahead, do this step and I'll see you in the next page. Now you are faced with another CAPTCHA and then they will send you the verification. Or the verification code or the text message. So, you have to fill this CAPTCHA and then you will get the code. All right. So, this is the page and you will get the code. Enter it here and click on continue. Okay. So, I got the code. It is 5320. 5320. Continue. Okay. In my case, because my um credit card, my phone number, and all that exists already on AWS, they are refusing to give me a free plan and they will upgrade me to a paid plan. So, anyone who created an account before in the good free tier all times where we could create five 10 accounts and use free tier in all of them for 12 months, this is not the case anymore. You need to use a new credit card, a different phone number if you would like to get around and have another free tier. In your case, this shouldn't be a problem because if if you are a newbie to AWS, this page will not appear to you. So, in my case, I'm going to say okay, I agree. I'm not eligible for the free plan anymore. Anyways, I'm going to click on confirm because I want to show you the rest. So, that page will not appear in your case. Now, we come to the support plan. Leave it to the basic and click on complete sign up. All right, so I'm going to click on that. And guess what? Congratulations, you have an AWS account right now. Click on go to AWS management console. All right, so once you log in, that means you're going to the management console. This is the portal. This is the orchestration and automation and management tool in AWS. So, I'm entering my account right now. All right, so let me take you through a walk through of the AWS management console to help you get familiarized about the AWS management console, how to use it and all that. Let's go ahead. Okay, so this is this are few messages if you'd like to go through them. That's okay. For me, I'm not going to go through them. Let me make this a little bigger. So, this is the console home for a brand new account. So, this is an account which doesn't have any recently visited services or anything. If you click on this side, you'll find the account ID. You can go to billing and cost management where you can look at your bills and find out your consumption and so on. You can sign out. And here you can see that you have all the AWS regions. So, by default, it has chosen for me this as the default, the one in Stockholm in Sweden. But, you can switch to a one closer to you because that will help you with the internet latency. If you want to play with an AWS service, work with an AWS service, then you can click on here and you can see that you have here a list of AWS services. Or if you know the service that you're going to work with, for example, in this course we're going to work a lot with EC2. This is the service that allows you to create virtual machines in AWS, virtual servers in the cloud basically. If you'd like to launch your own presence in AWS, you have to create what we call a VPC or virtual private cloud. There are some services under VPC that are created for you by default. You don't have to do anything about them and they are there for you. AWS assumes that this is like um common denominator that most of the people who are learning might need it and they volunteer and they create it for you. We're going to learn more about this later on. If you go into one of these services, I'm just going to show you how it looks like. You don't have to know anything about it right now. So, usually you have the dashboard. So, this tells you where exactly are you right now. So, I'm in the VPC dashboard, virtual private cloud dashboard, and these are the settings that I can choose or the stuff that are under the VPC. When you choose one of them, what you see on the right-hand side will be the details of what you have selected. So, for example, if I click on this, these are the subnets under subnet. VPCs, this is the the existing VPC. Route tables, these are the existing route tables. Now, let's go to EC2, which is the virtual machines in the cloud. And as you can see, this is the service. Here is the EC2 dashboard, as it says. Instances means virtual machines. And instance types and launch templates, and there's a lot of configuration stuff that also fall under the EC2 dashboard. For example, if I wanted to create a virtual machine, and you will be amazed at how fast you can do that. So, I click on instances. I don't have any, as you can see. But I can choose to launch one. So, this is the page that at the end, when you fill in all the information, you can just click on launch instance, and boom, you have a virtual machine in the cloud. So, what do I need to do? I'm going to call it first VM, first virtual machine. And here you have the operating system. So, you can do Amazon Linux, you can do Mac OS, Ubuntu Linux, Windows, Red Hat Linux, SUSE Linux, and so on. So, there are plenty of operating systems you can run on the virtual machine. Remember that the virtual machine needs a full guest OS. And after that, I'll leave it to the default. So, I'm assuming that I'm going to go with an Amazon Linux one. Any virtual machine has a V neck, virtual memory, virtual disk, virtual CPU, and so on. So, if you look here, you'll find that this is T3.micro. That's the size of an instance or a virtual machine. And it comes pre-packaged. So, the T3 micro will always have two VCPUs, 1 gigabyte of memory, and here it tells you the price is per hour if you use it. So, in my case, I'm going to choose, let's see if I can get to a smaller one. No, that's fine. That's the least I can do. So, T3.nano. Key pair, if you would like to access the instance remotely, then you have to create a key pair. Otherwise, I can do proceed without. We're going to explain that later on. Network settings, which VPC or where it's going to land. I'm going to leave everything to the default now because I'm just explaining that to you. Security. And once you are done with all of this, all you can do is launch instance. And congratulations, this is your first virtual machine in the cloud. Successfully initiated launch of this instance, and if you click on that ID, you get to here, and you will see that it is running, and we have created a virtual machine. Of course, as you learn the the the particulars or the specifics about each one of the attributes that we needed to configure, then probably it will take you another 10 seconds, 15 seconds, but you will have a virtual machine in no time. You don't have to virtualize your laptop, you don't have to learn about new tools like VirtualBox or VMware Workstation, and you don't have to do nothing. Your laptop is as is, you don't need to split or partition it to include a a VM. You don't have to do nothing. In the cloud, in your case, if you are new to AWS, it's going to be free. You have $100 credits, and you can do some exercises and gain another $100 credits, and it's going to be there for you for 6 months. You don't need anything else to do. All right? And at the end of the 6 months, as you advance, you can upgrade to the paid plan, and then you start controlling your expenses based on your usage, basically. You are investing in the environment that would look like the actual environments you are going to work on as you specialize in your career. All right? Hopefully that was clear. What I need to do now is I'm going to terminate the instance because my account is not a free account. And once I click on that, guess what is happening right now? You'll find that it is shutting down, and it will be terminated in no time. The second thing you need to do, and it is recommended by AWS, is I'm going to head to a service called IAM, Identity and Access Management, or manage access to AWS resources as they call it here. And we need to click on users, or I can go into IAM. And I would like to create a user that is going to be the one that we'll use from now on in the account. Why? Because it's recommended by AWS not to use the root account that you have used to create the account, because that is the one that has the most privileges in your account. It's not recommended to use that one for the day-to-day stuff. So, what I will do is I'm going to create a user. I'm going to call that user, let's say, admin labs. Or or can can be just admin. And I would like to provide access to the AWS Management Console, so we're going to go ahead and do this. And I'm going to create an IAM user as we mentioned, and I'm going to create a custom password for that user. Okay, you can click on show password if you'd like to view it. I don't want to share that with you. Next, do you want to add the user to the permission or attach policies directly? This is not recommended. It will work, but since this is not an AWS course, let's not get into a lot of details. So, administrator access. This is the highest privileges you can pro- provide to any user. So, I have looked for administrative, and this is the administrative access. Tick the box next to it. And then click on next. This is the permissions that you are going to provide to the user, and create user. So, from this point onwards, this is what I'm going to use. Now, if you want the credentials to be maintained, all you need to do is you can download the CSV file. It will have the This is the URL that the user needs to use all the time in order to look into the account. And this is the password. The only time you will be able to view this password is right now. So, you better download the CSV file, and this is the user. So, I'm going to use this in order to get into the account, and you will notice here that the name has changed. So, I'm going to copy this, and I'm going to download the CSV file. Please save it in a place where you know that is handy for your case. I saved it just in the downloads. I can really hit it later on. And then, now I can return to the users list. I can email that to myself if I would like to. So, I can email it to marketing@dolphinate.com, and I'm going to log out and try to log in with the user and see what happens. So, I'm going to sign out. And here, I'm going to use the URL. As you can see, this is the sign-in URL that we have copied. And I'm going to hit enter now. So, if you notice now, it has from the sign-in URL, it had find found out what is the account ID. So, all I need to enter now is the user and the password. And now, I'm Oh, I think I wrote something wrong. I think I misspelled the password, but I checked the CSV file, and I found it. In your first sign-up, you will be prompted to change the password. So, basically, the one that you have created with the user is a one-time, and you have to change it, and that's a protection. Once you change it, you are going to use that one from that this time onwards without having to change until it expires. And by default, I don't believe there is an expiry, but if there is, it will be like 90 days or something. So, you have ample time to use it without any issues. So, let's go ahead and change the password. So, now you will see the difference here on this side that it's not the course labs anymore. It's admin@theaccountid. All right. So, since we understand how to work on AWS account briefly right now, then let's take it to the next step. Let's go ahead and launch an AWS EC2 instance, an Ubuntu Linux instance. This is going to be the Docker host that we are going to use. So, this virtual machine or EC2 instance is going to be what we will install the Docker engine on, and this is what we are going to use for practicing throughout the course. Why Ubuntu? Why Ubuntu Linux? Why not Red Hat Enterprise Linux? Why not um AWS Linux? Why not other distros of Linux? Because Ubuntu is not going to cost you anything on AWS, and most probably you can do it in any other environment, and it's available. So, it's not a licensed product that will cost you a lot of money, and that's why we're going to go with that one. If you work on Azure, if you work on Google, if you work on premises or on your laptop, you will be able to find the Ubuntu image, and you will not find complications or cost associated with that. So, what do we need to achieve in this hands-on lab? So, here is what we need to do. We need to get to the AWS console, and then we're going to launch the virtual machine or the EC2 instance with an Ubuntu operating system, Linux operating system, and we are going to make sure that it is the free tier, and we are not going to pay anything for that. In any virtual machine in AWS, there is something called a security group, a virtual firewall that protects the instance and allows which traffic comes from the outside and which traffic is allowed to go outbound or basically from the instance outside. So, for that we're going to configure the security group to allow everything for now. We This is not an AWS lesson. This is not a cybersecurity lesson, and this is not a production environment. So, we By default, all the traffic from the instance going out by default is allowed on any security group. And we're going to allow all the traffic coming into the instance at the beginning. So, that's what we're going to do. And we'll configure something called an IAM role, and I'm going to show you how to do that. All right, so that's all what we need to do. And we're going and we're going to jump straight in into the AWS console and start working on this. All right, so here I am in the AWS console. So, what do I need to do now? I need to go into IAM before we leave. So, this is the identity and access management. If you don't know how we got here, just type IAM, and then you'll have manage access to AWS accounts IAM. Click on that, and then you'll get to this dashboard. Before I move any step anywhere, I'm going to go ahead and do roles. So, in the left dashboard, create on roles. Okay? I'm going to explain briefly what that is. We're going to click on create a role for an AWS service, and we're going to choose from here EC2, and then I'm going to scroll down click next. Then, in the permissions, I'm going to click SSM, and you'll find an Amazon EC2 role for SSM. So, I'm going to click on that, and then click next. And I'm going to call this IAM role Docker. Okay? So, I'm going to remember the name because we need to locate it. And then I'm going to go down and click click on create role. Right? And now if I look here, I'll find the role is right here. And if I click on it, I'll find that we have the permissions of Amazon EC2 role. Let me explain to you what that is. In AWS, so let's say this big box right here is AWS. All right? So, that's everything the EC2 instance and all that we are going to do is within AWS. And this is where the internet is. And this is where the different users or even my laptop that I'm using right now, it's connected to the internet somewhere. All right? So, what does the IAM role do? One of the methods that I would like to access the instance in order to install Docker and do all the labs is called SSM, Systems Manager. So, what does that one do? This is a service that sits within the AWS cloud somewhere, SSM. And any EC2 instance with an image from AWS will have an SSM agent, a software that is installed in the AMI, in the Amazon Machine Image, in the operating system basically of the instance. So, the recent ones, the recent instance, the recent versions will have that agent installed. As soon as the agent is installed and you bring up the virtual machine, then it will try if it has an IAM role with permissions to communicate with SSM, then it will establish a connection with SSM. All right. So, what is the point of having that? The point is this is like a pipe that is connected between them, a session that is communication channel open, and through that communication channel one of the ways is I can use SSM to connect and get to the prompt of the virtual machine, and then I can install Docker and do all the labs. We are going to see that next. So, without the IAM role, this cannot happen. So, we need IAM role, and we are going to use it when we are creating the virtual machine, okay? So, now we have fulfilled the prerequisites. I have the AWS account, and I have the IAM role. Now, let's move on to creating the Ubuntu virtual machine. Let's go back to the console. In order to create the virtual machine, I have to go to a service called EC2, Elastic Compute Cloud. This is the service through which we can configure virtual machines in the AWS cloud. I'm going to click on EC2. So, now I'm in the EC2 dashboard, as you can see on the left-hand side, Amazon Elastic Compute Cloud. And I'm going to click on launch instance. But, one thing before we move into this. Depending on your location, choose an AWS region that is close to you. How can I do that? As you can see here, I am now if I launch a virtual machine, I'm going to to have it in Stockholm, in Sweden. But, then if you click on that pull down menu, [clears throat] then you have if you are in the United States, you have North Virginia, you have Ohio, you have North California, and you have Oregon. So, if you are on the East Coast, choose one of these. If you are on the West Coast, choose one of these. In case if if you are in the US, go with North Virginia. But for EC2, I mean, nobody cares. Any one of them would satisfy that. If you are in Asia Pacific, choose one that is close to you. So, you have Tokyo, Sydney, Singapore, Seoul, Osaka, and Mumbai. Right? If you are in North America still in Canada, then you can go with this one. If you are in Europe, choose the one that is close to you. So, this is Stockholm, the closest right now. And then you have South America, São Paulo. So, these are part of the regions. What if you are looking for a different region? Let's say Bahrain or uh Dubai or South Africa, then you can go ahead and manage regions and choose which region you want to work with. So, in my case, I'm going to leave it to the default because it found out and this is the closest to me or maybe I will go with Frankfurt. I am in United Arab Emirates right now. So, Europe is close to me. If I was in the US, then depending when I used to live in California, then West Coast will make more sense. North Virginia, anybody can choose North Virginia without any issues. The reason for North Virginia is all the AWS services are first launched in North Virginia. And then they would they are rolled out into other regions in the world. Now, you need to choose which region that you are going to be working on consistently. What's the reason for that? Let's say I go ahead and choose North Virginia. I create my instance. And then next time I log in, without noticing, maybe I would go based on my location, I would go to the nearest region. So, that could be Stockholm or could be Sydney in Australia. If that's the case, then you are going to create that thinking this was in North Virginia. But then, when you move back to the US or when you you intentionally to the US, you start forgetting about resources you have created in regions that you don't use regularly. That's why, please try to fix a region and always check that this is your default region and this is where you're going to create your your resources. I get a lot of questions about I created the VPC and I did the subnets and I did this and I did that and I created instance, but I can't find them. Yeah, because you switched the region. And if you switch the region, you can't see the resources in the other region. So for now, let's go ahead and I'm going to create this in Europe and I'm going to choose, let's say, Frankfurt. That's the one I'm going to go with and this is the one that I'm going to stick with. What's the reason of choosing Frankfurt? Why geographical proximity is important? Because you are communicating with that region through internet links, right? So chances are if you are far away, if you're in Australia and trying to get to the US, then it's going to take longer and at times it becomes really boring that you click and then you keep waiting and waiting for the page to load. So choose one that is close to you and stick to it at least for now. So now I'm in Frankfurt and I'm going to go ahead and create a virtual machine. Launch instance means create a virtual machine. And here I'm going to name it Docker host. So I will choose the name Docker host. It's up to you. You want to call it George, you want to call it John, Samantha, it's up to you. Choose a name that makes sense to you and you like to use it. Then I'm going to go down and now it's time to choose the Amazon Machine Image, the operating system and it could have also some other components. Defaults to Amazon Linux and I'm going to go ahead and choose Ubuntu Linux in this case. And as you can see here, then I'm going to go with 2404. That's the version of Ubuntu. I don't want that and I'm going to create only one instance, so there are no worries so far. So, that's the AMI. Okay, right. Then, the instance size and it's T2 micro. And as you can see here that it has Let me just zoom in a little bit. T2 micro, so it has one VCPU, one gigabyte of memory and that's what it has. As you can see here, there will be a charge which is like 1.5 cent or something or 0.5 cent per per hour. Taken from your credit. Key pair name. If you want to connect remotely to the instance, there could be a chance that you need what we call a secure shell, an SSH, an encrypted connection between you and the between your laptop and the virtual machine or the EC2 instance. So, for this, I'm going to create a new key pair and I'm going to choose it I'm going to call it Docker key. I think I misspelled that. Docker key. And I'm going to leave this to the default. I'm going to create the key pair. Notice what will happen now. So, as you can see, it's automatically going to be downloaded to my machine. If it is a Windows machine, this is a macOS machine. If it is a Windows machine, you'll find that it is downloading somewhere in here. It is very important to know which path, which folder it's going to go to on your laptop because you will need it or you may need it depending on how you will connect to the machine. So, please when you see that, then you can right click if you if it is a Windows laptop, right click and find out the properties and the path where exactly it went. Did it go into C downloads or into a specific folder? I'm going to show you that in a different video, so don't worry about that. Now, we are talking about My machine is a macOS, so that that shouldn't be a problem. So, I know that it is in downloads folder. I'm going to save it. So, now it has been downloaded into my downloads folder. All right. Next step, if this is a brand new account like mine, then don't worry about going into here because they are going to be all the same. So, this is where the virtual machine it will exist and then for the subnet, I can just pick anyone because they are all the same and they are all connected to the internet and we call them public subnets. So, if this is if you are new to AWS, just choose any one of them or just ignore it. Auto-assign public IP, please don't change this. This is very important because we need an internet IP to be connected to the virtual machine, otherwise you will not be able to connect to it from the outside. Then, here is the virtual firewall that I told you about here. Let me wipe this out. All right. So, the virtual firewall around the instance that we needed to allow all traffic is what I am at right now. So, I'm going to create a security group and then I'm going to call it Docker SG. And what I will allow is I will allow all traffic in the inbound direction from anywhere. So, anywhere from the internet is going to be able to communicate with this virtual machine. Basically, as if I'm disabling the virtual firewall. That's what I'm trying to do now. All right. And as you can see here, the storage for the virtual machine is 8 GB and I'm going I'm not going to change that because I have a free tier. So, here is another reminder about the free tier and what you have and what you can use per month. All right. One important thing to note here, what if I went on and I I said, "Okay, fine. You know what? I want the T3 uh micro not the T2 micro. So, I'm going to scroll down. The T3 micro here, because we have the T2 micro available as you can see here, there is no free tier eligible. So, if you decided to go with this one, which will give you two VCPUs and 1 GB of memory, immediately you will start being charged this amount per hour. So, don't do this. If you couldn't find T2 micro in that region, you will find that the T3 micro is going to be free tier eligible in that case. All right? So, please be wary of that. If you choose any other one, as you can see, there is no free tier eligible. So, these are all chargeable from day one. So, please do not do these mistakes, silly mistakes, but they could cost you money. All right? So, now I have done all of this and all I need right now is to go ahead and launch the virtual machine. Okay. Now, let me I could have assigned the I am role while I was creating that the instance, but in my case, what I will do is I'm going to go ahead and you will see that there is a virtual machine right here. And here is the ID and it is running and it's going through some checks initializing right now. One might think, okay, but how did you get here? I clicked on the link that appeared. If you didn't know how to get here, all you need to do is to just to type EC2. Go back to the dashboard, which is here, and then click on instances, and then you'll find the running one right here. And this is the one that you need to select. All right. >> [snorts] >> You will see here that it has a public IP address. So, this is the IP address on the instance that is facing the internet. So, if you are on the internet, so this is AWS and this this is the internet. If I would like from my laptop to get access to the instance, what do I do? Then I need to use the public IP address of the instance and type it on my laptop and then do whatever I would like to do with the instance. So, that would be how you can communicate. So, because when we are doing testing throughout the labs, I'm going to tell you go get the public IPv4 address of the instance and use it in your browser to do such and such. If I ever say that or if you you find this statement in any of the lab scripts, then that means I'm referring to this IP address right here. So, you would like you need to go to the instance to the Docker host. If I mention Docker host from now on, I mean the EC2 instance, the virtual machine that we have created with an Ubuntu Linux with a public IP address. So, this is the public IP address, but what is this? This is the private IP address. When you log in to the instance, you will see this on the instance. And we're going to see that later on. Okay, so public IPv4, private IPv4. All right? Now, I need to attach the IAM role to the instance to be able to communicate with SSM. So, what I will do is I'm going to go into actions, security, and then modify IAM role, and let me zoom out. And I'm going to choose the Docker IAM Docker and then I'm going to click on update. Is this? All right. So, congratulations. Now, we have a running Docker host that has passed all the checks. Everything is running and all all good. What about if I wanted to add on the IAM role while I was creating the instance. It's very simple. You do all the steps that we have done. But then you go all the way down. When you have done all of this, you go all the way down and in advanced details, all you need to do is when you talk about the instance profile, you scroll down and then you choose this and that's it. And then you go scroll to the right and launch the instance. So, all the steps that we have done, but when you get here, this is usually collapsed. You need last line, you need to click on the triangle and then on the instance profile, you need to choose the one that uh you have created beforehand and choose it and then go ahead and do launch instance. But you have to do all the steps that we have done here and that will be the only extra step that you need to do. All right? So, I'm going to cancel this because I don't need to create a second one. Let me close this tab as well. So, now I have my instance right here. And I can click on instances. I can click on here and here is my instance. All right. Now, if you have done it the way I have done it, then there is a chance that agent might not have connected with SSM. So, all you need to do at that case is you do a reboot for the instance. Reboot and it will be few seconds and the instance will be rebooted. Life is good. You finished the lab for the day. So, you have worked so hard today and you would like to stop the instance so you don't consume from the 750 hours. What do you do? All you need to do is tick choose the instance state, stop the instance. So, if you stop the instance and then click on stop, you'll find here that the instance is changing into stopping. Takes a little bit, half half a minute, 1 minute and then it will be in a stopped state. I need to make sure that it has stopped before I leave. Keep refreshing the page until you see that it has stopped, but it takes time as I mentioned. You would like to zoom in You would like to minimize or maximize this, so you have to pull it from here. So now I can resize this if I wanted to, but of course there is a limit for how much resize you can do. All right. So I want to restart it again. All you need to do is come here and click on start the instance. Uh all the time you have to tick the instance first because if you have multiple ones, you have to tell AWS which one you want to start or stop or reboot and so on. All right. Let's now use SSM, the one for which we have created the IAM role and attached it to the instance. Let's use it to connect to the Ubuntu EC2 instance. Let's go ahead and find out how we can do this. All right. So here is my instance. If in your case it was not ticked, all you need to do is to tick the instance. And then I'm going to go into instance state because now it is stopped. We have stopped this before we finished the previous video. I'm going to click on start the instance. And it wouldn't take long and goes into pending and then almost immediately after it will go into running, but this is still initializing. So it's not 100% ready. However, I'm going to show you how to connect. Let me click on this so we can widen the page without the navigation bar without the navigation bar and I can always go back if I wanted and I can open it again. All right. So now I have my EC2 instance. I have selected it and it's initializing. Refresh to find out where we are right now. We don't have to wait for that. Okay. So I want to connect to the virtual machine. Why do you want to connect to it? Because that is going to be our Docker host. We need to get to the prompt of the Ubuntu Linux. And then we can start playing and down downloading the Docker engine and so on. So after ticking the box, all you need to do is click on connect. Then, as you can see here, I have options to connect. I have the EC2 instance connect. This is based on SSH into the instance. I have session manager and I have SSH client. These are the ones we are interested in. So, I'm going to start now with SSM. Session Manager is a subservice under SSM or Systems Manager. So, I clicked on connect. Now, I'm going to click on this tab. So, you have to see that this tab is the selected one, not this one and not this one. After you click on this, all you need to do, this has to be in this orange color. If it's not in an orange color and it's in a gray color and you have some errors here or telling you that agent is not connected, maybe you did not attach the IAM role into the instance. So, please go back and do this. How can you do it? As I showed you as we did it in the video. I'm going to go back to the instance. I'm going to click on actions, then security, modify IAM role, and that's how you get into it. So, that's what you need to do. In my case, I have done it. What's the proof that I have done it? Because as soon as I go into Sessions Manager, this is connect the connect button is in the orange state. All I need to do is click on that and you will see that a new tab is now opening. And you guess what will happen now? A new terminal is being connected and, as you can see on the left-hand side, you are now at the prompt of the Linux instance. So, if I do sudo SU, changing my privileges into the root privilege, the highest privilege on the Linux machine, click enter and you can see that I am now at the root and then some folder here. If I click on If I do who am I, which is a Linux command, it will tell you that you are the root. You are the top. So, what I need to do now is just do a CD forward slash, hit enter, and now I am at the root. And this is the IP address, the private IP address of the instance. How can I prove it? 172.31.42.177. If I go back here, and let me just zoom out a little bit. 172, here is the private IPV4 address of the instance that we are in, and this is the Docker host instance that we created. You'll find that the private IPV4 address is 172.31.42.177, which means that I am connected actually to this instance. If I want to make sure that the instance is connected to the internet, what do I do? All you need to do is do ping. Ping is basically sending messages to an IP address on the internet and finding out if it is alive or not. So, 8.8.8.8, that's the Google DNS servers that are available on the internet. So, if you do this, and then I'm getting a response without errors, so this is a response from this IP address. So, basically the ping, what it does is I'm sending you a message. Are you alive? And then you respond back to me if you get them my message and say, "Thumbs up, I'm okay." So, now Google is telling us that I'm okay. What does this signify? It signifies that your instance now, your virtual machine, the Ubuntu virtual machine, is connected to the internet, so it can communicate with the internet. All right? So, now from the virtual machine to the internet, all clear. Later on, we are going to to from the internet to the machine, but that is not what we need to do now. I will do a control C to stop the command. And now, we have successfully connected into our virtual machine using sessions manager, using SSM. This is what I'm suggesting to be the easiest way ever. So, you don't need to worry about anything else. You don't need to worry about downloading stuff on your uh laptop, nothing at all you need to do. So, that's the way or the the first way to do this. All right. So, let me show you a different way you can do it. And now, it's not going to be through SSM. It's going to be through SSH, but again, from the console. So, let me go back to the console now. Here, on this tab. And I'm going to click on connect once again. All right. Now, I'm not going to use SSM. I'm going to use EC2 Instance Connect. Connecting from the console through SSH into the instance. So, I'm going to click on this. And public IPv4 address is such and such. If you followed exactly what I have done, this should work for you as well. And the username is going to be Ubuntu. Right? So, if I click on connect, see what's happening now? A completely different terminal is opening. And it is not the SSM. SSM is still available. If you want to check, if I do the ping again, 8.8.8.8, you'll see that it's still working. So, this session is still working. I'll leave it open now and working. And here, you'll find that we have a completely different one. So, now I have through SSH, I'm connected to the instance as well. How do I know? If you can see here, this is the Ubuntu user. And it's connected at this IP address. If I just zoom in a little bit so you can see it. So now we have the Ubuntu user connected into this. And if you look at this, it's exactly the same. 172.31.42.177, which is exactly the same here. If I do control C to stop it again, 172.31.42.177. I can do a clear. And it's exactly the same. So I'm connected to the same virtual machine, two sessions, and it's exactly the same. You'll find out throughout the lab that I will ask you at times in the lab scripts, open a new terminal session to the Docker host. So what I mean is, you have one that is open and you are connected to the Docker host, please open a different one. So how can you do that? All what you need to do is go here and click on connect and open a new session. It's up to you if you want to do them both SSM, if you want to do them both with EC2 Instance Connect, or a third way that I'm going to show you as well. Different ways. All I need is that you are at the prompt and you can type commands. That's all I need from you. Okay? But if you do here, if I do exit, this is the SSM one, okay? So if I go here and I do a who am I, I'm basically I'm telling Linux, I'm telling Ubuntu, which user I'm I'm using on the machine right now, and this is SSM user. So anytime, if you are lost and you don't know which terminal and and where did you get here and all that, just do a who am I. If you did the sudo SU to elevate your permissions and then you can do all the commands on the machine, you'll find that if you do who am I, let me do the CD forward slash, if you do a who am I here, you'll find that now you are becoming the root. So, the sudo su changes you from a normal user to the root, the top user in the machine, basically. Here, as you can see, when I did a who am I, it's a completely different answer. Who am I? Then now it's telling you you are the user Ubuntu. But if I do a sudo su and I do a who am I again, you'll find that you are the root. So, now I am 100% the same on this terminal and on this terminal. All right? So, these are the easiest two ways that you can do in order to get to the instance from the console. You don't need to worry about what is your machine. Is it macOS? Is it Linux? Is it Windows? Nobody cares. Do you have to install any devices or anything on the machine? Nobody cares. I haven't done any commands. I haven't even touched which SSH key that we have downloaded. So, the SSH key that we have downloaded is going to be, if you want to access from your laptop remotely into the machine. These two methods are connecting from within the AWS console into your machines. So, what if I'm done and I'm I'm done for the day and I don't want to continue? What do I do? So, all you need to do is just close the tab and in the SSM, terminate terminate or even if you didn't do any of that, you just go ahead to the instance, instance state, stop the instance and you're done. Khalas, I'm done for the day. So, now I I can go back to the instances and then I check here and I'll find that it is stopping. If you do this and you are always stopping the instance after you are done, guess what? Now you are not going to be charged even the 750 hours are not counting. They stopped. What you are going to be charged for is the cumulative storage for all the instances you are using if it goes beyond 30 GB. Now for this instance, the storage allocated is 8 GB. So I can have a second one and a third one all in stop states without any problems. I have the fourth one then the total is going to be 32. So I'm not going to pay for the first 30, but the second two I'm going to pay for at the end of the month, but don't worry we have the cost budget. It's going to let you know that this is what is the situation. All right? So this is how we can do it from the console and that should be more than enough. If you are happy with either one of these, stick to it and finish. We don't want to do any laptop problems. So finally, it's time for us to install Docker on the Ubuntu EC2 instance that we have already created. So let's head to the AWS console to do this. All right, so here I am in the AWS console. I have stopped it earlier because we are not using it while I was doing the other labs. Now it's time to tick on the box and then change the instance state into start instance. And shortly, as you can see that now it is in the pending, it will go into running. And then the checks are going to be happening for initialization. So what do I need to do? You have a lot of choices on how you can get into the instance. I am going to use the SSM one because I'm already in the console. It's up to you if you want to use MobileXterm, your Windows SSH open SSH as we have shown in the video. If you are on Mac or Linux, you can do SSH through the terminal in Mac. You can do it directly from Linux. However you like. The point is we would like to be logged into the instance or the virtual machine and I would like to be at the command prompt because this is where we are going to do everything. So let's go ahead and click on connect. If you are going to follow what I'm doing, Session Manager in my case. And I'm going to wait until this one turns orange, and then I'm going to connect. Okay, here we go. So, I can go from here, and I have also taught you how you can go from here. Either one is fine. Choose whichever you like. So, let me do it this time through EC2 Connect. The result is 100% the same. I want to be at the prompt. That's all I care about. So, here is the information that we have, the public IP, the private IP, and the name of the instance. And I am now at the prompt, as you can see. All right. So, let's clear. If you are on Windows, on the command prompt, you'll do CLS instead of clear. CLS, one word. All right. So, what do we need to do? In the code files, you will find this. And also in the PowerPoint, you will find this link. So, this is where we want to go, and that's exactly where I got the VS Code and the steps. So, we're going to follow these steps. Here is the link. You can just copy and paste the link. What if you are looking at the instructions that you have in this file in VS Code, and you found that it was different? Or some error. Go to the link. The most updated one will be to the link. If you send me a message saying that there is something wrong with the script or the the commands or I'm getting an error, I will go to the link, find the updated one, and I will send it to you. So, you can use the link. It will have the updated information. Let's go to the link. Visit it before we use this file. So, I'm going to click here on the link. And it will take me to manuals on docker.com. So, I got redirected to docker.com under engine installation Ubuntu. All right. So, this is for Ubuntu. Please be clear. If I go back to anyone I have here, CentOS, Debian, Fedora, and so on to install it on uh these machines. So, in my case, I am have an Ubuntu machine, and I mentioned that the reason for Ubuntu is because of its popularity. It is open source, and you can use it on your laptop, you can use it in Azure, in Google, or in the AWS, or wherever you want. So, this is the in- installation Docker in Ubuntu. And we have the 24.04, I believe, the one that we have installed. And some instructions, and then it will start right here. Installation methods. There are multiple installation methods, and this is the manual one, and there is a convenience uh script. But, this is for testing and developing environment. This is manual step-by-step. So, we are going to take the steps from here, and that's what is in the YAML file. We are going to update the Ubuntu operating system, first thing. We're going to install prerequisite packages that will allow apt to utilize HTTPS. Update the GPG key for official Docker repo. We're going to add the repo to the apt resources, and we'll update the database with the Docker packages. And then, we are going to install the Docker packages. Container ID, Docker uh commercial edition. Docker Compose plugin. Buildx plugin. And then, we're going to check the status. Started. And we're going to validate the status again to make sure that it has been started. Enable it, so every time when we stop and uh start the instance, it's going to be active. And then, we'll do the hello world. And then, we're going to do some other commands. All right? So, let's do this step-by-step. I'm going to re- remove it from here, but I will be copying and pasting from this script, which will be available to you. So, let's go back to the terminal. And I'm going to start with the first one, which is the update. Of course, you can try to do this. Could not open lock file, and you have no permissions, basically. So, why I have no permissions? Who am I? You are Ubuntu user. Looks like we don't have permissions. So, one of the two two things, either we do the command the same command with a sudo. So, we have higher permissions to implement it. That's one thing we can do. Lots of updates. All right. So, we are done. Clear. The other option I have is to do sudo su. So, now I have changed from an Ubuntu user to a root user. So, I have all the permissions. I don't need to type sudo before every command as we go. Okay, now we're going to install the prerequisite packages. Right. And I'm going to do the installation of the keyrings. Then, we'll add the GPG file. So, now I'm going to start typing without the sudo and see what happens. As you can see, it's the same. Now, whether I use sudo or not because I have the permissions as the root. chmod the permissions. And then, we are going to add the repo. I don't think I have copied the whole command. All right. Then, we'll do update from the added repo. Then, we're going Let me clear again. We're going to install the Docker commercial edition, container dio. Yes, please continue. As you can see, some of the familiar stuff started showing up. Docker compose, we're going to look at it at the end. Docker D, build X. And there are a few packages that I have forgot, so I'm going to repeat the command. But, of course, it will install only the ones that we did not go through. Do a clear again. Now, Docker is now installed. So, I'm going to check the status of Docker. Systemctl status Docker, not long commands. So, I have Docker active, started, as you can see. Docker.service and it's active and running, which is good. In your case, if you found that it was not running, what you can do is you can I did control C to get to exit. Um in your case, you can do the command system start systemctl start Docker, if it was not running. In my case, it's pointless because it's already running. And you have all that again in the script, so you don't need to worry about that. All right. So, let's do system enable Docker, systemctl enable Docker. So, every time we stop the instance, we start it again, you don't have to go and do system CTL start Docker. So, you don't have to do that manually anymore. Now, it's going to be after every reboot, it's going to start by itself. All right. So, how can we check if Docker is running? We can do this command, Docker run hello world. So, now what we're doing is we are using a Docker command, the first Docker command. And we are building a container from an image called hello world. Don't worry, we're going to learn all that together. So, this is supposed to type, if it works, it's going to echo hello world. See what happened now. See the sequence of events. I did Docker hello world. Then, it searched locally for an image called hello world, the latest version. It couldn't find it. Because it couldn't find an unable to find, it will pull it from Docker Hub. We're going to go through all these details. I'm just explaining very quickly. Pull completed. So, it downloaded that image. And then, download new image for hello world latest, and then, hello from Docker. And now, it's telling me that the Docker client contacted the Docker daemon. This is what happened. The Docker daemon pulled the hello world image from Docker Hub. The Docker daemon created a new container from that image, which runs the executable. And then, the Docker daemon streamed that output to the Docker client, which sent it to your terminal. Try to do something more ambitious. You can run Ubuntu containers with such and such. And this is the hub.docker.com. And now, if you are run the same command again, you will find the hello from Docker echoed here. So, I ran a container and that container has implemented the hello from Docker got me all these messages, which proves that Docker is running in my machine. So, if I want to find out, let me clear the version of Docker that I'm running here, I can do Docker version. As we can see here, I have the community edition. The version of Docker is 28.1.1. And again, the information repeated. I have the containerd installed and this is the version for the containerd. I have the runc, which is the actual component that takes care of the containers. I have the version installed. All right. And we can also do Docker-v if I want the short form. It will tell me that this is what you have. So, Docker version is going to give me more details. And I can do Docker info as well, which will give me even more details about this. So, let's see what we got from the Docker info. So, here's the command. Docker engine. Plugins, buildx. Compose, Docker compose and the version of Docker compose. And this is the server, the server that contains the demon. So, containers, it's telling me that I have two containers right now. Stopped are two and images one. So, this is the hello world and these are the containers I created when I did the Docker run hello world twice. And as soon as it gave me the output, it went into exited state or stopped state. We're going to talk about this in details. And then we have swarm is inactive, as you can see. Runc version. Containerd. And the details of the machine I'm running on. So, the architecture, it's a Linux machine, it's an Ubuntu, and here's the Ubuntu that we are working on. So, basically that's the kernel it will lean on, the containers will lean on. It has one CPU, one vCPU because it's t2.micro, and we have one gig, so here it's showing almost one gig that we have right now. And the name of the machine is IP 172.31.42.177. Here is one very important thing to note, which is the Docker area, the Docker root directory. This is where Docker is installed, and there will be subdirectories for the containers and for other stuff under this path. So, it's very important to know about this. This is a Docker controlled area, so it's not recommended that we play with it at all. But, this is where Docker exists, and this is where all the subdirectories for everything in Docker is going to exist. So, let's inspect that directory. We're not going to play with it, just inspect it. So, we're going to do CD, and I'm going to go into here. And I'm going to go LS, and as you can see, buildkit, containers, container ID, image, network, overlay, plugins, runtimes, swarm, temp, volumes. So, these are all the directories for Docker. Again, this is a protected, controlled, managed by Docker, so it's not recommended that you play with it. I'm just showing you where is Docker installed. Of course, that's the default path. You have the option to install it wherever you want, but again, in that new path, it's going to have all these directories and subdirectories available, and that's exactly the components of Docker and how it works. Not recommended to touch it. All right? That's another good point that we wanted to see here. See if there is anything else worth highlighting. Yes. So, when you did it the Docker version, we had the client as well. The client So, it it talked about the client and the server. So, we have both. So, we have Docker version and Docker info will give you a lot of information about the system or the Docker engine that you are running right now. All right? So, now we have Docker installed and whether you contact it through the EC2 instance connect or remotely or through SSM, it's going to be the prompt for the system that has Docker. One important thing we note. If you connect remotely, most probably you will end up with this as the home user directory, home/ubuntu. Very important to know the path. If you go through SSM, you will not find the home/ubuntu. It will be just the root. If you don't know, you do the print the working directory and as you can see, it is the home/ubuntu. In any way you log in, before you use any path, do the PWD, you will find where you exist right now in the system. So, now we have installed Docker successfully and we're ready to roll throughout the rest of the course. All right. So, it's time to get to know some basic Docker commands. So, let's go ahead and introduce that in slides and then we're going to immediately apply it in the console. So, theory labs, theory labs and that's how we practice and we verify what the information in the theory mean exactly. So, the first command we are going to introduce is the Docker pull. If you are on a Docker host and you would like to pull an image from Docker Hub. So, you don't have that image. You want Apache, you want Nginx, you want Ubuntu, you want CentOS, whatever the image that you need, you don't have it locally, so you want to pull it from Docker Hub. The syntax of the command, it starts with Docker. All the Docker commands start with Docker and then pull. And then we have options. And what's the image that you would like to pull? If you want a specific version of the image. If you don't specify the tag, it's going to pull the latest version available. So, here's an example. Docker pull Ubuntu. Then it will pull the latest version because I did not include a specific version detail here after the colon. Then it's going to pull the latest version of Ubuntu. If you want a specific version, then I'm going to do Docker pull Ubuntu 20, for example, 04. So, that is I want the Ubuntu image version 20 .04. It will pull that specific image. Say also Docker pull --all-tags. So, these are options now. Ubuntu. So, pull all the versions that are available from the image Ubuntu. From where? From Docker Hub. After I pull an image, how can I find out if it was pulled? Of course, I I'm going to see some activity on the screen and then I need to know what are the images that I have on the host such that if I'm looking for one that I don't have, then it will be pulled from Docker Hub. If I have it, then activities are going to run from the local image. So, Docker images is the command we use in case if I need to find out what images I have and that includes the images we downloaded from Docker Hub and the images we created locally. And we can use the command Docker images. It will list all the images on the local host. We can do Docker images minus Q so it's not going to give me all the details. It will only list the image IDs that are available. If I need to find out if I have any containers available on my machine, then I do the Docker PS but there are some options as well. List the running containers. If no options are pasted or are specified, it will list only the running containers if any or blank if there isn't any. If I do Docker PS minus A or hyphen A, that means tell me all the containers, the stopped and the running ones. So that will give me detailed information about each container, its status, ID, name, and more information. So we can do Docker PS and we can do Docker PS hyphen A or I can do hyphen hyphen all and that will list all the containers running and stopped. So let's go ahead and check on the Docker host what we can do with these images. We're going to visit also the Docker Hub and we can see where are these images and how do they look like and how can I find out about the tags and so on. So let's go ahead to the console now do some activity before we cruise through the rest of the commands. So I have connected again to the host. I'm going to do a clear sudo SU so I will have I elevate elevate the privileges basically that I have. And now I'm back into the home directory as you can see. All right. So let me do Docker images to see if I have any images available on the machine. And as you may have guessed it in a previous lab, when we installed Docker, we looked at the hello world when we did Docker run hello world, right? So, at that time it installed this image for me. Now, if I want another one, let me say I want to pull the Ubuntu image. What do I do? Docker pull Ubuntu. And I did not specify any tag. So, here I can specify 24.04, for example. I did not specify anything. I'll just do this. And now it's pulling from library. By default, it goes to docker.io, as you can see here, docker.io. Found the Ubuntu, and it went for the latest. Why did it go for the latest? Because I did not specify what is it exactly that I need here in this command. Let me just enlarge this a little bit. So, I did not specify anything here, and that's why it went on and it brought the latest one. So, let me repeat the Docker images again. And now you'll find out that we have Ubuntu, and it's the latest, and here is the image ID, and it was created on dockerhub.io 2 weeks ago, and that's the size. If I do Docker pull, and now I'm going to go for a specific version in Ubuntu, let's say 24.04. It downloaded a newer image in this case. So, in my case, which is this one, pulling from library, and I just and downloaded the image for Ubuntu 24.04. If I do Docker images again, now I have three images. I have the latest of Ubuntu, and I have the 24.04, and you can see the size and the one that I had earlier as well. All right. Now, let's check for what containers I have if any on the Docker host. So we can do Docker PS. And as you can see the Docker PS without options, it shows me if any running containers are available on the host and none is available as you can see. If I do Docker PS minus A, show me everything including the one that have are in stopped or exit state. And as you can see we have two and these are the ones that we ran through the installation of Docker from the Hello World image and the command was hello. And that was 52 minutes ago and these are random names that have been created for these containers. I could also do Docker PS PS hyphen hyphen all and this will show me the same output. So if you look at this or I you look at this, it's exactly the same. So the minus A or hyphen A is a short of hyphen hyphen all. So either one will get me to find out if I have any running containers on the system. Now let's go go ahead to hub.docker.com in order to find out about the available images. If you go on the left hand side, you can see Docker official images, verified publishers and sponsored OSS. So I'm going to go into Docker official images. I'm looking for images to be more specific. And then as you can see here memcached, Nginx, busybox, Alpine, Redis, Ubuntu. So this is what we have been pulling. And you can see last week there has been more than 4 million pulls and there is more than 1 billion downloads. I'm going to click on that. And here you can find out about overview, quick reference, supported tags and respective Dockerfile links. And if you click on the tags, these are the available versions basically, and you will find out what's available here. And now you can see the tags 25.04 latest 25 24.10 24.04 And this is the command if you would like to pull the image. This is the latest one, of course. And if I go to another one, a specific one, like the ones we have seen latest for example, here is the command to pull it to pull it to your machine. And if you have of course one like this, then it will be the colon and then the the tag. This is how you pull it to your machine. All right, so let's go ahead and continue our basic Docker commands journey. Docker create is to create a container from an image. You can assign the container a name if you'd like to, and it will be created, but it will not be started. So, let's look at an example. Docker create and then hyphen hyphen name, so these are the options. And this is a name of your choice, and then the image, and you can also add a tag if you want to the image. So, if you don't add a tag, it will be latest. If you add a tag, it will be the specific version that you need. If it's not available locally, it will be downloaded, pulled from hub.docker.com, and then it will be downloaded, and then the container will be created, but not started. All right, the order is very important. So, if you don't add this for example, the hyphen hyphen name, they will consider that you want to create a container from an image called my hyphen container. It will look for it. It will look for in Docker Hub, it will not find it, then it will give you an error. So, the order is very important and when you want to add an option, you have to commit to the syntax of the option as well. Okay? So, this will create a container. Let me just erase this. So, it will create a container with this name from Engine X. That's what it will do. Here's another example. Docker create and then hyphen hyphen name my container Ubuntu and then a specific tag, so it will be created from this specific version. So, that is a container created but not started. What if I want to start it? Then we go into Docker start. Docker start and then the options and the container and flags. So, start an already created container that is not running. And the container is the name of the container that you have or of course you can use the ID as well. So, here's an example. Docker start my container, assuming this was already created beforehand as we did in the last slide. That means please start this container for me. Docker start ABCD 123, if you want to specify by the ID. Where do we get the ID from? From the Docker PS command and then the output will find that or Docker PS hyphen A, depending if it was running or stopped. And we can start more than one container by the names or by the IDs. All right. So, now what if if I have a running container and I'd like to stop it for whatever reason. I mean, it could be troubleshooting, it could be we have prepared it and it's not production yet, so we're going to shut it down until the production time comes and then we'll bring it up again. Whatever the reason is, you can create a container using Docker create but it will not be started. You can start uh a created container that is not started using Docker start, and you can stop a running container using Docker stop. So, this is going to stop the container gracefully. Gracefully means don't stop it immediately. By default, I believe it gives it like 10 seconds, but also you have an option that you can specify a longer time if you think the container will need more time to gracefully stop. If the process doesn't terminate by default, then 10 seconds, it's going to stop it no matter what. You can extend it if you'd like in the options. So, Docker stop and then the container ID or the container name. And you can also do an option minus T to to extend the 10 seconds. Here, it's 30 seconds and then my container. So, if it doesn't finish within the 30 seconds, it's going to be forced to stop. And we can also stop more than one container if we want to. This is not Docker, but remember at the initial lectures or we always say that containers are nothing more than a software process that runs on Linux and it has a process ID. So, how can we prove this? We have multiple Linux commands, not Docker commands. They don't start with the word Docker. PS A show all processes that are running PS {hyphen} A PSX and then PSU and we can combine A with U and X to show the processes owners and if they are not attached to a terminal and also the process that are available on the system. All of that we are going to do to are going to use the PSAUX in order to prove to you that actually this container or the containers we're going to work with are nothing more than a Linux process from the Linux kernel perspective. So, let's go ahead and do this in the console. Let's do the Docker create, Docker start, Docker stop, and we're going to prove that also it is a software process. By the way, you have this access also to the script files that I'm using and these are going to guide you through each step that we are doing right now and you have access to them. So, you can repeat, watch the video and repeat, or you can look at the script, and you can do it yourself without watching the video. So, you watch the video, you understand everything, now it's time to practice and you have all the instructions what to expect to see and all that. So, this is more like a step-by-step guide into doing all these labs for all these commands, all right? So, I'll keep it on the side. I'm going to be doing the steps, but you can always refer to it later on. And it's going to be available to you in the Docker commands YAML file. I'm going to remove this now. And let's go ahead to the console. So, here I am in the console again. By the way, if you get into the instance using EC2 Instance Connect, you have all the right to remove this. I mean, the good thing about this is it shows the public IP and the private IP. In some labs, we might need the public IP to connect to the instance and other stuff, or if you would like to connect remotely, you'd need the public IP as well. But in my case, I need more screen space than the public IP. So, I'm going to remove it. All right. So, let's now start with the Docker create command. Docker create, and then we do hyphen hyphen name. You don't have to if you don't want to specify a name. And then I'm going to create it from image Nginx, and I'm not going to add the colon, and if I do colon latest, it's exactly if as if I did not add anything. All right? Remember we don't have the engine X available. So, let's see what will happen now. So, first thing unable to find image image engine X and it decided because I did not include anything here that is going to be the latest. It's not available locally. So, it's pulling from the library engine X and you have pull complete for different items. We're going to discuss the details later on. And now we have a new image available on the host and the name is engine X. Let's check. Docker images and as you can see here that we have another image available engine X and it has been created not here on Docker Hub 7 days ago, this latest version. And here is the size. Okay, but I have created an a container, right? So, how can we find out if we have running containers? Docker PS Let me clear. Docker PS We don't have any running container. If I do Docker PS minus A and you'll find that here that here is a container with the name cont1. So, we're not getting the random names anymore because we specified the name. And it is created 59 seconds ago. And it's from an image engine X and here is the container ID. So, you have all the information, but it doesn't say exited. Exited means it was running and stopped. So, that's exited, but created that means it's created. So, how can we start it? Docker start and then either we provide the container one or I could have also provided the ID. So, either the name or the ID, both would work without any issues. Now, if I do docker ps again minus a, so now these are the first two ones that we know about, but this one is up. So, even if I did docker ps only, I should still see it because it's up in for 21 seconds now and the port is 80 and it's about a minute ago it was created and it is from engine x and it's exactly the same ID. So, ends with 2450, ends with 2450, ends with 2450. So, that's the same one that was created and it's available now. Let me do a clear. Now, let let me prove to you one thing. We have discussed that containers are run as software processes or processes in Linux, as a software process. Software process must have a software ID. How can we find out? So, let's use the Linux command ps. So, that's not starting with docker. So, that's a Linux command. And I'm going to write a. So, tell me all the processes that are running right now. Okay? So, now this is not showing what we want. So, let's do ps aux. So, show me basically everything. And as you can see that engine x is running, but this is not what I'm worried about. I'm worried I'm I'm concerned to find out if container one is running as a process or not. So, I'm going to repeat the same command and I'm going to search instead of looking into all of this, grep find out in this output if there is anything called con cont1. And sure enough, there is one container, there is a process run by the root because I have the root privileges and this is the process ID. How do I know that this is the process ID? Let's scroll up in the command output and find out what are the different columns that we are seeing. So, user, PID, and then the CPU it's taking, the memory it's taking, and so on. And the status as well. So, PID, that's what I have. So, we got assigned 6551 as the process ID, and here, as you can see, the process name. So, Engine X is running, but that's fine. Engine X is running, but I was concerned about the container. How is the container functioning? And that's that proves that containers are run as software processes. All right, back to Docker. So, what do we need to do now? So, we have a running container, and we have proved that we have a running container now, Docker PS. How can we stop it? Docker stop. And then, either the container name or the ID. Let's go with the ID this time. And let me do a Docker PS again. Oh, I'm sorry. Docker PS. Nothing running. Docker PS minus A. And you'll find out that this container has exited 9 seconds ago. All right? So, that's about how we can use Docker create, Docker start, Docker stop, and we have also proven that containers run as processes on Linux or on the operating system. All right, still with the Docker commands, we are going to look at the Docker exec command. What if I need to start the container, and I need to run a specific command? Let's say it's a Python container, so I need to start Python 3, I need to start the Python editor, basically. Or maybe it's a new Ubuntu, and I would like to list content of a specific directory or a specific file. Can I pass commands to a running container? And the answer is absolutely. If it is a running container, you can do that, not on a stopped container. So, the command is docker exec for execute, and then options. We'll see some options, and then what is the container ID or name, and what's the command, and what are the arguments for that command that you'd like to pass to the container. It has to be a running container. Okay? So, it can be used to interact with a container's file system or processes or environment as if you have created the container, logged into it, executed that command, and then looked at the output of the command. That's exactly what we are trying to do with docker exec. And here's an example. docker exec the container name, or it could be the ID, and then the Linux command ls, and then a specific path. So, you'd like to list what is in this folder, basically, or in this directory using this command. It's very important to notice that you are now passing the command. You will see the output if there is an output, and that's it. So, you're not keeping the command like an interactive shell open where you can type extra commands, and so on. It's not the case. So, when would you use this without any options? This is when you are running non-interactive commands. So, commands that don't expect input from you, and you don't care about how the output would look like. So, for example, ls or cat or echo. These are examples of what you can do. Let's continue with options for this command. So, let's look at the minus t or the sudo tty option. This is if you'd like to see the output properly formatted on your screen. So, here's an example. docker exec my container, the container ID, and here's the command ls. Directory is app. I would like to list the content of this directory, but here we are enabling or adding the option minus t. Please add a tty or a pseudo tty where I can see the output properly formatted. If you do the previous command and this command on the same folder, the output for this one is going to be much more organized as if you are inside the shell of the container. So, it will allocate a terminal or a pseudo tty to run interactive commands like bash and so on within the container. And the minus like it can be written hyphen hyphen tty or hyphen t it attaches the pseudo tty to the container basically. So, you get access to the feature of the tty devices. Okay? But, until now you don't really have all the input control and we'll see that in the lab. Then, we have the minus i option. So, the minus t gets you the proper output, attaches a terminal to the container. It can keep the standard in open so you can interact. You can send information or instruction or username or passwords into the container. And here's an example. Docker exec minus i my container and then cat etc host name. It's not the best example. If we have tried for example login, it would have been much better. Why? Because login expects you to enter a username and password after that so the standard in makes sense. Or if this was a Python simulator a Python 3 command for example, then it will add the simulator and then you can interact. But, now you have the standard in but you lost the terminal. So, you don't have a terminal for the output. So, you'll be typing this, it goes into the container, the container responds, but you don't see the output. So, it kind of like open one way also. Minus t was open for the output, minus i is open for the input only. So, you can do i or hyphen hyphen interactive. It keeps the container standard in open and allows you to send input to the container through the standard input. And this is good in case of commands that would like to receive input from you in order to complete. I mean, them and bash maybe login would be the best example in this case. So, you need to enter the username and password. What if we combine both of them? Minus I and minus T. You can do hyphen I hyphen T with with a space in between or hyphen IT. So, that means you are combining both together. Keep the standard in open. And please, I would also to have access to the output or the TTY. So, this case in this case when you do this, you are actually logging into the container. So, imagine what we are doing now. We are treating the container as if it was the Ubuntu host or the local host. And now we are logging into the prompt of that virtual little minor tiny computer or virtual machine. It's actually a process as we mentioned. And now you get a prompt and you can run commands in the container as if you are on a virtual machine or a server or on your laptop. So, in this case you are doing two things. You're keeping the standard in out and the output as well. So, you are opening or binding the input output streams and you'll see that the prompt has changed. You are now officially inside the container doing activities inside the container. And here's an example. Cat ETC shell and you'll you'll see that you are you have a shell open now inside your container and you can interact with it. If you do the cat ETC shells, so the in and out are open, but now you are only executing this command. But if you did bin bash or bash or shell or zsh depending on which image you are using and what are the available shells, then you can actually get into the prompt of the container and then you can start working on it. This command the cat ETC shells, it will tell you which shells are available in the image you are using. So it could be bash, it could be shell, it could be zsh shell and so on. So if you will if you are not sure, you can just run this one. If it is Ubuntu or most of the Linux ones, you could have the bin bash or you can just write it as bash. It will give you exactly the same if bash was on the path inside the operating system, but that's more of Linux. This is not Docker, okay? So let's go ahead to the console and let's try these commands one by one. And again, the scenario that we are going to work on is available in the script that will be available to you in the course resources. So I'm going to be looking at the file, doing the steps, but you can do it on your own from the file. You don't even have to look at the video because even the exact steps and what what they do and why we are doing them, it's all explained as you can see right here. So taking it step by step to see what's the difference between the minus I and the minus T and so on. All right? Let's go ahead to the console. All right, so still in the console and if you recall, we ended up with container one and we have jolly Debian and anyways, I mean these are the old ones. If you want to clean up everything, we can do that simply with the Docker RM. And then the name of the container, for example. So Docker RM, if I do Docker PS minus A again, you'll you'll see that container one is gone. And I can also do it by the ID. Docker RM and then I can copy the ID. And I can do more than one at the same time. So now I'm going to delete both the other containers. If we check again I don't have any containers. Nothing running and nothing stopped. Clear. Okay, and for the images, what this is what we have. We have Ubuntu the latest 24.04 and the Hello World latest. What if I want to delete an image? So, I can do Docker then I can do RMI, remove image and I can then take this one for example. So, the Hello World now is going to be removed. All right, so if I do Docker images again now I have only the two Ubuntus. All right, let's now start what we wanted to do. We want to try and see how can we execute commands inside the container. So, for that let's go ahead and create a new container. And I'm going to call it container two for a change and this will be from an engine X image. Okay? So, now I don't have engine X locally, that's why it's being downloaded now, the different layers of the image. We'll talk about layers later on. And as you can see there's an ID for each one and if I do Docker images now I should have engine X available as well, as you can see. So, I have engine X and it is downloaded and so on. All right. So, let's do a clear. So, now we need to start the container. Start container two. Docker PS and as you can see we have the container up and running, container two up 3 seconds ago and it was created 35 seconds ago and it's engine X and this is the container ID allocated. Okay, excellent. So, let's execute a cat command on the container, so exit no options container two and I'm going to do cat ETC hostname. And here is a hostname that is available in the container. But again, now the container if I do PS, container is still running. I executed that command, got the output, and that's it. So, let's do cat, and let's try ETC hosts. As you can see the output, cat ECT hosts, but then I have all of these are inside a file called hosts under directory ETC inside the container. All right. So, what if I did docker exec minus T. I want the output to be a little bit better than this, if possible. And I'm going to do exec into container two, and I'm going to do an LS command. See, the LS command it's kind of as if you are inside the machine, a a Linux machine, and it is properly formatted. Let's prove it. Let's remove this and do the same command. So, exec also container two, LS. See the difference? So, this is just like a dump of all the output, all what's available, but here it was appropriately and lined up nicely and all that. Why? Because the minus T gives me the pseudo TTY output, so it's nicely formatted on the output. Okay, all right. Let's do a clear. Still with container number two. And if I do docker PS, I still have it running. And what we'll need to do now is we would like to try something else. So, I have the minus T, I know that. Let's forget about options now. Let's say that I'm going to do docker exec container two as well. But in this case, I want to run the command login. So, I want to login to the container operating system. I would expect if I was on a Linux machine, if I am logged into the prompt, then I would get a login prompt, and then I will enter the password, and that's how it works. Let's do it. I don't get anything. I don't have access to the container to send in, and I don't have the output as well. So, let's change this and put the option minus T and see what happens. See the difference? Here I didn't get anything because I don't have any options. Here, I get the output nicely formatted. And if you notice, the host name is exactly the container ID. So, I'm getting this response from the container. It's asking me to login. So, let's say I'm going to say just anything random, nginx. I expect it to ask me for the password, and then it will tell me an error. There you go. So, I sent it in. The container is waiting for me. I'm waiting for the container. I don't see anything. And why is that? Because I don't have actually a channel into the container to send this. So, it didn't make it to the container. And since it didn't make it, although I have the TTY, nothing came out. So, what do we do then? Let's control C. Let's make sure that our container is still running. Yeah, it is still running. Let me clear the screen. And now let's do docker exec, but I'm going to do the interact the minus I. So, now I have sending in into the container. I have the standard in that will be available to me. And I'm going to still do the login. I don't see the login information again. So, it looks like I'm sending information into the container, but the container doesn't have any instructions. It doesn't have any TTY attached that will display things for me. So, what I can do now is I can combine both, the minus I and the minus T, and let's see the difference now. I have this. I'm going to type nginx, and guess what? Now the minus T is sending me the password because the minus I was open and this went into the container. Of course, I'm going to type whatever. I don't have this username. I'm just trying any random thing. Could take some time, give me an error, and we are good to go. Login incorrect. See, I have still the channel open with the container and the output as well working for me. And that was the command login. So, let's do control C now. And I'm going to check also that it's still running. Let me do a tricky thing now. Let me do docker and I'm going to do exit -it and into container two. And in this case, I'm going to do a cat into the file that we discussed. Which is the ETC {slash} shells. {slash} ETC {slash} shells. Okay, engine X does not have this command. All right, so let's do let's do this. I'm going to do it blindly. I think it will work because I believe that engine X has the the bin bash and has the the bash as well. So, I'm going to do bin bash. And of course, you can write bash only and let's try what happens. Please notice that I am on the docker host and this is the prompt. Uh my mistake. We shouldn't add the cat at all. I'm just trying to start the bin bash shell. So, this should not be here. And either I write bash or I write {slash} bin {slash} bash. And see what happened now? The prompt has changed from this into this. And I'm a root privilege into this host. What is this host? If you go a little bit up, see when we got the login, what was the prompt? It It from BD2 and it ends with 22A. And now I'm in BD2 and it ends with 22A. So now I'm inside the container. And let me show you one thing also here that if you do LS, that's exactly what we have received before when we did the LS command. And if you do PS here, oh, okay, the PS command is not. So we have to install some utilities to get in here. I think the ping is not available as well. Let's try eight and ping is not available. So it is skimmed from the essential utilities, but I will show you in a later lab how we can install these utilities so we'll have troubleshooting ways inside the containers when we log into them. What if I want to exit? Just type exit. And if you do docker PS again, you find that the container engine X is still up and running as you can see. Docker PS minus A and I have only this container. It's an up and running. All right. So if you would like to interact with the container in and out, minus IT is your best friend. And you can write it docker exit. By the way, docker exec. You can write it as minus T minus I or minus I minus T if you don't want to combine them and then this is container two and I'm going to run bash in this in this case, not the bin bash and you'll see that it works. And again, I am inside the container again. So if you would like to do troubleshooting testing, installing packages, whatever you like inside the container, you can log into the container and do that. If you don't want to log in, then you want to just LS something or cat something, you don't need all of this. You need the minus T just to get the output nicely formatted if it is a command that does not need the interaction. If it was vim or login or something else, then it's better to have the dash IT, get into the container, do whatever you like and then save it and exit and that's it. So, I'm going to do exit. And here I do a docker ps. Okay, let me clear. Docker ps. The container is still running. If you want to stop it, you know it. Docker stop con two. And now if you do a docker ps, it it's not there. If I do docker ps minus a, it is there and it has been exited by force because you stopped it. Let's continue with more docker commands. And this is a very important one, docker run. Docker run is equal to docker pull plus create plus start. So, basically, if you do docker run and then you decide what options and you define the image and the command if you would like to execute a command when the container runs, if the image is not locally available, it will be pulled from Docker Hub. And it will create the container and it will start the container. So, this is equivalent to the three commands, docker pull, docker create, and docker start. Here's an example. Docker run nginx. There is no tag here, which means the latest one. This will create and start a container using latest nginx image. And if you don't have these on the docker host, then it's going to be downloaded from Docker Hub beforehand. You can add the options dash dash name or hyphen hyphen name, and you can also put a tag if you would like to. When you run a container like from nginx, and this is how you do it and we'll see that in the lab, then the prompt is going to be stuck. So, basically, you will not get the docker host prompt again. If you'd like to run the container in the background and you get hold back of the prompt from the Docker host, then you use the minus D or detached mode. So, basically, create the container from Engine X. If Engine X is not in the local host, download it. Start the container, but please give me back my Docker host prompt. Run it in the background in detached mode. We can also use a run with the {hyphen} IT in order to get into the container as we have seen before like in exec Docker exec command. So, we can do Docker run {hyphen} IT interactive and terminal from Ubuntu and start bin bash. So, you will be inside the Ubuntu container prompt or logged in, and then it will be a bin bash shell or a bash shell basically open for you as well. And you get the interactive, so you get the input the ability to send input into the container, and you get also the TTY with it. And it depends on if the bash was in the path in the operating system of the container, then you can just write bash without {slash} bin {slash} bash. So, these two are the same, but in case if bash was not in the path, then you have to define the total path {slash} bin {slash} bash. Now, we have Docker create and Docker run. Both of them, they will try to locate the image locally, and if not available, then they will try to get it from Docker Hub. If it's not on Docker Hub, that means you are This is maybe a typo or the wrong name, and it cannot find it, and you'll get an error. So, as a workflow, you can start with Docker run or Docker pull. And Docker will look for the image locally. If it's not available, then it will go ahead and search in the Docker Hub. And as we mentioned, it is by default docker.io. If it is on Docker Hub, if the answer is no, then you get an error, the image cannot be located or is not found. If it was on Docker Hub, then you will get into downloading the image different layers, then the image is going to be installed on the local host. It will be available now. If it If the command was Docker run or create, then it will have to create a new container from the image, and it will start the container if you used the Docker run. If it was only Docker pull, then it will stop here. If it was a Docker run or Docker create, then it's going to create the new container. If it was Docker create, it will create it and that's it. It will not start it. If it was Docker run, then it will start it and then the container will be up and running. So, Docker run is the one that does the full nine yards. Docker pull starts right here, and Docker create starts right here without starting the container. If the image was available locally, then it will just jump into this. If it was a Docker run or Docker create, create the container. If it was Docker run, then it will also start it and the container will be running. Okay, so that's more or less what we have discussed, but in a visual format or in a workflow format. We have also one option, if you would like the container to run something specific and then it will self-destruct. So, if we do this, Docker run {hyphen}{hyphen}rm. Basically, that means remove or delete. Ubuntu is the image, and then here is the command that it will do. Echo, this will self-destruct. So, what will happen here is it will echo this sentence on the screen, and if you go and look for the container, you will not find it running, and you will not find it as well in the exited mode. It will be deleted. So, why would you do this? Use it for one-off containers. So, you just need it to do something and disappear. Gets deleted, clean up by itself. Like if you want to curl or ping or do some testing function, and once it's done, the container is no longer required, and I don't want to go and remove it manually. Just remove it. But, don't use this at all if you're talking about long-term containers. If it is a website, a database, component of an application that needs to be up and running all the time. Here we have docker run IT and remove Ubuntu bash. So, if we don't look at this part, this is a normal command we have seen before. Docker run {hyphen} IT Ubuntu bash. That means start a bash terminal or shell inside the container. The {hyphen}{hyphen}rm, once you exit, it will be deleted. So, create and run an Ubuntu container, open the interactive shell into the container. Once the user exits from the shell, delete the container. All right. So, let's go ahead and do this in the console. Let's work on that and see how the docker run acts or behaves as we have seen with the previous examples. All right. So, let's go ahead and play with the docker run command. Let me now get to the console. So, I'm going to go in. I'm going to use EC2 instance connect. Open a new session, and from the same script that we have been using before, now we are going to start with the docker run uh stuff here. Maybe the names I will use for the containers are going to be shorter. Doesn't matter. When you see the names, choose whatever names that you would like to do, but you need to update the different commands. All right? So, what I will do now is I'll do the sudo SU. And I'm going to do a clear. I don't need this, so I can stop this as well, so I have more space. So, what are going are we going to do? We are going to create an Ubuntu container. So, Docker run. Docker run. And then we need to do it in I'm not going to do it in detached mode. I'm going to start without detached mode. I'm going to show you the difference between using the detached mode or not. Okay, let's say say name is con one. And this will be from Engine X. Engine X. Can't find the image locally because it's a new machine, I told you. So, it will download it from Docker Hub. And once downloaded, it will start the container. As you notice right now, the container is up. Life is good. But then I don't get my prompt back. So, I'm stuck into a container that is running now. The image is already downloaded, as you can see. And configuration was ready. All looks good. Start worker process. Start worker process 29. Engine X started. Everything is cool. But then I'm stuck. Well, that doesn't help. One might say, "But how can I believe that the container is running? Maybe you are just bluffing, right?" So, let's do one thing. Let's go ahead here and I'm going to open a new term a second term. So, this is one terminal which is stuck and this is the second one. And I can open more than one. So, it feel free if you'd like to do testing where you do some commands on one and then you log in from another one and see what's going on. So, let me do a clear. Now, let me do Docker PS. And you can see here we have a container called container one. It's Engine X and it has been up for about a minute, and here's the ID. So, this proves what I said, that we have a container running, but I'm stuck within the container. That's what's happening now. And here's the name, cont1, and Engine X. So, what do I do now? Then, you can exit, but if you exit, that means you have stopped the container. And even if I go to the other terminal and repeat the same command, we'll we'll see that there is nothing running. Docker PS PS minus A, you'll find that we have an exit container 15 seconds ago. So, I'm going to leave the second terminal for now. Maybe we'll need it for the for the future. Okay, let me do a clear here. All right. So, what do I do? I want to do exactly the same, but I don't want to be stuck. Though, in this in this case, all you need to do is Docker run minus D, detached mode. And name, if you want. And if you'd like to name it, that's fine. Container Can I use one? Let's see. Let's find out if I can use one again. Conflict. There is an error. There is already a container, even if it was stopped, and here's the ID that is already with the same name. So, please, if you'd like to use a name, use a different one. That's why if you don't use the hyphen hyphen name and you provide a name, then there will be a random name assigned to the container. So, let's try that. I'm not going to assign it a name at all. I'm just interested to see the detached behavior, and I'm going to hit enter. So now, there is a random name assigned, and there is an ID for the container, and now I have a container running, and I got the prompt back. So, I can do more commands from the same terminal. How do I know that? Docker PS, and as you can see here, that we have a container running and it is from Engine X. Here is the ID. And it was done 14 seconds ago and uh random name. Basically, that's what we get here. All right? If you look here at this ID and if you look at what we got as an output here to the command if you look at the first part, first 12 alphanumeric characters, they will be identical to this one. So, that's the container ID. All right? So, that's fine. So, now we know about this one. Now, let's do one thing more, which is trying the {hyphen} IT into the container. Of course, I can do Docker exec {hyphen} IT and I can get into this container. I can use the name or in this case, let me use the ID for a change. And bash. So, now I got into the container and here is the ID and I have root privileges and this is the host name and I'm now inside the container. I'm going to exit now. Now, let's look at Docker PS again. We still have the container running. When you run from Docker run and you have the container running and you get into the container and you exit, as you have seen now with Docker exec it doesn't terminate the container. The container continues. So, can I have done the same in one step instead of creating the container and then doing the exec? What if I I know from the beginning that I need to get into the container? So, in that case, you can do Docker run {hyphen} IT if you want to give it a name, that's fine, but avoid an existing name or you will get the error, up to you. And then I can do Engine X and then I'll do bash. So, that's all this is. this first command and the second command in one. Can I run this? And then I can keep it in detached mode. Yes, you can. You can add a D at the end, ITD or space {hyphen} D. That means run in detached mode, but keep the terminal running and please the interactive mode. I need to have the ability to send information into the container and also to receive the output. Okay, so now here I can do LS and as you can see we have lots of directories. If I go, let's say for example, into the ETC folder and I do LS you'll find here that we have hosts. For example, I can do cat hosts and then you'll find the information about IP addresses and stuff like that. So, for example, the container now has this IP address, but this is not the time to talk about this. I'm not going to talk about networking now. The time will come when we will talk about it. All right? So, I can do exit. Now I'm outside the container. Let's do docker PS. I still have the container up and running in my case. Oh, that's the other container. I'm sorry, that's the previous one. If we do docker PS, I'm looking I should be looking at container two. So, container two when you do the docker run {hyphen} IT and you get into the container and then you exit, see what happened now? The container stopped. Whereas, when we did the docker the the docker run Where was it? Right here. When we did the docker run in detached mode and then I I got into it into it with a docker exec, it did not terminate the container. That's why we have one running right now. So, what if I wanted to stop the other container? It's very easy. Do docker stop and the container ID. So, we have to do docker PS first because we don't know the name. The name was a random one. I can choose this name if I want to. And then I can do docker stop. And if I do now docker PS, there is none working. And if I do docker PS minus A, then you will find that container two and the elastic board and container one, they all all have stopped. Let's do a clear. All right. So, let's do one more example. So, docker run -it and then what we'll do is I'm going to do name container three because I used one and two. You can just use any names you'd like. And this one I'm going to run it from Python image and the command I want to run once this this is started is bin bash. So, I'm going to get into the shell bash shell with interactive terminal in order to get into the container. So, notice that this is the prompt we have right now and I will hit enter. The Python image is not available locally. So, it will download it and as you can see different layers of the image. We're going to talk about layers later on. It's downloading one by one as you can see and they have different sizes. So, now what I'm doing, believe it or not, I'm getting Python inside the container. That's what we are doing right now. And not only that, we have downloaded that and also the container has started and now we are inside the container. So, this is the container itself. All right. So, what do I do now? Let's update. So, now I'm working inside the container as if it is a Linux machine. If you notice, I'm using Linux command, Ubuntu commands because the container has access to the kernel, right? We said we are sharing the operating system, and the operating system is Ubuntu, so that's why I'm using Ubuntu commands without any problems. Inside the container right now. But, of course, not the full list of commands. This will be a mini set of commands that are available. Now, let's do apt upgrade. Yes, I need to continue. See, package lists, dependencies, reading state information, calculating upgrade. Packing. All right. So, let's do a clear. That's too much in the screen. All right. So, what do I need to do now? I need to do ps to see the processes that are running. I have the ps itself, and I have bash running. So, this proves that the command we executed when we created the container has started a bash process inside the container. Okay, that's fine. Then, what do we need to do now? Now, we have Python, right? Let's run the editor. So, this is now talking about this Python version, and this is the editor. So, Python is running. If I do 1 + 1, you will get the result is two. Okay, let's do 2 * 5, and the answer is done. Let's do print. All these are basic Python commands, and I'm going to do hello world. You'll find that it is printing hello world. If I want to exit, I'll do this and just the parenthesis. So, now I'm out. And if I do exit again, I'm outside the container now. Let's do if the container is up or or down. The container went down now because we did the run {hyphen} IT and when we get into the container then you exit and it goes away. All right, so let's do a docker PS. So now the container has stopped but if you do a docker PS {minus} A you'll find that the container is available. The Python container is still available. What if I wanted to do a one-off job and I want the container to disappear afterwards? So here's what we'll do. We'll do the another container. Let me Let me use container four for example. And I'm going to use the {hyphen} {hyphen} RM. So remove upon exit. And I'm going to do this and start. So the container is started. I am inside the container right now. What if I do an exit now? Or let me before I do this, let me check from here to make sure that it is running. I have container four running as you can see. Now if I go here and I do exit and then I repeat the command here I don't see anything running. If I do {minus} A I will not find container four exited as before. It has been deleted. Still with docker basic commands and we're going to look at docker inspect. A very good command that is used to find detailed low-level information about containers. You can use it with containers. That's one usage. You can use it with images. You can use it with volumes and you can use it with networks. The output is going to be in JSON format. So what kind of low-level details about containers you're talking about? What are the mounting of volumes if there are any? What's the IP address that the container has and a lot more information about that as well. So this is for the containers. How about the images? The details of the image, layers of the image, volumes. Tell me details about the volume, the size of the volume and so on. So we are going to use it extensively throughout the course, but it's good to introduce it right now so we are familiar with it. So, we can do the inspect when it comes to containers. You can do it for running or for stopped containers. So, a stopped container can be inspected. You are only inspecting it. You are not trying to do traffic through it or anything else. And here's the usage. We can do docker inspect and the name of the container. Of course, the ID is also or can be done. docker inspect nginx latest. So, so this is for a container and this is for the image and you can put the nginx latest or a specific version or just remove the colon and latest and it will be understood that this is the latest. We'll get information like image ID, creation time, and more than that. Okay, so let's go ahead and try the docker inspect command. So, I'm at the docker host. I'm going to connect. I'm going to use EC2 connect. You know what? Let's Let's try session manager for a change. So, let me do this. All right. So, session manager this time. I'm going to show you that they could be either one for as long as you're comfortable with one of them, that's fine. So, here is the prompt, the dollar sign. And what we'll do is sudo su and I'm going to do cd and I'm going to go back to the root. Now, if you do pwd, you'll be at the root folder. And here you can see that we are at the root and here's the private IP address of the instance. All right? And I have root privileges. I've elevated my privileges. So, now I can do any commands I would like. Okay, so let's do docker ps. I don't have any running containers. docker ps minus a and then now we have Let me just minimize it a little bit so we can see the containers. So, this is uh it's not the perfect output. You know what? Let me shift to the other one. This is container three and then container two and container one. I would rather see it on a one line. And this is not going to help. Maximizing or minimizing is not going to help. So, let me I'm going to leave this for second terminal, but I'm going to go and do an EC2 instance connect one. And I think the output is better organized on the EC2 instance connect one. All right. So, let me do a clear. Let me do a sudo su and if I do pwd, see here I'm at the /home/ubuntu whereas on the Systems Manager, I was at the root. So, please pay attention to the differences if you are if you decide to use the Session Manager instead of the EC2 instance connect. All right? Okay. So, what do I need to do now? As we mentioned, docker ps -a. And as you can see, we have container one, container two, container three, and elastic borg, and all of them they have exited about 20 hours ago. All right. Okay. What do you want to do? So, we do we want to do docker inspect container one, for example. So, we have plenty different pages of output. So, all of this is the output and that's why we said low-level details about the container. So, this is the output of the command when we inspect it. Let's find out few fields that are going to be beneficial and we're going to look at them later on as well. First of all, if you look here, we did container one. So, this is the ID, right? E6 and it it ends with 092. So, you'll find it here that you have the ID. The exact same. This and this are exactly the same. So, that's the ID of the container. When it was created, so that was created close to 20 hours ago in And then we have the arguments, the engine X. And if we look here, you'll find that it is from engine X actually. Status exited. And the image where it was created from. And notice now when we're talking about the resolve conf path, host name path, any path inside the container, see where it starts. Under the var lib docker, this is where the docker will be installed and any folders that has to do with docker are going to be subdirectories from that folder or from that path. So here we have the containers path for example. They all start with var lib docker, var lib docker. All right, name container one. Platform is Linux. Networks, we're going to look at that and the port bindings if any, we're going to look at that later on. But this is an important part that we should also look at when we are inspecting for networking. And if we scroll down ready path, grab drivers. Oh, mounts is very important if we have any volumes attached to the container. And the image engine X, volumes we don't have any volumes attached to it right now. And if we scroll down more, network settings, information about the network. And the network is a bridge. And as we scroll down Oh, we don't have any IP address assignment right now because it is in exited mode. All right, DNS name and a lot of other things that are important. So let's bring this container to life. So let's do Docker start cont1. So, now it has started. Let me do Docker PS to verify. Yeah, it has started. So, let me repeat the same command again and see the network part what will be the difference. Oh, I'm sorry, not start, inspect. Okay, see, for the network part, you'll find now that we have a MAC address, a layer two network address, and then we have an IP address on the container, and we have a gateway for the container, which was null before. So, this is important because now we can see that when it is active, it has networking components. We are going to cover a full section on networking, so don't worry about that. All right? So, that's Docker inspect. And also, we can do Docker inspect for images. So, I can do nginx. And now I'm inspecting an image. So, we have here type, and we have layers in the image. We're going to talk about layers later on. Let's go up and find from the start what information we got. So, here is where we started. So, the ID of the image. Configuration, hostname, domain name, and all that. We don't have any information about that. Path. nginx version. And the command that executes when the container runs is nginx to start nginx, basically. We don't have any volumes. And labels, the maintainer of this is nginx Docker maintainers, docker-maint@nginx.com. And OS is Linux. The size. And that's it. And metadata. Last tag time. All right. Let's conclude our discussion about basic Docker commands with Docker rm. If you would like to move a container, remove means delete, completely move it or remove it from your containers on the Docker host. Docker rm and the name of the container is going to to only remove the stopped containers, not the running ones. What if I need to remove also the running ones? Then I need to have the hyphen f or the dash f, which is force the removal or the delete. Here's an example, Docker rm. I can put the container ID or the container name. And I can do multiple containers at the same time, and I can only add from the IDs the first few letters if I would like to. And minus f is to force stop the running containers and then delete it. What if I need to remove images? Then I have Docker rmi. Remove image. So this can remove one or more Docker images from the local system, but if I have a dependent container on one of the images, it will not be removed. Again, minus f means remove the image even if there are containers stopped or running created from that image. Here's an example, Docker rmi my image and Docker rmi multiple images and Docker rmi minus f. Remove the image, force the removal that has dependent container created from it. All right. The next command is Docker logs. And then we have options and the container ID. This is to read logs of a container, basically. Logs are important if you are doing debugging, if you are doing troubleshooting, or we want to monitor logs for application or for processes running in the container. Here's an example, Docker logs my container. and docker logs and follow my container. So, that means it will display the logs and keep updating the terminal the output with the logs with the new logs. Not just giving me what is in the container and that's it. What if I need an option for a docker run but I don't remember it? So, I can do docker hyphen hyphen help or you can do docker specific command hyphen help. So, for example, docker run double hyphens or dash dash help. This will give me the list of available option and flags for this command. So, I can do it with docker commit, I can do it with docker inspect and so on. Then, if I have images that are not used and I would like to free up space on the docker host, then I can do the command docker image prune. So, this is going to remove the images that I'm not using. Let's go ahead and do this in the hands-on lab. So, let's see what images and containers we have. Okay, minus A. So, we have container 1 2 3 and we have this random container and they are from Ubuntu, Nginx, Python and bash. So, what images do we have? We have the Ubuntu utilities, Nginx, Python, Ubuntu and bash. So, we have these images and we have this. Let's say you would like to clear up space on the host because there are some images that you are not using. So, you can easily do docker rmi and then the name of the image. So, if we have this Python unable to remove repository Python there is a container using it. That's why you cannot remove it because we have one here that is from Python. All right. So, what do I need to do then? Then, I can force removal rmi minus f and the image name. And now, as you can see, it is removing that. And if I do Docker Docker images, now Python is gone. Although, there is one container dependent on it and it's still here. Let's do Docker RMI, remove multiple in and I I'll do minus F because there are containers dependent on them. I'm going to remove the bash. I'm going to remove the Ubuntu and I'm going to remove the engine X. Docker images. I'm going to retain this one because, as you know, that this one is having the tools that I usually use. So, I'm going to keep this one. I'm not going to remove it. Now, let's go ahead and check what can we do with the containers. Docker RM, this is for the container and then I'm going I can do 0 CC, so the first three letters from this one, and 5 D 7, which is the first three three letters from the second one. So, now I'm removing two containers at the same time. Let me see what happens. Docker PS minus A and we have container two and three. So, this one and this one are now are removed. Okay, let me start one of the stopped ones and then I'm going to see what happens with the container when it is running and I'm trying to Let me run a container. Docker run minus IT. Let's say name is container five. And I'm going to run it from this image. The one that is left here. And 1.1. So, we have to put the tag as well because this is what I have here. So, I'm going to run this one in a bash shell. So, I have it right here. Okay, And I'm going to open a new window, new terminal, and I'm going to try and remove it. So, it is running, and I'm going to try and remove it and see what happens. Cuz I want to show you that you can do the minus f command or the minus f option to the command. sudo su and then docker ps docker ps Okay? So, I'm going to do docker rm container five. And let's see what happens. So, you can't because the container is running. So, I can either stop it and then remove it, or I can do docker rm minus f container five, and it's going to kill container five. So, docker ps Now, I don't have anyone running. docker ps minus a and now we have two containers running. I can remove them in one shot now. I can do container two, container three, or I can use the first the the container IDs or the first few letters from each ID. And now we don't have any containers left, stopped or running, and I have only one image left, which is the one that has the ping and curl and all that stuff that we used before. Now, let's try the docker help. Let's say I am stuck with docker run or docker commit, and I'm not sure what options I can use with this command. So, I can do docker help, and then it will tell you that you can do minus a to add the author, minus c to apply docker file instructions, minus m to add a commit message, minus p to pause container during commit. So, these are the available options, and here it gives you the syntax. So, docker container commit or docker commit and then the name of the container here and the image that you're going to create from it. All right? All right. Now, let's move to the next one, which is the Docker logs. So, I have a script for you. So, we're going to run a container with this script. It's a long command, that's why I'm copying it. So, Docker run ITD interactive detached mode. Name is container logs, and the image is Alpine. And then it shell, it will run a shell command. While true do date it will print the date. Sleep for 2 seconds until the 2 seconds are done, then there will be logs in the container. So, Alpine doesn't exist, it will have to download it. So, for 2 seconds it will be printing the date. And now, what we need to do is I need to do Docker logs and the name of the container. We have to do Docker PS first. So, we'll do Docker PS. And I'm going to do Docker logs and the ID of the container. And you'll see now it was printing the logs. This course would never be possible without your support. In order to support us develop more free content that is high quality at no price to you like this one, consider buying the full package of this course on www.dolphined.com. It can be found at this address www.dolphined.com/courses/docker. Very easy URL to follow. And for a price of a lunch or even less with the inflation that we are living in right now, you can support us develop more free and quality content like this one to help you throughout your learning journey and to help the masses as well across the globe. If you buy the full VIP package as I like to call it, you are going to have lifetime access to the content and its updates. It's going to be split into video lectures, so you don't have to be overwhelmed with seven or eight hours or even 15 hours a single video. You can have that divided into separate lectures for theory and hands-on. You're going to have access to the full 15-hours version of this course and you're going also to have additional hands-on labs on the topics that we have covered but at at a deeper level. You'll have a second real-world capstone project that will deepen your real-world experience with Docker and also you'll have a community access to that community for faster Q&A support. And of course, the ability on our platform to have quizzes and assignments is going to be there as well. And also you'll have access to the scripts for all the hands-on labs and the 330 pages PDF guide that includes all the slides of this course. We appreciate your support if you can and that would definitely be a good return on investment to yourself as well through more free content that we can generate through your support. When using Docker, it is very handy to use an IDE. An interactive development environment like VS Code. I mean, it's up to you if you want to use a different one, but I'm going to show you where you download VS Code from. From Microsoft, it's free. And also how to get you can install the Docker extensions because you are going to use it in our demonstrations moving forward. So, if you had to Google and you just type VS Code download and you'll find the official website visualstudio.com download, click on that. And then here you'll find out the Windows installation, and then you'll have the Mac installation, and if you are working on a specific Linux image as well. Okay, so if you click on Windows for example, then you will find that the a direct download link is going to start, or if it's not started, you can click the link. So this will download the package, and then you can just double click it if you are on Windows, and then you can follow the instructions, and yes, yes, continue, add the user agreement, and then you'll have the file, add a shortcut to the desktop, and life is good. So you have VS Code now. The next one is we need to open VS Code, and we need to install the Docker extension. So it will help you as you write Docker code basically, or Docker scripts. So let's go ahead and do this. So if you are in VS Code, what you need to do is you need to click on this, which is the extensions. And then here you'd like to look for Docker. And this is the one that we are looking for. Edit smarter, ship faster, and so on. In my case, this is already installed, so I can uninstall it and disable it. So it's installed and enabled. In your case, if you didn't have it before, then you will have here install, click on install. It will take some time, and then it will be installed. Make sure that after that is done, that here it's going to show disable and uninstall. If this is what you can do, that means it is installed and enabled. So if this one shows enable, please click on it. If it shows disable, don't do anything. You are good to go. If this one shows install, that means you need to click on it to install it. If it shows uninstall, you are good to go. Don't do anything. So you're looking at that it should be exactly like it shows here, and the auto update in case if there are any updates, you can do that as well. All right? So, we need the one from Docker, not from Microsoft, not from any other ones. The one from Docker, and you need to install it. And make sure that it's enabled. That's it for this hands-on. Please install Visual Code, and please install the Docker extension. Let's look now at how you yourself can customize a Dockerfile based on what application you are using. So, for example, you would like to run an application that is written in JavaScript. Has nothing to do with the base images that are available, except for the fact that you need to run it on Ubuntu, or Alpine, or Fedora, or Red Hat Enterprise Linux. Whatever the base image is, but then you have a lot of files, and dependencies, and code that you would like to upload. So, now you are customizing an image. How can you write the text file, which is the Dockerfile, from which you can use the Docker build command to build an image, and then you can use that image for creating your production, of course, development, testing, and production environment eventually? And also, using the same technique, whenever there is an update to the code, or update to the dependencies, or the runtime version that you would like to use, you can go back into your Dockerfile, create a new version, so now you are maintaining that, let's say, in GitHub in a repository, version two, and then update whatever you like. Create from version two an image two, and then from that you can build also new containers, and then you can decide on how the migration will happen. So, the essence is building and customizing your Dockerfile, from which everything else happens. And this is what we are going to discuss right now. A Dockerfile is nothing more than a text document. And in that text document, you tell the Docker engine all the commands that a user would have otherwise done manually on the command line to build the application. So, what we are trying to say here is the instructions in the Dockerfile are nothing more than the actual commands that you would have used manually on the CLI to build your application. So, if I wasn't going to use containers and I wanted to build the same application using command line, I would have done that step-by-step manually in the command line. Let's say, start a virtual machine, Ubuntu virtual machine, and then go into the console and start as the root user or as a privileged user to do make directory, CD, copy, run apt update, yum install, and all that stuff. That's exactly what we do, but we would like that to be automated, and that's why we build the Dockerfiles. So, how would a simple Dockerfile look like? This is an example where we are instructing Docker, "Please build an image that is going to download the base image from Ubuntu." And I could, of course, include colon and then a specific tag for a version if I wanted to. Who created this Dockerfile, and that will be in the image as well, the details of who created that, the author, basically. And then, I want to execute the command apt apt-get update. So, I want to run this command. And then, at the end, please execute this command, echo hello from Dolphin app. So, that's a very basic and simple Dockerfile, but as you can see, it's all text. You can write it in your preferred editor, or maybe in VS Code, or any other IDE in order to give you help with the Docker plugins and all that. And you can build it, and life is good. Very easy. And from that, you are going to save it as the Dockerfile, and then you execute it with a Docker build and boom, you have an image. Docker can build these images automatically by reading the instructions from a Docker file. And how does that happen? When we have the Docker file [clears throat] edited and saved, then we can use the Docker build command and in the Docker build command instruct it or let it know where is the Docker file. So, it will read the instructions and it will create a Docker image. That's how simple the whole process is. So, let's understand the syntax. I mean, we have here from all all uppercase, maintainer all uppercase, run all uppercase, CMD all uppercase. What does each one of these mean? And also, what are the other options that we could use? So, let's go ahead and start to investigate that. So, let's start with the very first one, the Docker command or the Docker file instruction from. The from is nothing more than letting Docker get the base image on top of which the image is going to be built. So, the syntax is from and then the name of the image and the tag or the version in case there is a version to be followed. Let's say I have the after that run. I have command and I have other instructions. So, all these instructions will be based on the image that we have downloaded or created a layer for in the image based on the from instruction. So, this one, for example, from Ubuntu means since there is no colon and tag, that means please pull the latest base Ubuntu image and the following instructions are going to be based on Ubuntu. When you have a Docker file that has multiple instructions, when an image is built, Docker is going to build each line in the Docker file, each instruction in the Docker file as a separate layer in the resulting image. So, for example here, if we have a Docker image that has four layers, this could be corresponding to the file that we had. So, the from is going to map to a layer, the maintainer is going to map to a layer, the run will map to a layer, and the command will map to the layer. Why is that? Why is it built in this structure? And that's a long story about the union file system that the Docker images use, but the point simply is if you have these segregated from each other, then if you want to build a derivative from this image, let's say I go later on and then I change the author, and this will be John Doe plus George Watson. So, now it will update the corresponding layer only without having to impact or download or change the other layers. So, the new image will will reuse the existing layers, but will only change the one for which a change has happened in the Docker file. So, that's the simplest the layman terms of why it is layered, and we're going to play with the layers also in the hands-on labs. Second instruction we need to look at is the run. So, remember from base image. Now, if you have any run commands, they will be run based on that base image. So, run will run one or more commands, normal commands that you would have otherwise done manually. So, the run instruction will execute any commands in a new image layer and commit the results. And the syntax is run, and then you put the command or commands. There could be multiple commands, not only one. So, here is an example. I have a statement in my Docker file. So, let's say we started with from Ubuntu, as we did in the previous one. Then run apt-get update. So, this command is based on the fact that we are starting with Ubuntu. If it was Alpine, maybe it was going to be apk with a k, not apt. If it was a Red Hat Enterprise Linux or Rocky Linux, for example, this would have been yum. So, it all depends on which base image and then what will be the commands that you would have used manually on that base image or operating system, if you will. So, run apt get update and then run apt get install and yes for any questions, vim. And I can do also get, I can do echo, I can do nano and other tools that I might need to use as well. So, these are two instructions and they will end up being two different layers in the resulting image. All right. Is there a way I can minimize the number of layers by combining run commands? And the answer is absolutely. This is actually not the recommended way because now you are creating multiple layers for no reason. And the recommended way would be that you can combine both. So, you can have the two ampersands, which means do this command and this command to install them and this command to install get and you can have more than one. So, all of this is going to translate into one layer in the resulting image. So, if you are image layers, one might ask, but is it a rule that we try to minimize the layers as much as we can? This is all based on what is it that you are doing. So, if you want to run different packages and you know that down the road one of them is going to be changing frequently, which will result in that this layer will have to be run again and again and executed in every update, then maybe you would think, "No, no, no, no, I don't want to do that." For them, I don't want it to be updated regularly. So, I'm going to separate it in a separate run command and the others I'm going to combine them. So, minimizing the layers is sometimes a very good idea and sometimes it is required to have multiple and separate layers depending on the frequency of the updates. The Docker history command can help you find out what are the layers in the base image if you will or in the resulting image that you have created and you can use it to inspect the layers available or the layer details in any image. Very handy to use when you would like to find out what is the number of of layers available and what do they map to exactly in the instructions in the Dockerfile. So, very easy Docker history and the name of the image that you are using that you have on the local host and it will tell you everything about it. Still with Dockerfiles, let's look at the CMD or the command instruction in a Dockerfile and also how we can build images using the Docker build command. The command or CMD. So, this is to specify the command to be executed when the container is started. If you think about it, run that was maybe installing something, updating something. That is run command. When the container runs, what is the command that will be started? Is it bin bash shell terminal? Is it going to run engine X? Is it going to do an echo command? That's what we mean by to be executed when the container starts. And the syntax is we have command and then I mean this is the JSON and the preferred way. Then we have the brackets, the square brackets and then what is the command? So, this could be echo for example, can be LS, can be something else. And then parameter one, parameter two and so on. Usually, only one command instruction should exist in a Dockerfile. But what if I am building this image from an image that already has is command and I would like to add a command in my file. What happens? If you have multiple ones, then the latest one is going to be the one that will be executed. So, only one will be executed. The weak side of the command is that it can be overridden at container start time. Don't rush it. We I'm going to show you that in the hands-on labs. Here's one example. Command, square brackets, and then we have the double quotes, echo. So, this is the command to be executed. And here is the message that will be echoed. So, this is the parameter for the command. And the output after the container runs will be hello from Dolphin app. That's it. And if we have another example, if this is the command that will be executed when the resulting image from this Dockerfile is going to execute when we run a new container, so that
Original Description
Ever wondered how tech giants like Spotify and Netflix scale their software so fast? The secret is containerization, with Docker as the essential tool at its core. This structured, hands-on Docker course will take you from absolute beginner to job-ready, providing the practical skills needed to build, test, and deploy containerized applications reliably.
Docker course resources: https://www.dolfined.com/courses/docker
Eissa from DolfinEd developed this course.
❤️ Support for this channel comes from our friends at Scrimba – the coding platform that's reinvented interactive learning: https://scrimba.com/freecodecamp
⭐️ Contents ⭐️
- 0:00:00 Introduction to Containerization & Docker
- 0:01:41 Who is this course for?
- 0:02:05 Course Curriculum Overview
- 0:03:35 Instructor Introduction & Experience
- 0:05:02 Support & VIP Course Package
- 0:07:01 Detailed Topic Breakdown
- 0:10:21 Why Learn Docker? (Market Demand)
- 0:12:11 Top 4 Benefits: Reproducibility, Dependencies, Portability, Version Control
- 0:15:30 From Physical Servers to Virtualization
- 0:16:16 Computing Device Components
- 0:19:18 What is a Server?
- 0:23:57 The Move from Virtual Machines to Containers
- 0:34:04 What is a Software Process?
- 0:37:54 Container Features vs. Virtual Machines
- 0:42:07 Docker Architecture Explained
- 0:53:07 Setting Up Docker on AWS (Free Tier)
- 1:04:12 Alternatives: Docker Desktop & VirtualBox
- 1:17:16 Connecting to EC2 Instance (Session Manager & SSH)
- 1:31:03 Installing Docker on Ubuntu
- 1:42:24 Basic Docker Commands (Pull, Run, Stop, Inspect)
- 2:08:38 Docker Networking Overview
- 2:18:00 Docker Networking Modes/Drivers
- 2:30:40 Docker Networking Labs (Bridge Mode)
- 2:38:00 Data Persistence: Volumes & Bind Mounts
- 3:04:07 Docker Compose Introduction
- 3:17:48 Docker Compose Workflow
- 3:22:40 VS Code Setup & Docker Extension
- 3:40:00 Creating Custom Docker Files
- 3:55:00 Understanding Image Layers
- 4:04:40 CMD vs. RUN Instructions
- 4:10:40 Expose and Copy I
Watch on YouTube ↗
(saves to browser)
Sign in to unlock AI tutor explanation · ⚡30
More on: Docker & Containers
View skill →





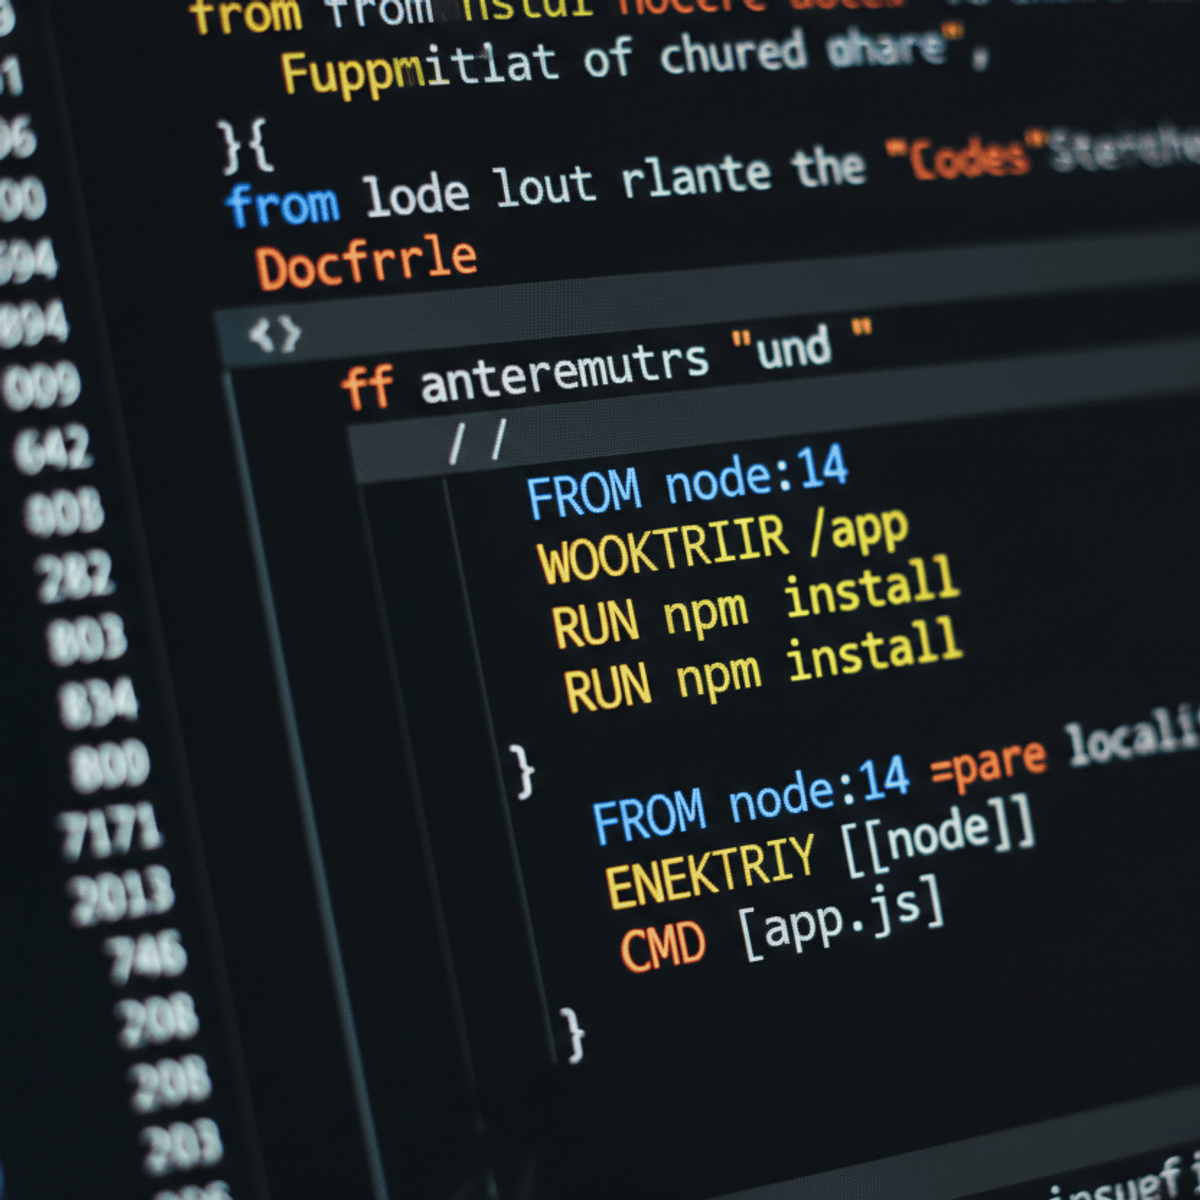
Related Reads
📰
📰
📰
📰
AWS CodePipeline Tutorial: Deploy to EC2 with CodeCommit, CodeBuild & CodeDeploy
Dev.to · Guna SantoshDeep Srivastava
Harbor HTTPS Setup Using a Self-Signed Certificate
Medium · DevOps
Debug a Legacy Frontend-Backend Deployment With One Trace ID
Dev.to · Odd_Background_328
Four inspectable workflows for context, research, orchestration, and evaluation
Dev.to · Zain Dana Harper
🎓
Tutor Explanation
 DeepCamp AI