Data Structures and Algorithms in JavaScript - Full Course for Beginners
Skills:
Algorithm Basics90%
Key Takeaways
Covers data structures and algorithms in JavaScript
Full Transcript
hi i'm bo in this video i will be going over some common data structures and algorithms in javascript i'll be showing you how to implement them in javascript so if you want to see the exact list you can check the description and i have links to all the code in the description as well so let's get started a stack of books is a great example of the stack data structure if you make a stack of books the topmost book in the stack was the one that you put there last if you removed that book from your stack's top you would expose the book that was put there before the last book stacks are of laspin first out type of service the last book you put on top of a stack would be the first book you take off the stack another example of a stack is your browser's back button if you look up here we just opened up facebook.com so we add it to the top of the stack of sites that we've already visited previously we do stack.push push is one of the stack methods you push facebook on top of the stack this middle is what it looks like when we are visiting facebook and then this bottom image is where we press the back button to navigate back to twitter so we pop off the most recent url and we just leave twitter at the top of it the functions traditionally provided in this stack are push for placing data onto a stack pop for removing the top element of a stack peak for displaying the top element of a stack and length or size for determining how many elements are on a stack a nice feature of javascript is that the array object already has all the functions we need in order to use it as a stack so you could just use an array as a stack i will show you how to do this using an array but then i will actually create a stack class and show you how that works too i'm going to use an array stack to find words that are palindromes a palindrome is a word that is spelled the same forwards and backwards such as bob bob or car r-a-c-e-c-a-r okay so we have var letters equals an empty array and that's the stack because remember i said arrays are have all the functions of a stack so look at how this program works first we're going to set a word to be anywhere we want and we're going to choose race car which is a palindrome and then we are going to have a variable which is just a empty string for r word or reverse word we're going to use the stack to fill up the r word variable with the reverse of the word variable the first thing we're going to do is put the letters of the word into the stack so we have a for loop here and we're going to start at index 0 and go to the last index of the word length so an index and a string is just which character we're looking at so we're going to do letters which remember is our stack dot push the stack function where you push something on top of the stack and we're going to push word index i so that's just going to take this for loop is just going to take each letter of our word because we have index 0 index 1 index 2 each letter is a new index and push it onto the letter stack now we are going to pop off the stack in reverse order so we can create the r word variable which is this the reverse of the word variable another for loop and now we are going to have the r word and we're going to add one letter at a time from the stack by popping off the top letter and because they were put in order they're going to be popped off in reversed order now we have a string that should be the reverse of the the first word so word and our words should be reversed of each other now to check if it's a palindrome we just say if r word equals equals equals work it is a palindrome or else it's not a palindrome so let's run that and see what happens and racecar is a palindrome but if we change that to free code camp and run that nope it's not a palindrome okay that was just a basic usage of a stack using an array now i will show you how to implement a stack in javascript so you can understand stacks a little more you probably would never do that because you can use an array as a staff but this should possibly help you understand how stacks work a little better so here's where we're going to create the stack which is going to be this function here we're going to have two variables this dot count and this dot storage now this storage is an empty object and count is going to keep track of how many items are in the stack so here are all the different methods we have push this.push is going to add a value to the end of the stack you're going to pass in the value this dot storage remember storage is the empty object at the index this dot count we are going to add the value so we're going to put the value on the top of the stack or the end of the stack and then we're just going to increment count up one so now it's showing that we have another item in the stack the next function we're going to remove and return the value at the end of the stack or at the top of the stack which is the stop pop this is going to pop an item off so if this.count equals equals zero that means there's nothing in the stack and we're going to return undefined because there is nothing in the stack once we return undefined we're not going to do anything the rest of this code here because we've already returned from this function if we're popping off something we're going to have to decrement the count so it's a count minus one so one less we're going to set the result to this.storage which is the object for our stack and it index this.count which is the last item in the stack and then we're going to delete that item and we're going to return results so you get the last item back but it will be deleted off of the stack and there's just a few more methods this dot size is going to return this that count which is the number of items in the stack and then the last function is this.peak which is going to return the value at the end of the stack but it will not remove it like pop so peak and pop are kind of similar but popper moves that item and peak does not remove the item so return this dot storage and then this dot count minus one this that count would actually be the index one after the final item because what that's where you would add a new item but you would have to do minus one to get the last item and if you're peaking you do not want to pass in a value so let me take that that off there so you only pass in the value when you're pushing in something let's see how this would work down here okay we are going to create a variable called my stack which is a new stack which is what we just defined up there we're going to push one onto it to the top then we push 2 on the top so it's just a stack with 1 and then 2. we're going to peak and we're going to console.log this because it's going to just return the top number of the stack which should be 2. now we're going to pop off 2 so it's going to return 2 again but it's going to remove it and if we peak we should be back to one and before we run that i forgot these extra parentheses here because these are functions and need the parentheses at the end of all functions so let's try that okay see we peaked at two we popped off 2 and then when we peaked again it was 1 because 2 was was removed now you can also add other things to the stack now we're going to push a string onto the stack and we're going to check the size then we're going to peek and we're going to pop it off and we're going to peek again so let's see what that does so we pushed one we pushed two we peaked which showed two we pop which popped off to we peaked again which showed one so there's only one thing in the stack then we pushed free code camp to string and we console.log the size and now the size is two the stack is just one on the bottom and then free code camp on the top we're going to peak which is going to show free code camp now we're going to pop which is going to pop off and show free code camp and we're going to peak again and we'll see that it's just one on the bottom well those are the basics of stack the set data structure is kind of like an array except there are no duplicate items and the values are not in any particular order the typical use for a set is to simply check for the presence of an item i'm going to show you how to implement a set function es6 actually has a built-in set object however the built-in set objects does not contain all the methods that are common to sets so you may still have to implement part of the set yourself depending on what you're going to use it for when i show you the implementation for the set i will tell you which methods are part of the es6 set and which are not so we're just going to go through this code we're going to call it my set now we could call it set but i want to make it different than the the es6 set so this is my set so here's just the collection the set is going to be a collection of items and we're going to store them in an array which an array can have duplicate items but we're going to implement this in such a way that you cannot add duplicate items to this array this method the method has is going to check for the presence of an element and then return true or false so you're going to pass in the element and it's going to do collection.index of element is not negative one so if the element is not in the collection it's going to return negative one so if it doesn't return negative one it's true so if it's not negative one it's true that means the element is in the array else it's false now we have the values this is going to return all the values of the set pretty straightforward just return the collection now add we're going to add an element to this set but first we have to check if the element is in the set already so we're going to call the the method we've already defined the has method and see if the collection has the element if it does not have the element then we can add it we're going to push that element to that collection array and we're going to return true else we're going to return false so if we don't push an element to the collection we're returning false now we have remove this is going to remove an element so first way to check if the element is in in the collection and if it is in the collection we're going to find out what the index of that element is and then we're going to remove it splice is means we're going to take out we're going to take out an element in the array starting at the index of the element and going for one element we're going to take out one element and then we're going to return true or we're going to return false if that element is not in the collection then we're just going to return the size of the collection um we're just going to return collection.link every method we've gone through so far is in the es6 implementation of the set so the es6 set has values add remove and size except remove is delete in the ex6 set instead of calling remove you're going to call delete but all the other things are included oh another thing is size is not a method in the es6 set size is a property that just means that when you're calling it you're not going to put parentheses at after the the method because it's just a property so you can do set dot size instead of set that size with parentheses after it okay now we're going to get into the methods that are not in the es6 implementation of the set but are often included in sets the next few methods actually just help you work with sets and when you're working with two different sets so we have union this method is going to return the union of two sets so it's going to combine the sets but leave out any duplicates in the combination of the sets so we're going to call the union method on the original set and we're going to pass in the other set that we want to combine we're going to create a new set which this should be my set same with down here because we want to make it distinct from the es6 set so we have the the union set which is just a new set that's what we're going to combine the sets into we have the first set which is this.values and the values we're just calling the the values method up here to return the collection and the second set is going to be the other set.values we're going to first set for each and for each value in that set we're going to do unionset.add to add the value then we'll do the same thing second set dot for each and for each value in the second set we're going to add the value remember the add method already does not add the value if it's a duplicate so the union set now will not contain any duplicates and since for the set data structure the order doesn't matter we don't have to have the values in any particular order and then we're going to return the union set now we have intersection which is going to return the intersection of the two sets as a new set so we're gonna make a new set here intersection set equals new my set the first set again we're gonna call the this.values to get all the values in the first set now for each value in the first set we are going to check if the other set has the value we are going to add it and then we are going to return the intersection set so the intersection is just all the items that are in both sets and that's we're going to return that as a new set and this next function we're also going to have to add them my there so this is the difference so the difference between the sets so all the items that are in one set but not the other set so we're gonna create a new set again the different set and again we're gonna get the values of the first set now this is very similar to the intersection we're going to go through each value in the first set and if the other set does not have the value remember up here we're seeing if the other set had the value now we're going to use the not operator the exclamation point to see if the the value is not in the set and we're going to add that to the difference set then we'll return the different set and the last method we're going to talk about is the subset and this is going to test if the set is a subset of a different set so it's going to test if the first set is completely contained within the second set so it's just going to return true or false so we're going to pass in the other set we're going to again get all the values of the first set and we're going to call this function first set dot every and what that every method is going to do is going to test whether all the elements in the array pass the test implemented by the provided function so we're going to test if all the elements in the first set will pass this function which is other set dot has value are all the elements in the first set um are they in the second set so we're going to see if the first set is a subset of the second set so that's the set data structure and let's quickly just show you some some uses of the set so we have set a is my new my set set b is new my set we're going to add to set a a we're going to set b b we need to set b c we're going to add to set b a and we're going to add to set b d and now we're going to see if set a is a subset of set b so is set a is every item in set a which is actually just the letter a and set b which it is because it's right here let's run that and it should say true let's do some other things okay and this is the set a dot intersection set b is going to return a new set which we are then going to call the values function so we can see all the values in that set and it's just a because the only value that's in both set a and set b is a but we can do a lot of the same things with the built-in set i'm going to copy all this instead of calling this my set we're just going to have set we're going to do set c and set d okay so here's one difference with the es6 set is that when you call the values method instead of returning an array it's going to return an iterator so you can see object set iterator here and then you can still iterate through all the items in the array besides that all the other methods that a set has are very similar to the met the set that we implemented so we can do set d dot delete now this is instead of remove so we're gonna delete the a and then we're going to console.log and check if set d has a and we can see it's false because it's been deleted and we can also try to add d which is already in the set oh and there is one final thing that's different with the es6 implementation the add method is not going to return true or false um whether the the item has been added or not besides adding the item what it's going to return so what it's going to console.log is is the set itself it's not an array of the set it's going to return the full set so if we run that you can see here it's going to return the set which is an object and since it's an object it's not going to show all the different items in the set okay that's the set data structure the q data structure is a way to hold data it's similar to a stack while a stack is first in last out a queue is first in first out an example in real life is when you are waiting in line to buy something at a store the first person to get in the line is the first person to get to the cash register another example is a print queue when a lot of people are printing documents at the same printer the documents are printed in the order they were sent to the print queue in javascript just like a stack you can implement a cue with just an array if you want to limit an array to just the traditional queue methods you must create it yourself let me show you one such implementation so we have the queue right here and we're going to have a collection that's going to collect all the items in the queue and this is just kind of a helper function to print or to console.log the collection and here that the main main methods of a queue we have enqueue which is going to push the first item onto the queue and then we have dq which is going to take an item off the queue so there's two ways to do it with an array items can go into the array at the beginning of the array or items can go in the array at the end of the array in this implementation items are going into the array at the end of the array and then they come off of the array at the beginning of the array to put an item onto the queue we're just going to push that item that element onto the queue then to dq we're going to use the array.shift.shift just pulls off the first item of the array it removes the first item of the array and returns it another q method is front this is just going to return what item is at the front of the array without removing the item off of the array so we're just going to do collection just going to return what items at the at the zero index of the correct collection array and size we just try to figure out the size of the queue pretty straightforward just collection.length and then is empty check if it's empty if there's no items on the queue so let's see how that was going to work down here i'm just going to uncomment that and run the code so we enqueue we created a new queue then we inc we enqueued abc so the line the end of the line is the end of the array the beginning of the line is the beginning of the array so it's going to print a b c here and then dq means that the the item at the beginning of the array is going to be removed so the a is going to be removed and then we're going to do um q dot front which i forgot to put the console.log here if i run that again you'll see that it's going to check what what elements at the front of the array which is b and they're going to print the array again it's just going to be b and c because we dequeued a another way to create a cue is a priority queue in a priority queue not only do you pass the element into the queue you also pass the priority of the element so if all the priorities are the same number it's going to behave just like a normal cue but when you pass in elements at different priorities the elements that are passed in with a higher priority are sent to the beginning of the queue so all elements with priority five are ahead of elements with priority four but if elements have the same priority it just behaves like a normal queue so let me explain how the priority queue works first let me show you an example of this code down here where we're using the priority queue so we're going to create the priority queue and then we're going to enqueue something and so we're going to pass in an array the first element in the array is the item we want to put on to the priority queue the second thing in the array is the priority and so you can see i'm not pushing them on in the same order two three one but if i i run this when we the print the collection it's going to print in the order of the priority and just to show another example let me add an item with the same priority as an item we already have and if i run that you can see these two items have the same priority so they're in the queue in the order that they were pushed onto the queue so everything's the same on a priority queue except the enqueue function so in the nq function first we're going to check if the queue is empty if it's empty you're just going to push on the element but if it's not empty you're going to have to check the priorities to see where to put the element on so we're going to create a variable just to check whether we've added the item to the queue or not and it's false it starts at false and now we're going to have to run through each element in the the collection or the queue to check what the priorities are so we have this for loop that's going to run through each item in the collection and we're going to check is the element at index one remember the element that we pass into the queue is an array index 0 is the item you want to put into the queue and index 1 is the priority so is the priority of the element we're passing into the queue less than the priority of the item in the collection that we're checking and see we're using this i from the for loop we're gonna go through and check every item in the collection and we're gonna check the index one which is the priority of that item and then if the priority is less than the item we're going to add that item or the element to the collection array that's what this splice is doing and then we're going to say add it equals true we're going to break out of the the loop here and then we're going to be done except if the element hasn't been added we are going to then push the element to the array and the only thing that's slightly different is this dq method and this the way i did is kind of optional you could return the entire element with the item and the priority or you can do what i did where i just um returned the the item without the priority here that's just index zero of this value which is the item that we got off the beginning of the array well those are cues and priority queues a tree data structure is a way to hold data that when visualized looks like a tree you would see in nature now this is actually what we visualize a tree data structure to look like all data points in the tree are called nodes the top of the tree is called the root node and from here it branches out into additional nodes each of which may have more child nodes and so on nodes with branches leading to other nodes are referred to as the parent of the node of the branches that leads to the child leaf nodes are nodes at the end of the tree that have no children also any children of a node are parents of their own subtree in this video we will be covering a specific type of tree called a binary search tree while the tree data structure can have any number of branches at a single node for instance see the c here there's fgh it has three branches at a single node a binary tree however can only have two branches for every node so look down here here's a binary tree each node only has two branches also binary search trees are ordered each subtree is less than or equal to the parent node and each right subtree is greater than or equal to the parent node because they use the principle of binary search on average operations are able to skip about half of the tree so that each lookup insertion or deletion takes time proportional to the logarithm of the number of items stored in the tree this is much better than the linear time required to find items by key in an unsorted array but slower than the corresponding operations on a hash table so let's see how this works in javascript here we're going to use classes to create the binary search tree basically we're going to create two classes the node class and the bst or binary search tree class the node class represents each node in the tree and there's going to be three data properties we have the data which is what we're actually trying to store and we have this dot left and this dot right which are going to point to the left node and the right node so in the binary search tree we're going to have the constructor which just creates the the root node which is the top of the tree which starts as null and then we're gonna have the add function so this is how we are going to add something to the tree so we're gonna add the data we're going to get a reference to the root node but if this is the first node node will be null in that case we're just going to set the root node to the new node the new data we just put in so new node data so we're just going to create a node based on that data if it's not the first node we're going to have to figure out where to put this node in the tree to figure out where to place the new node we are going to use a recursive function so we're going to create this function which is search tree we're going to pass in the node which starts off as the root node if the data we pass in is less than node.data that means we're going to put the node on the left side of the tree so if the node.left side of the tree is null we're just going to assign node.left to the new node and then we'll return but if node.left is not null we're going to return searchtree node.left that just means we're going to continue searching this is where the recursive nature comes in it's going to run the search tree function again and continue working down the tree to find where to put the node and you can see here else if if the data is more than node.data that means we're going to put the node on the right side so if node.write equals equals equals null then we just assign node.write to the new node and we can return else if if the node.right does not equal null we are going to have to keep searching so we're going to return search tree node.right so else that means data is not less than node.data data is not more than node.data so they must be equal if they're equal we're not going to add the data to the tree we're just going to return null so this is the search tree function and this is how we initially call the search tree function return search tree node which starts out as the root node but then it can be called with different nodes as it's going recursively through the tree let's say you have 50 in your tree and you have 17 in your tree and you want to add 23. first it's going to see that the node is not null because you have things in your tree and then it's going to run the search tree function putting in the root node which is 50. then we'll see if data is less than node.data which it is because 23 is less than 50. we're going to go to the the node.left if node.left is null we would put it here but it's not because there's a 17 here remember we're just adding the number 23. so else if if left node.left does not equal null which is true we are going to return the search tree node.left so we we are now going to run this searchtree function but pass in the 17. so now we're going to see does is data less than node.data well now data is 23 but node.data is 17. so this is false now we're going to go down to this is data more than node.data yeah 23 is more than 17. well is node.right null in this example we're saying that 23 isn't there so node.write would be null and then we can just set node.right to be the new node the next functions we're going to talk about are find min and find max so we're just going to be finding the minimum of the array and finding the maximum of the array if you look at this binary search tree right here you can see the minimum is all the way on the left side nine the max is all the way on the right side 76 so just using that knowledge makes it easy to find min and find max so i'm going to set the current node to the root node and so the min is going to be all the way on the left so while this dot left does not equal null the current node is going to be current.left and then at the very end it's going to return current.data so we're going to check this if the left side is not null we're going to go to the next one if it's not null we're going to go to this one if it's not null we're going to go to this one now the next is null because there's nothing to the left of 9 so we're going to return current.data we're going to return the 9 because that's the data on the very left side find max is just the same way but the opposite we're going to start at current which is going to be this dot root which is going to start the the top while current.write does not equal null well this does not equal null because it's 72 then we're gonna go to the next loop current equals current dot right when we go to the next one but now current.right is null because there's nothing to the right of 76 so we can just return current.data now we have the find function now is present is very similar but instead of returning the node we're just going to return true or false whether the the data is in the tree so we're starting at the top the root note while current that means while there is a current node while current is not null we're going to do the following if data equals equals equals current.data return true that means we've found it if we haven't found it we're going to see is data less than current.data now current equals current.left so we're going to start searching on the left side else well data must be more than current.data so we're going to start searching on the right side and we're going to keep searching and if we never find it if we never find that data equals equals current.data and return true that means it's not in the tree and we can return false okay the remove function is a little more complicated than the other functions we've covered just like in the add function in the remove function there's going to be a recursive function so we're going to create this function here const remove node equals function where we're going to pass in the node and we're going to pass in the data which is the data what we're trying to remove so we have this whole function here and then here's where we're going to call the function at the end this dot root equals remove node and we're going to pass in this that root and data we're assigning this that root to whatever is returned to this function here we're going to pass in the root node because you always start with the root node and then the data that we're searching for so let's see how that works first of all we have to check if we have an empty tree if the node equals null then we have an empty tree and we can return null now we're going to see does data equal node.data so we're trying to see if we can find that data in the tree so if we've found the node with the data this is what we're going to do there's actually three different options either node has no children that would be just like the 76. if there's no children we just completely delete that node so if node.left equals null and node.write equals null that means there's no children just return null when we're returning null we're setting the node that had that data to null now we're going to check if the node just has one child if node has no left child if node.left equals null that would be just like this 54 here there's a node on the right but there's no node on the left if node.left equals null then we're just going to return node.right that means we're going to replace this node with whatever is on the right which is 67 so instead of 72 pointing to 54 that will be replaced with 54s node.right which is 67. and if there's no node on the right we're going to do the same thing we're going to just return the node that's on the left to be the the new node that's being pointed to it gets more complicated when the node has two children like such as 17 if you want to replace node 17 you can't just put in 12 here because then what will happen to 23 you can't just put in 23 here because then what will happen to 12. so let's look down here this picture down here is kind of small let's say we're trying to remove this 3 here that has the red x in here the way to remove this node right here would be to replace it with this node down here so if we remove three we can place we can replace it with four and then everything will be right with the binary search tree so if you look at what it would become over here we just replace the 4 down here with the 3 up there but how are we going to get down to that 4 well first we have to go to the right sub node and then we have to go all the way down to the most left sub node after we've gone to the right subnode so let's see that we're going to create a temp node which is going to be node.right so in this case the temp if we're trying to delete the three the temp node would be node.right which would be the six here well no tip node.left does not equal null tip node equals node.left that means we're going to keep first we're going to go to the right of the node we're going to delete and then we're going to keep going to the left until we get to the last one on the left side and this one just happens to be four there's no more to go down because you just have to go down one but if there was more to go down it just keep hopping down until it got to the most left node now we're going to set node.data to temp node.data so the node is the three up here so instead of the data of this node being three the data the node is now four because temp node.data is four now we're gonna set node.right to equal and now here we're gonna call the remove node function again this is where it starts becoming recursive and we're going to pass in the node the node on the right and the temp node data and this will keep running through the function and set up the right side of the tree correctly we see here we are saying if data equals node.data else if data is less than node.data that just means we have to go to the left side of the tree because it's less and here we're going to call we're going to say that node.left equals remove node and we're going to call this recursive function again and pass the node.left and the data and then we're going to return the node else that means data is more than node.data we'll do node.write and then call this recursive function again and node.write data and we're going to return the node so you can see that delete is the most complicated one that we've covered especially when one node has two leafs so let's look at how you use a binary search tree at least this one that i've created so far so let's open up the console here i'm going to do const bst equals new bsd i've created my binary search tree we're going to add 4 add 2 6 1 3 5 7 and then i'm going to remove four and then we're going to fi we're going to console.log the min and the max two times and then we're gonna check to see if four is present another thing we're gonna do is where i'm gonna add in a remove seven and we'll run that again you can see it first it's the minimum is one it's gonna console.log max which is seven but then we remove seven and now the max is going to be six and we're gonna see is this present is for present false note 4 is not present because we've removed it this video covered all the key methods common to a binary search tree however in a future video i'll be going over a few other things you can do such as finding the tree height and traversing the tree through in order pre-order and post order traversal if you want to play around with this code you can check the link to the code in the description i'm going to talk about finding the tree height and tree traversal height in a tree represents the distance from the root node to any given leaf node so if you look at this example over here the root node is nine that's height zero but if you see four and seventeen here that's height one 3 6 and 22 height 2 5 7 and 20 are height 3. so it's the distance from the root node to the leaf nodes they're kind of like layers of a cake and that's how you're going to count them different paths in a highly branched tree structure may have different heights but for a given tree there will be a minimum height and a maximum height and if the tree is balanced these values will differ at most by one so before i show you the code to implement those things i'm going to show you the use of the code we're going to go all the way down to the bottom where we create a new binary search tree and then we add all these values which those values there are the same values as in the picture over here we're going to find the min height we're going to find the max height and we're going to check if it's balanced let's just comment out these now so it's showing the min height is 1 in the console the maxi is 3 and it's not balanced the min height is the distance from the root node to the first leaf node without two children so if you look on here 17 is a root node without two children it has a right child but doesn't have a left child so the minimum height you start it at the root node which is zero and then you count to the next level which is one so the min height is one now the max height is just the distance from the root node to whatever the the most bottom node is so 5 7 and 20 are all at the max height so 0 1 2 3. so the max side is three now this tree is not balanced because remember if a tree is balanced the values between the min height and the max height will be at differ at most by one you can see that there's a missing number here the reason why this tree is not balanced is because there's no number here to the left of 17 but if i uncomment out this code here we're going to add 10 now 10 if you see when it's being added it's going to add to the left of 17 because it's more than 9 but it's less than 17 so the 10 will fill this spot right here and then we're going to find the min height the max height and then check if it's balanced again okay so now the min height is two and the max height is three the min height is going to be either this three or the ten that we just added it's not showing up in the picture but just imagine there's a ten right here so we have zero one and then the min height is this level right here because this is the first level that there are nodes without two children if you imagine there's a 10 right here so that's two and then three is down here right now is balanced is true the difference between the min height and max height is at most one so it's going to have to be either zero or one to be balanced when a tree is balanced then searching through it is much more efficient we're not going to cover this in this video but there are ways that you can make a tree automatically balance itself when you add new items and when you delete items this creates greater efficiency when searching the tree okay now we're going to look at these last lines i have commented out here this these are ways to traverse the tree tree traversal methods can be used to explore tree data structures and basically find all the values in the tree in depth first search a given subtree is explored as deeply as possible before the search continues on another subtree when i show you an example that will make more sense but there's basically three ways that this can be done there's inorder traversal pre-order traversal post order traversal and this last one i'm going to talk about later this level order traversal so let me run this and then i'm going to explain it so here you look at the bottom of the console and you can see what we what we've logged here for in order traversal you're going to begin the search at the left most node and end at the rightmost node so you can see this this just has all the numbers in order three four five six seven nine ten seventeen twenty twenty two those are just all these numbers in order you're going to begin at the left most note and you're gonna add all the numbers in order now pre-order traversal you're gonna explore the root nodes before the leaves so let's look at this i'm going to read off these numbers down here and i'm going to show up on the picture where they are in the picture so we're looking at the root nodes first in the list nine is first that's a root note then four that's a root node then three and the next n is going to be six and then five and then seven then seventeen and then ten which we don't have on this picture then 22 then 20. so the preorder focuses on the root nodes first and then adds the nodes below that the post order explores the leaf nodes before the roots so look at this one the first node on the list is three because it's a leaf all the way down and then we have five because that's a leaf node and then we have seven and then we're going to go to six we're not going to hop over to 20 over here because that's on a completely different branch of the tree you have to finish all the leaf nodes on one branch before you go to the next branch so after six is four now is where we jump over the leaf nodes on the next branch and we use 10 which again is not on the picture then 20 then 22 then 17 the nine this level order is called a breadth first search this explores all the nodes in a given level within a tree before continuing on to the next level first it's going to do level zero which is nine if you see these numbers down here and the next time next is going to show 4 and 17 then 3 6 22 then 5 7 20. so let's go over the code so first we're going to go over the code for the min height and the find max site and that is balanced so the is balanced is pretty simple because you just call these functions that i haven't talked about yet but you're gonna call find min height and see if that's less than or equal to find max height minus 1. so this is going since this is a conditional statement it's going to return true or false so as an example if you remember before we added the 10 we had the min height of 1 and the max size of 3. if this dot maxite is 3 3 minus 1 is 2 so is 1 less than or equal to 2 no false so we know that the tree is not balanced we have false right here but then we run it again down here and the max height is three and the min height is two if we do three minus one that's gonna be two so now we have is two less than or equal to two yes so we're going to return true so that's how we're going to find out if it's balanced now let's look at find min height this is going to be a recursive function you can pass in a node but if you don't pass in a node it's going to set the node to the root node here and then it's going to check if the node is null and return negative one if you haven't added anything to the binary search tree it's going to return negative one for the height we're going to set the left and right to calling the find min high on node.left and find min height node.right so this is where the function becomes recursive eventually one of these two is going to be negative one because the left or right node is going to be null so here we are going to add one to the left if left is less than right and we're gonna add one to the right else so if right is less than left and for five find max height it's the opposite so instead of having the less than here we have the more than here so here we're going to return left plus one if left is more than right else return right plus one feel free to check the code in the description to play around with this yourself the inorder pre-order and post order there's a lot of similarities to the code so let's look at the in-order traversal first um the only thing that's going to be different in each of these in-order pre-order and post order are these three lines and the only thing that's going to be different in those three lines is the order of the lines so for all of them we're going to check if the root is null and return null this just to check if there's even a binary search tree that exists or if there's any values in it so if we find out that there is a binary search tree we're going to do these things we're going to create a new array of the result and we're going to add each value in the the in the tree onto the result so we're going to create this function traverse and order function and you can see down here we're going to call that function and pass in the root node and then after the function has been run you're going to return the result so inside this function it's going to be recursive and remember these three lines are the only thing different between inorder pre-order and post order it's going to change the order that we check things so in order we are going to first do this line so this right here is short circuit evaluation whenever javascript evaluates the and operator like this if the first thing is true it will also run the second command if the first thing is not true it will not run the second command check my video on short circuit evaluation to find out more about that so if dot left is true that means if no dot left exists then we are going to run the traverse and order function on node.left and that just calls the same function again and passes in node.left then we're going to push node.data so we're going to push the value in that node onto the result array and then we're going to check if node.write exists if it does we are going to call the traverse in order function on node.right and if we look down here remember i said that just these three lines are different so in preorder it's going to push first and then it's going to call the function on node.left and then it's going to call the function on node.right in post order it's going to call the function on node.left then call the function on node.right and then push the data so just the order that we call these commands is going to change the order of how we get the result when traversing the tree again you can check that code and play around with it until you can figure out exactly how it works i'm going to go down to the level order function in this method we start by adding the root node to a queue then we begin a loop where we dequeue the first item in the queue add it to a newer array and then inspect both its child subtrees if its children are not null they are each enqueued this process continues until the queue is empty we are creating a result array that we are eventually going to return now here's just the the q array this is just a temporary array that we're using that we're eventually going to put things off that rayon to our result if this dot root is not null if there actually is a binary search tree we're going to push the root node onto q this is a while loop so it's going to continue going through this until we've actually added all the all the elements from the tree so while q is q that length is more than zero we're going to keep doing these things so first we're going to let node equals q dot shift now shift just takes off the first element in the array and returns the element so we're going to put the root node into node because it started out as the root node and now q is not going to have that root node on it anymore and we're going to push node.data onto that result so we just pushed nine onto the result and if you remember um nine is the first thing in the the level order result now if node.left does not equal null we are going to push node.left onto the queue and if node.write is not equal null we're going to push node.right onto the the queue and then then we're going to go back through the while loop we're going to take off the first node and put into node which remember is going to be node.left that we push on here and we are going to push that value to the result so i'm going to push 4 to the result and now we're going to push node.left and we're going to push node.right so in the queue we're now going to have 3 and 6. but when we go back through the while loop and we shift off an element even though we added 3 and 6 in the last iteration of the loop the node that we're shifting off is going to be 17 because shift is going to take the first item of the array off and 3 and 6 are at the end of the array so then it's going to get that value and so on it's going to keep going through this until it's gone every value from the tree a hash table is used to implement associative arrays or mappings of key value pairs hash tables are a common way to implement the map data structure or objects they are widely used because of how efficient they are the average time for each lookup is not tied to the number of elements stored in the table in fact the average time complexity of hash tables and big notation is o of one for search insert and delete that's very fast the way a hash table works is that it takes a key input and then runs it through a hash function a hash function basically just maps strings to numbers and usually the numbers just correspond to indexes in an array so for example here are the strings we pass through the hash function and then we get the numbers over here a hash function needs to be consistent so when you run a key through the hash function it always gives the same number and it should map different words to different numbers if two words get hashed to the same number this is called a collision you can see in this example john smith gets hashed to two lisa smith gets hashed to zero one um sam doe four and then sandra d also gets hashed to two so this is a collision because both of these names once they run through the hash function get turned into the same number or the same index for the array one way to handle collisions is just to store both key value pairs at that index then upon lookup of either you would have to iterate through the bucket of items to find the key you were looking for this could take a little extra time because of the iteration so here's another example where it's showing that the names are going through the hash function and then it's showing basically the information that's being stored in the bucket so this would be the array index and then in that array index or the bucket we would store the phone number so this would be like a phone book the numerical value from the hash function is then used as the index to store that information then if you try to access the same key again the hashing function will process the key and return the same numerical result which will then be used to look up the associated value which just means that once you store all these things in the array once you want to get the number again you would just pass in the key john smith into the hash function it would give you the exact same array index two and then you would get the information returned to you which is the phone number now you'll probably never have to implement hash tables yourself because most languages including javascript already have them built in in javascript hash tables are usually used to implement objects however it can be helpful to see how they are implemented just to gain a better understanding so i'm going to show you the code for a hash table so you can see how they work first of all we have our hash function where we're going to pass in the string that we want to hash and then the max max is the number of buckets that we're using in our hash table to store values we're going to start with hash being 0 and we're going to for each character in the string string that length for as long as the string is we are going to add the care code of each character each string character has a numerical value associated with it so basically we're just adding up the character codes for each character in the string and putting into the hash now instead of returning the hash we're going to return hash modulus max that just means we're going to divide by the number of buckets and then return the remainder so if we had five buckets if we're dividing by five the remainder is either gonna be zero one two three or four and then that would be the index that we're going to place the item into the array now this is a very simple hash function just for an example but they can get much more complicated now let's go into the hash table function so in the hash table function we're going to have our storage array which is where we're going to store all the the data we're putting into it and the storage limit now this is the number of buckets in the array at first i'm just going to show you with just four different buckets but normally actually this number will be much higher and this is just a utility function just for this example so i can easily print all the items in this storage array i can easily log them so here's where the real methods come in for the hash table if we want to add some information so first you're going to pass in a key and a value we're going to figure out the index of the array by running it through the hash function so we create this half function where we're going to pass in the key and the storage limit the number of buckets that we're going to have in our hash table and that's going to return an index that we went over before if there's nothing in that index in the storage array if it's undefined we're just going to set that index to be this key value pair array else if it's not undefined that means there's already something in that bucket so first we're going to set inserted to false and then we're going to go through each index to see if the key already exists if the key already exists we're going to set the new value here and set insert to true if the key does not exist then insert is still going to be equal to false so we're going to push in the new item that's where we'll get multiple entries into one bucket so the next thing is if we're going to remove an item from the hash table so if we're going to remove you're just passing the key of what you want to remove and now we're going to look up the index by passing it into the hash function if the index that length equals 1 that means there's only going to be one item in that bucket and the item in that bucket equals the key that you passed in then you can just delete that index you can just delete that item but if it does not equal one that means there's probably a few different items at that index and we want to only delete the item associated with that key so we're going to go through each item in that bucket or in that index and if the key equals the key we passed in then we can delete that item the zero index is the key the one index is the value so let's go how we would look up an item again we're going to set the index using our hash function with the key that we passed in and the storage limit if the index there is undefined we just return undefined it's not the item is not in the hash table else we are going to go through each element in that bucket if the element equals the key then we can return that element so let's look up a few examples first i'm going to show you an example of the half's function here if we run that it's going to be 3 and every time i run that you'll see in the console three three three every time i put bow it's gonna put three but if i put a different name here and i run that you can see on the console it's gonna be five and now every time i run that's gonna be five so with this hash function it's going to always be a number between 0 and 9 because we're passing in 10 as the number of buckets so now let's actually see the hash table so here we're going to create a new hash table called ht for a half table we're going to add beau who's a person add fido who's a dog rex is a dinosaur tux who's a penguin then we're going to look up tux and then we're just going to print the entire thing so let's see what happens in the console so we saw that tux is a penguin now let me bring this over a little bit it's going to show our entire hash table now normally you're never going to print out the hash table like i did to the console but i just did that just for learning purposes if you remember up here we have the storage limit set at four so we only have four buckets the reason why i had it set at four is so we will see what it looks like when there's a collision when there's two things in one bucket just by coincidence the first buck is undefined that means none of these words hashed to zero and then if we look at the second bucket that's right here there's actually two key value pairs in the second bucket so both bow and tucks both gave one when it went through the hash function and then you can see in this bucket right here we just have one item and then this bucket right here we just have one item so when we pass in rex to the hash function we got three returned but if we go up here and we change the number of buckets to something like 14 now i'm going to try running that again if you look right here now there's a lot more undefined because most of the buckets are now empty but this bucket only has one item that buck has one item and then the last two bucks have one item and there are no collisions now each bucket only has one item now this has just been a pretty simple example of a hash table implementation but it's enough to give you a basic idea of the hash table a linked list is a common data structure where elements are stored in a node the node contains two key pieces of information the element itself and the reference to the next node so in this example the element here would be one and then here's the reference to the next note this arrow is pointing to the two this two is the element we're storing the information to and the way this link linking to the next node like arrays linked lists can be used to implement many other data structures linked lists have some advantages and disadvantages when compared to arrays traditionally arrays are just have a fixed size and linked lists have dynamic size so you can just keep adding links and you don't have to do anything differently javascript kind of hides some of this but when you create an array it can only be a fixed size also arrays have pretty inefficient insertions and deletions while linked lists are very efficient insertions and deletions a benefit to arrays are the random access which means you can say you want something at index five and you can instantly get the thing at index five however with linked lists if you want something at index five you have to go through every element in the linked list to get to index five and then for raise they may result in much memory waste to make up for the fact that arrays can only only be made at a fixed size sometimes they will be created a lot bigger than what you really need to make sure you have enough room for everything however in a linked list because of the dynamic size there is no wasted memory and then we have really fast sequential access for arrays and slow for linked lists so every linked list is going to have a head so we have this head pointer here that points to the the first node and then it's also going to have a size so that's just the amount of node so in this example here the size would be three and you can see each node points to the next node and the last node just points to null because there's no next node so if you look at the code over here we start with the head of null because we don't have a head yet and the length is going to be zero and the linked list is made up of nodes so here's how we're going to create a node we pass in an element and this dot element is set to element this dot next is set to null so this this.element in the picture is the info and this that next in the picture is the link so it starts off just like the last element where the link is pointing to null next is point to null then we just have a few simple functions this.size just returns the length and this dot head just returns the head and here is the add function whatever you're going to pass into the linked list is going to be the element so you're going to add the element and then we're going to create a new node with that element so after you pass in the element and it creates this new node the element of the node is set to the element you passed in but the next of the node is set to null so if head equals null that means there are no nodes in the linked list yet so we just set the head to equal the node and at that point there would just be one node in the linked list and the head would be pointing that first node else that means there's more than one element in the list we're going to set the current node to equal the head and let's add a var in front of here so this just means that we're going to start at the head node which you always have to do whenever you're doing anything to a linked list you start the beginning and then you could go through each item in the list while currentnode.next that means while there is a current.next while currentnode.next does not equal null you can see at the end remember the link equals currentnode.next so at the end it equals null so before the end of the list the currentnode.next which would be the link does not equal null it equals the next node so this just means while there is a next node current node equals current node.next so that's just a way to hop from node to node on the list once there is no current node.next that means we're at the end of the list the end of the list is where we want to add the element that we're adding now we'll set currentnode.next to equal the node once we get to the last node in the list we'll set the current node.next or this link to equal the new node we added instead of null and we just increment the length the remove method takes an element and searches the linked list to find and remove the node containing that element so you're passing the element that you want to remove and we always start at the head current node equals head and then we also need to know the previous node when you're going to remove something so if the current node.element equals element if currentnode.element equals element well that just means that the head node is the element we're trying to remove so if we're trying to remove the head node we just have to set the head to current node.next so the head pointer will be pointing to the next node if the head node is not the node we're looking for we go to the else so else while current node.element does not equal element basically while the node we're on does not equal the node we're searching for previous node is going to equal the current node like i said we have to keep track of the previous node and then the current node is going to equal current node.next which just means we're going to keep going through this while loop and keep jumping to the next node on the list until we find the node we're looking for let's let's say it's the second node on this example here we're going to set previousnode.next to equal currentnode.next if we're trying to remove the second node we're going to set previousnode.next so the previous node.next would he be the first node so that'll be the link the link is now going to not point to the current node the link is going to point to the current node.next we would skip over that node and point to the current node.next right here and that's how a node would be deleted from the linked list and then we just decrement the link now here's another quick function it's empty return length equals equals equals zero so if the length equals zero we're gonna return true if it doesn't equal zero we're gonna return false and you may wanna know the index of a specific element so we're just gonna have to hop from node to node until we find that element and then return that index so the current node is going to equal head start at the beginning index is going to start at negative one and so while current node that means while there is a current node while it's not null we're going to increment the index so at this point if we start at the beginning we've incremented the index so where the index is now is zero so if current node that element equals element return index so if the first element which would be this info equals what we passed in up here we're going to return the index so if instead of the head node we're going to return the index 0. if not current node equals current node.next and we're going to continue doing this while loop and just hop from node to node and then then we're going to eventually be able to return the index as we keep adding one to the index for every time we do the while loop and if we go through the whole while loop and don't find anything we're going to return negative one that just means the element is not in the linked list so we just found the index of an element now we're going to find the element at an index that's just the opposite you're passing an index number and you're going to return the element so we have current node equals head count equals zero and here's the while loop here well count is less than index that means we haven't gotten to the index we're searching for increment count and current node equals current node.next so that means we hop to the next node so we're going to keep going through every node in the list until count is not less than index that means count equals index so we've reached the right index so we can just return current node dot element now in it you're going to pass in the index and the element and add remember you always add to the end of the linked list but in add at you can add in the middle of the list so just like add we're going to create a new node with the element we pass in and the current node is going to equal head we always start at the beginning we need to keep track of the previous node and the current index is going to equal zero so if index is more than length that means we've passed an index that's way bigger than the actual length of the linked list so we cannot add at that index and we return false if index equals zero that means we're trying to add the element to the head node so we'll set node.next or know it is a node that we just passed in so the next element is now going to be the current node which would be the current head node and then we just set the head to equal the node that we passed in else we don't want the index to be the head node while current index is less than index we're going to go through each index until we find the correct index so current index increment we're going to set the previous node to equal the current node because we want to keep track of the previous node the current node is going to equal current node.next we're going to keep going through this while loop until we find the correct node so if we want to add a node as index 1 or the second node in the list once we get to that index we're going to set node.next equal to current node so our node.next is the node we passed in and we're going to set that to equal the current node which would be this index right here then we have to set previousnode.next to equal the node that we're passing in and then we just increment the length and the last function i'm going to talk about is remove it now remove it and add it are very similar a lot of the lines are the same except we're not going to create a new node the current node is going to be the head we need a previous node the current index is gonna be zero here is a slightly different thing if the index is less than zero or if the index is more than or equal to length return null so we cannot remove a negative index and we cannot remove an index greater than the length of the list if index equals zero we're trying to remove the head node so we just set the head node to equal the current node.next so instead of the head pointer point to this node right here that head pointer is going to point to the next node right here else this part is just like the add at we're just going to keep going through each element on the list and once we find the element we want to remove like let's say we're moving this second element at index one we're going to set previousnode.next to equal current node.next we're going to set the previous node.next or this link is going to point to whatever was in the link to the current node or so this link is going to point to now this node right here and we're going to completely take out this one and then we're going to do length minus minus and return the node that we're removing and now we're just going to quickly show an example of using the linked list we're going to call the linked list conga because a linked list is kind of like a conga line and let me bring up the console so we're going to create this new linked list we're going to add some items kitchen puppy dog cat fish we're going to show the size we're going to remove the third item on the list so we'll run that and see we're going to remove cat now let's copy this we're going to do element at then we'll try index at and for the element we're going to put puppy look i mean index of so we remove cat uh now we check the new element at three which is going to be fish and the index of puppy is gonna be one uh kitchen would be zero coffee is one and the size is four well that's the length list a try that's how this is pronounced right here a try sometimes called a prefix tree is a special type of tree used to store associative data structures a try stores data in steps each step is a node in the try this is often used to store words since there are a finite number of letters that can be put together to make a string a possible use case would be to validate that a word is in a dictionary each step or node would represent one letter of a word so if you can see over here this is an example of a try this word right here will be b-a-l-l ball the steps begin to branch off when the order of the letters diverge from the other words in the try or when a word ends so if you get the word b-a-l-l but you also have b-a-t bat so the first two letters b-a are part of the word ball and part of the word bat and then down here you have doll do dork and dorm if you look at the red stars that just means it's at the end of the word so the word do you can see it's the end of a word even though there are still letters in other words after the o so let's look at the information in each node from the code here each node is going to have keys which is just a new map and this is the es6 map structure it's kind of like an object it has just key value pairs and in the in these keys the key value pairs are kind of like the name of a folder in a folder in a directory structure so if you can imagine these all folders in the root node there is the keys map that's going to have b d and s and e to the the key value pairs are the b the name of this folder is the key in the map and the value of that key is the folder b the actual contents of the folder b and so the d is the key in the map and the value the key value pair the value is going to be the actual contents of the folder each node is going to have a list of keys which is just a list of all the other letters that are inside that folder or in that inside that node and then we're going to have an end data that just means is this the end letter in a word so in this picture all of the nodes with a star have end set to true and all of the nodes without a star have end set to false now we just have a setter function set end and is equal true is end so it's just going to return true or false if it's the end of the word so now that we've looked at each node in the try let's look at how the code to the actual try setup so we're going to only gonna have three functions we're gonna have add to add a word to a try we're gonna have is word to see if a word is a word in the try and then print this is more of kind of like a helper function just to print all the words that are in the try so before i go through the code let me show you how it would be used we're going to create a new try and then we're gonna you can add the words like this and then after you add all these words and these are the same words that are in this picture over here you can check if it is a word is dollar word well doll is going to be a word is dora word see we have the word d-o-r in the picture but there's no star on r because door is not a an actual word even though those letters are in the try and then dwarf well check d o r and then there's no f so that's not a word and you just print the whole thing like that so if i run that you're gonna see in the console down here true false false and then you can see the whole list here so let's go back up to here first of all we're going to create the root node a new node and then let's look at the add function so this add function is a recursive function so when you call it for the first time you're going to put the entire word you want to add to the try and that becomes the input and here says node equals this dot root that means if you pass in a node it will use that node but if you don't pass in a node it will just use this dot root as the the default node so if input that length equals equals zero that means if we're at the end of the word that we passed in we're just going to do node.set end and then return and we're done with the add function else if that means if there's more than zero letters that we've passed into this add function we're not at the end of the word so first we're going to check if there's already a node with that letter that we're looking at so this says if not node.keys.has so let's say we're in the root node node.keys is a list of all the letters that that root node points to so if it does not has if it does not have a letter input 0 would just mean the first character of the string we passed in so if we pass in ball it would this is just saying if there is not a node with the letter b here then we are going to create a node with the letter b no dot keys dot set set is how we're going to create a new key value pair in the keys map we're going to set it with the key to be the letter input 0. so input with zero in brackets just means the first letter of the input we passed in so if we pass in ball the first letter is going to be b and so remember each key value pair is the name is kind of like the name of a folder and the contents of the folder the name of the folder is b the contents of the folder are a new node so then this is where it becomes recursive we're going to call this.add and we're going to pass in input.substra 1 which takes the input and takes every letter after the first letter and passes it in to the add function again so if the word was ball every letter after the first letter is a-l-l so we're going to just pass in the letters all and we're also going to pass in a node before i remember we start the with the root node now we're going to pass in this node which is also the node we just created here so we're going to set a node with the letter b that would be the input 0 so now we're going to get the node with the input 0 that's the the first character so so now we're going to run the add function but instead of at the being at the root node we're going to be at the the node b and then the else is just if there's already a letter by that name so remember here we added a node with the letter b but if there already is a letter b like for instance let's say we already have the word doll and we're going to add the word dork if we're at the d and the word doll is already in the try and we want to add dork well o is already going to be in the try so if o is already in the try we're not going to create the o node we're just going to add the the new substring which in this case would be ork we're going to add that to the nodes that node.keys that get at input 0 which would be the o node so we're going to keep running through that until we've added the word to the try and then down here we're going to check if the word is in the try so this is where the try really performs you can check if a word is in the dictionary much quicker in the try than other data structures because we don't have to check through every word we're just checking one letter at a time so we're passing in the word we're setting the the node to the root node at first and then this is the loop that we're going to keep running through until we find the word so while word.linked is more than one while there's more characters to search in the the word that we passed in so if not node.keys that has word this is saying we're going to check the first character in the word so let's say we're on the the root node so if there is no key with the first character in the word like let's say we pass the word tree well there's no t there's no key with the letter t here so we can return false we quickly determine that that word tree is not in this try because there's no word that starts with t else that just means there must be a word that starts with that letter so let's say we're looking for the word send well if it does have the letter s then we're gonna do these two things we're gonna set the node remember which we used to be the root note but now we're going to set the node to the the node s because if we're going to look for the word send we're setting the node to the s node and we're going to change the word into the word minus the first character so now we're just going to be looking for the word end instead of send so i'm going to go back up here now we're going to keep running through this now we're on the s node but we're looking for the word end and yeah we'll find the e we'll find the n and we'll find the d and now we go to this very last line if node.key dot has word which would just be a single letter because remember we keep taking the letters off and so if it has the last letter of the word that we passed in and it is the end so is end then we're going to return true that word is in the try else we're going to return false yeah so this last one was just the print function because it's kind of a helper function and so we're going to create an array of every word but right now it's just going to be empty then we're going to search we're going to pass in order to search if we don't pass anything here it's going to set this to the root node actually i bet we don't even need this let me just run that just to see if it does the same thing in the console yep we don't even need to set the node to the root node uh because when we first call the search command down here we already pass in this dot root so we're just going to pass in a node and we're going to pass in a string here if node deck keys that size does not equal zero that means there's still still more letters to look through so for each letters and the keys here let's say we're on the root node so the letters in the key would be b d and s so for each of those letters we're going to run the search command again and then we're going to pass in node.keys that get letter that means we're going to pass in the the node at that letter so we would pass in the b node and then we're going to add that letter to the string at the beginning the string will be empty so do string dot concat that means we're going to add one letter we're going to add the letter b and basically since this is recursive it's going to keep going and keep adding each letter it's going to keep concating each letter to the string until it's formed the whole word and then see if no dot is end if we've gone to the last node in the word it's gonna do word dot push string so that's our words arrayed if we've gone to the last letter in the word we're gonna push the word onto the words array now else that's the else to this if statement if the node.keys that size does equal zero then we're at the last letter of a branch if string.length is is more than zero we're just gonna push that word on to to the words array or else returned undefined and here's where we call that search function for the first time so here's the search function um and then we call for the first time and it's just going to go over and over until it gets every word in the try if words that length is more than zero it's going to return that were the words the words array or it's going to return null if there's no words in the array so that's a try a binary heap is a partially ordered binary tree which satisfies the heap property it has some similarities to a binary search tree except the order is a little different each node has at most two child nodes the heat property indicates a specific relationship between the parent and child nodes you may have a max heap in which all parent nodes are equal then or greater to the child nodes so you can see the the biggest numbers on top and the smallest numbers are on bottom or you may have a min heap in which all child nodes are greater than or equal to the parent nodes so the child nodes are the biggest ones and the parent nodes are the smallest ones the order between child nodes on the same level does not matter so you have 10 6 and 12 here here we have 5 6 and 1. you can see that it goes from a small number to a big number to a small number the order doesn't matter if they're on the same level binary heaps are also complete binary trees this means that all levels of the tree are fully filled and if the last level is partially filled it is filled from left to right so if you see the example down here so here's level one then we have level two here level three level three is all the way filled level four is only partially filled because there's nothing over on the right side here but you can see it's filled from left to right binary heaps may be implemented as tree structures with nodes that contain left and right references like what i showed in my binary search tree video however heaps are more often implemented as arrays this is possible because of the partial ordering according to the heap property we can just compute the parent child relationship of the elements now this will make a lot more sense with this diagram here so if you see this array right here this is the array representation of this tree right up here the number 1 is 20 and that's the root you can see that right up here and then 2 and 3 are the child nodes 19 and 17 right here and now i want to pull your attention over to these equations up here so the left child is going to be i times 2 the right child is going to be i times 2 plus 1. let me show you what that means so if you look at 20 here which is at index 1 in the array also i should point out that there is no index zero so when you're representing a heap you're just going to leave index 0 as null to make the math work out a little better so if we go back to index 1 well the equation for the left child is i times 2 so one times two would be two so yeah nineteen is the left child and the right child is i times two plus one so one times two plus one is three seventeen that's the right child now let's say we go to number thirteen here that's index four well if we go to the equation i times two four times two is eight so if you're index four and you go to index eight eleven yep that's the left child now if we start index four and we do the right child equation i times two plus one that's nine so if we go to index nine yep that's the right child here so that's how you can use these equations to find the left and right childs from an array representation you can also figure out the parent so the equation for appearance i divide by 2 if we are on 11 that's index 8 8 divided by 2 is 4 index 4 and this really should be floor i divide by 2 because you divide the index by 2 and then round down to the nearest whole number for instance 5 divided by 2 is 2.5 but if you round out it's 2 and then 2 would be the the index 19 here also you can see in this diagram that the last index is also the size of the heap size 10. this diagram is a max heap i'm going to show you the code for min heap but in the same file down here we i also have the code for the max heap down here so you can check the link in the description so you can review this actual code yourself and you can review the max heap on your own but like i said we're just going to review the the min heap right now but before i show you the actual code i want to show you a visual representation of how it works when you're inserting and you're removing items from the heap those are the main two commands insert and remove and then there's one more i'll show you at the end but let me show you this representation here so you can see this is the array representation and i'm going to insert some numbers and you'll see them show up as a tree representation so let's see four you can see four goes at the top that's the the root node now i'm gonna put in six six just goes down to the bottom there eight so as it builds the node one thing to keep in mind is that it's going to build one level of the tree at a time i'm going to put in 10 it's going to be on the very left side now so far i've been putting them in order but now i'm going to put in the number 5 here and when i insert the number five you're gonna see this it's gonna first go to the end of the array here you'll see the array which is gonna first appear right down here and then it's going to move up to the correct position so let's see that so then as you see it checks what position to move it up to so i'm going to put in a few other numbers here see 16 three okay so you see it always puts in at the end of the array or the end of the tree and then it moves it up to the correct position now i'm going to just show one more where i put in one where it's going to put it put it down here and it's going to move all the way up to the top and it's a check one at a time to see if it has to move it up also another thing would just be removing when you remove you always just remove the smallest it's going to remove what's in index 1 which is always going to be the smallest and then it's going to pop the last node to the first node and then it's going to sort them so let's see how that works so did you see that so it moved the last node to the first node and then it has to keep checking and keep moving it down until it gets to the right position so let's move remove three okay so now let's go to the code and you can see how that works in the code so before we entered anything you can see that we've created a heap with an array that just has one item and it's the item null at index zero so when we insert something we pass in a number and we're going to push that number on to the end of the heap so if you pass in the number three there's going to be index 0 is null index 1 would be 3. now if the length of the heap is more than 2 that means there's more than one item in the heap if it's less than 2 there's one or zero items in the in the heap and that makes things really easy but let's say it's it's a more than two so we're gonna let the index equal heap.length minus one so that means we're finding the last index in the heap while heap at that at the last index is less than heap and then see this equation right here that is the the parent equation so now we're saying if the last item in the the array which is the item we just inserted right here if the last item of the array is less than its parent well if it's less than its parent we're going to have to move it up because the smallest numbers have to be at the top in the min heap so if the index is more than or equal to 1 that means if we haven't reached the root node then we're going to do this now this is es6 destructuring syntax which just means we're gonna switch the node we just inserted with the parent node we're gonna we're gonna switch them so here is the parent node here is the node we just inserted and now we're going to switch them so the node we just inserted is going to be first and then the parent node is going to be next so it's just a way to swap them for more information about the es60 structuring you can check out my video about that topic so if math math.floor index divided by two is more than one this just means if the parent node is not the root node because remember this is the equation for the parent node one is the index of the root node so if the parent node is more than the root node then we're going to set the index to map that four and x divided by two that's the parent note which if you remember up here we just put the number we passed in into the parent node so now the index is still going to refer to the number we just passed in because that number has went into the parent node and so now we're going to set the index to that node and since this is a while loop we're going to keep going through this and we're going to keep switching the the node to its parent node as long as it is smaller than the parent node else break so once it's not smaller than the pair no we just get out of this while loop and that's the insert so let's go down to remove it's a little more more code but it's some similar concepts so we are always going to remove the the top node the smallest node so we're going to let the smallest equal heap 1 so that just means that the first node in the array is the smallest node so that's the easy part the hard part is rearranging the array after you've removed that node so if heap dot length is more than two that just means we have more than one node in in the tree we're going to set the first node in the tree which remember was the smallest node but we're going to set this to the last node the last node in the array now gets moved to the first node in the array now we're going to heap dot splice keep that length minus one this just shortens the array by one so we just remove the whole the last index of the array completely since we've already moved that to the first index if heap.length equals three that means there's only two numbers in the the tree and that makes things really easy just if one is bigger than the other then we just switch them this is the destructuring syntax again so if the first one is bigger than the second one then we switch it so the second one is bigger than the first one and then we just return the smallest if there are more than two nodes in the array that's where it gets slightly more complicated so we're just going to set the index to equal one we're going to set the left to equal 2 times i and the right equals 2 times i plus 1. remember that was just the equations from up above the equations right here we're just putting them into our formula down here now technically you would not need to put this equation here since we know that i equals 1 you could just put 3 here you could just put 4 here but this is just so you know we're using the equations from above so we're remember one is the root note so we're starting with the root note so while the root note is more than or equal to its left child or the root node is more than or equal to its right child we're going to do everything in here that means we're going to have to basically move it down and keep moving it down until we get to the appropriate spot so if the the left node is more than the right node then we're going to switch the root node with the left node this is the destructuring syntax again so we're going to just swap the nodes so for instance we would be swapping if we're on this node and this one we just swap those two nodes and then we're going to set the index to the left node so we're going to set the index to be the node that was at the top node but it's now been swapped else that means the right node is less than the left node we're going to switch the node with the right node so we're just going to swap with the right node and then we just set the index to be the right node so the node just moved down a little bit and then we set the index to point to the node that we just pushed down a little bit and then we have to set the new left and right node so we would set the left and right node to be the left and right of the the one we just passed down and then if the the left child or the right child equals undefined that means we're at the very bottom of the tree so we can just break out of this while loop and if it's not undefined we just keep going through until we find the place where the node that we're moving down the tree is not more than equal to the left node and is not more than or equal to the right node else if if the length equals two that means there should be only one element in the array so we just cut off the last element else we return null that means there were zero elements in the array to begin with and then we're just going to return the smallest element which is just the element we just set up here the last thing i'm going to talk about is this now a common use case for the heap data structure is for heap sort this is one of the most efficient sorting algorithms with average and worst case performance of o of n log n heap sort works by taking an unsorted array adding each item in the array into a min heap and then extracting every item out of the min heap into a new array the min heap structure ensures that the new array will contain the original items in least to greatest order so this is the function that you would use to do that keep sort the hard part is creating all the code we just already went over and this is just going to use that code so let result equals new array well heap that length is more than one we're gonna do this.remove so we're gonna remove the element on top of the tree and we're going to push on to the result and we're going to keep doing that until we've removed all of the smallest elements and push it onto the result and it's going to put the elements in order well that's all i'm going to talk about for heaps feel free to check out this code and create your own heap and and add some items and remove some items just to see how it works the graph data structure is not the same as a graph you may have learned about a math class graphs are collections of things and the relationships or connections between them the data in a graph are called nodes or vertices the connections between the nodes are called edges one example of graphs is a social network where the nodes are you and other people and the edges are whether two people are friends with each other there are two major types of graphs directed and undirected undirected graphs are graphs without any direction on the edges between nodes directed graphs are graphs with a direction and its edges an example of an undirected graph could be a social network the nodes are people and the edges are friendships an example of a directed graph could be the internet and web page links the nodes are web pages and the directed edges are links to other pages which might not necessarily point the other way i'm going to show you three ways to represent a graph the first way is called an adjacency list this representation for a graph associates each vertex in the graph with the collection of its neighboring vertices or edges in this image a is connected to b b is connected to a and c and c is connected to b this is how you could show a relationship with text and here is how you could show this adjacency list with javascript this is an undirected graph because it does not show the direction of the edges this can also be more simply represented as an array where the nodes just have numbers rather than string labels another way to represent a graph is to put it in an adjacency matrix an adjacency matrix is a two-dimensional array where each nested array has the same number of elements as the outer array so it's basically a matrix of numbers where the numbers represent the edges zeros means there's no edge or relationship and ones means there is a relationship this table shows an adjacency matrix to represent the image you can see that the labels for the nodes are on the top and left now here's a javascript representation of the same thing unlike an adjacency list each row of the matrix has to have the same number of elements as nodes in the graph here we have a three by three matrix which means we have three nodes in our graph an adjacency matrix can be used to represent a directed graph here's a graph where the second node has an edge pointing toward the first node and then the third node has an edge pointing to the second node notice how the numbers in the array change there are only ones where a node is pointing toward another node and since there are only two points there are only two nodes the final way i will show to represent a graft is an incidence matrix like the adjacency matrix an incidence matrix is a two-dimensional array however the rows and columns mean something else here the adjacency matrix used both rows and columns to represent nodes an incidence matrix uses rows rows to represent nodes and the columns to represent edges this means that we can have an uneven number of rows and columns each column will represent a unique edge also each edge connects two nodes to show that there is edge between two nodes you will put a one in the two rows of a particular column as you can see in the diagram edge one is connected to nodes a and b now look at the column for edge 1 in the incidence matrix table you will see a 1 in both the a row and the b row this shows that edge 1 connects to nodes a and b here is a directed graph for a directed graph use 1 for an edge leaving a particular node and negative 1 for an edge entering a node and here is a javascript implementation of the incidence matrix graphs can also have weights on their edges so far we have unweighted edges where just the presence and lack of edge is binary zero one you can have different weights depending on your application a different weight is represented as a number greater than one well now you know about different types of graphs and how to represent them in javascript i'm going to talk about how to find the distances between two nodes in a graph this is one of the main uses of graphs and is called graph traversal traversal algorithms are algorithms used to traverse or visit nodes in a graph the main types of traversal algorithms are breadth first search and depth first search in this video i will be showing how to implement breadth first search in javascript as you can see the algorithm starts at one node first visits all its neighbors that are one edge away then goes on to visiting each of their neighbors the point is to determine how close nodes are to a root node there are different ways to implement breadth first search in this version you pass in an adjacency matrix graph and the index of the root node remember in an adjacency matrix each nested array in the matrix shows which nodes in the graph are connected to the node at that index for example this array is at index 0 so it shows which nodes that node 0 is connected to if it is connected to a node there is a 1 at that index but if it is not connected there is a 0 at that index before i go through the code let's see it in action so here is a graphical representation of this adjacency graph check out my previous graph video to see how this adjacency graph goes into this graph so we ran the breadth first search function we passed in this graph up here and then we passed in the number one so that means we're trying to find out how far away every node is from the first node so you can see this graphical representation of the exact same graph and if you see the first node right here that's the node we passed in to the the breadth first search function we're going to see how far away each node is so you can see right here it shows how far away is so node 0 is two nodes away see because of the direction of the graph we can't just go straight across a zero first from one we go to two then we go to zero so that's two nodes away one the the node itself is always zero nodes away and then the second node is one node away just one third node is three nodes away see first you have to start at one then you go to two then zero then three so that's three hops and four is infinity because when you're on from the first node it's impossible to get to the fourth node because the fourth node only points back to the first node this function will output an object of key value pairs where key is the node and the value is its distance from the root this object will be used to store the distances to the root node we will start all the distances at infinity which in this version of breadth first search indicates that a node is not reachable from the start node here the distance to the root node from the root node is set to zero instead of infinity we are going to create a simple cue to keep track of nodes to visit and the purpose of this variable is to keep track of the current node that we are traversing now we will start a while loop to keep traversing nodes until there are no more nodes in the queue to traverse we'll start the loop by popping off a node from the queue to traverse which at the beginning is the root node here we get all the nodes connected to the current node remember each index of the graph is an array that shows what nodes are connected to the root node associated with that index so in this example we are first looking at node 1. at node 1 the array shows that it is connected to nodes 0 and 2. now we set the neighbor index variable to an empty array this will keep track of a list of nodes that are connected to the current node this line gets the first node connected to the current node when it says index of one this finds the first connected node because the number one in our array means that the node is connected to another node at that index if there is no node with an index of one the index variable will be set to negative one so while index does not equal negative one push the index onto our list of neighbors this line searches for the next connected node we look for the next one in the array starting after the previous one we found that's what this plus one means now that we know all the nodes connected to the current node we loop through these connected nodes and get the distance if the value in the node's lin array at the index of the neighbor from the neighbor index array equals infinity that means we haven't set the distance of that node yet so we will set it now we are going to set it to the value of the the node's length array for the current node plus one then we will push that neighbor to the queue so the next time we go through the while loop we'll check the neighbors of that node too this for loop is the most complicated part of this and you may have to read through a couple times to completely understand it at the end we return the node's length array and that's breadth first search of a graph thanks for watching my name is beau carnes don't forget to subscribe and remember use your code for good
Original Description
Learn common data structures and algorithms in this tutorial course. You will learn the theory behind them, as well as how to program them in JavaScript.
❤️ Try interactive Algorithms courses we love, right in your browser: https://scrimba.com/freeCodeCamp-Algorithms (Made possible by a grant from our friends at Scrimba)
⭐️ Contents (link to code after title) ⭐️
⌨️ Stacks (00:21) https://codepen.io/beaucarnes/pen/yMBGbR?editors=0012
⌨️ Sets (09:03) https://codepen.io/beaucarnes/pen/dvGeeq?editors=0012
⌨️ Queues & Priority Queues (19:24) https://codepen.io/beaucarnes/pen/QpaQRG?editors=0012
⌨️ Binary Search Tree (26:03) https://codepen.io/beaucarnes/pen/ryKvEQ?editors=0011
⌨️ Binary Search Tree: Traversal & Height (39:34) https://codepen.io/beaucarnes/pen/ryKvEQ?editors=0011
⌨️ Hash Tables (53:19) https://codepen.io/beaucarnes/pen/VbYGMb?editors=0012
⌨️ Linked List (1:03:04) https://codepen.io/beaucarnes/pen/ybOvBq?editors=0011
⌨️ Trie (1:14:59) https://codepen.io/beaucarnes/pen/mmBNBd?editors=0011
⌨️ Heap (max and min) (1:27:29) https://codepen.io/beaucarnes/pen/JNvENQ?editors=0010
🔗 Heap visualization: https://www.cs.usfca.edu/~galles/visualization/Heap.html
⌨️ Graphs: adjacency list, adjacency matrix, incidence matrix (1:42:07)
⌨️ Graphs: breadth-first search (1:46:45) https://codepen.io/beaucarnes/pen/XgrXvw?editors=0012
📄Data structures article by Beau Carnes: https://medium.freecodecamp.org/10-common-data-structures-explained-with-videos-exercises-aaff6c06fb2b
🐦Follow creator Beau Carnes on Twitter: https://twitter.com/carnesbeau
🔗Beau also made this Algorithms course from Manning Publications: https://www.manning.com/livevideo/algorithms-in-motion?a_aid=algmotion&a_bid=9022d293 (Promo code: 39carnes)
🎥And if you like robots and toys, check out Beau's other YouTube channel: https://www.youtube.com/robotfamily
--
Learn to code for free and get a developer job: https://www.freecodecamp.org
Read hundreds of articles on programming: https://medium.fre
Watch on YouTube ↗
(saves to browser)
Sign in to unlock AI tutor explanation · ⚡30
Playlist
Uploads from freeCodeCamp.org · freeCodeCamp.org · 0 of 60
← Previous
Next →
1
 2
2
 3
3
 4
4
 5
5
 6
6
 7
7
 8
8
 9
9
 10
10
 11
11
 12
12
 13
13
 14
14
 15
15
 16
16
 17
17
 18
18
 19
19
 20
20
 21
21
 22
22
 23
23
 24
24
 25
25
 26
26
 27
27
 28
28
 29
29
 30
30
 31
31
 32
32
 33
33
 34
34
 35
35
 36
36
 37
37
 38
38
 39
39
 40
40
 41
41
 42
42
 43
43
 44
44
 45
45
 46
46
 47
47
 48
48
 49
49
 50
50
 51
51
 52
52
 53
53
 54
54
 55
55
 56
56
 57
57
 58
58
 59
59
 60
60

React: Production Server Setup Part 2 - Live Coding with Jesse
freeCodeCamp.org
cookies vs localStorage vs sessionStorage - Beau teaches JavaScript
freeCodeCamp.org
Browser history tutorial - Beau teaches JavaScript
freeCodeCamp.org
Graph Data Structure Intro (inc. adjacency list, adjacency matrix, incidence matrix)
freeCodeCamp.org
React: Parameterized Routing with Next.js - Live Coding with Jesse
freeCodeCamp.org
React: Dealing with jQuery Issues - Live Coding with Jesse
freeCodeCamp.org
setInterval and setTimeout: timing events - Beau teaches JavaScript
freeCodeCamp.org
Browser and Device Testing - Live Coding with Jesse
freeCodeCamp.org
Last Minute Updates - Live Coding with Jesse
freeCodeCamp.org
Post Launch Updates - Live Coding with Jesse
freeCodeCamp.org
React: Setting Up Google Analytics - Live Coding with Jesse
freeCodeCamp.org
React: Masonry Layout - Live Coding with Jesse
freeCodeCamp.org
Load Balancing Digital Ocean Droplets - Live Coding with Jesse
freeCodeCamp.org
try, catch, finally, throw - error handling in JavaScript
freeCodeCamp.org
Load Balancing: SSL Passthrough Setup - Live Coding with Jesse
freeCodeCamp.org
Graphs: breadth-first search - Beau teaches JavaScript
freeCodeCamp.org
React: Masonry Layout Part 2 - Live Coding with Jesse
freeCodeCamp.org
React: WordPress API Live Search - Live Coding with Jesse
freeCodeCamp.org
Creating WordPress Custom Post Types - Live Coding With Jesse
freeCodeCamp.org
Dates - Beau teaches JavaScript
freeCodeCamp.org
Miscellaneous Front End Updates - Live Coding with Jesse
freeCodeCamp.org
Merging a Pull Request from GitHub - Live Coding with Jesse
freeCodeCamp.org
React + Prettier + Standard JS - Live Coding with Jesse
freeCodeCamp.org
React: Sortable Responsive Table - Live Coding with Jesse
freeCodeCamp.org
Geolocation Sorting by Distance - Live Coding with Jesse
freeCodeCamp.org
Tradeoff Matrix - Agile Software Development
freeCodeCamp.org
The Definition of Ready - Agile Software Development
freeCodeCamp.org
Getting first React job without experience - Ask Preethi
freeCodeCamp.org
React: Google Analytics Click Tracking - Live Coding with Jesse
freeCodeCamp.org
Submitting a PR to an Open Source Project - Live Coding with Jesse
freeCodeCamp.org
Should I go back to school to get CS degree? - Ask Preethi
freeCodeCamp.org
Hero Section CSS Changes - Live Coding with Jesse
freeCodeCamp.org
Working Agreement - Agile Software Development
freeCodeCamp.org
A day at Pennybox with Co-Founder Reji Eapen
freeCodeCamp.org
React: Sorting and Filtering Data - Live Coding with Jesse
freeCodeCamp.org
React: Sorting and Filtering Data Part 2 - Live Coding with Jesse
freeCodeCamp.org
React: Building a New UI - Live Coding with Jesse
freeCodeCamp.org
Definition of Done - Agile Software Development
freeCodeCamp.org
Getting started with jQuery (tutorial) - Beau teaches JavaScript
freeCodeCamp.org
Making a React Blog with WordPress Content - Live Coding with Jesse
freeCodeCamp.org
React, NextJS, CSS - Live Coding with Jesse
freeCodeCamp.org
jQuery events - Beau teaches JavaScript
freeCodeCamp.org
React/NextJS Routing and WordPress API Custom Types - Live Coding with Jesse
freeCodeCamp.org
React: Working with API Data - Live Coding with Jesse
freeCodeCamp.org
React: Refactoring Components - Live Streaming with Jesse
freeCodeCamp.org
jQuery effects - Beau teaches JavaScript
freeCodeCamp.org
More React Refactoring - Live Coding with Jesse
freeCodeCamp.org
animate in jQuery - Beau teaches JavaScript
freeCodeCamp.org
"Finishing" My React Site - Live Coding with Jesse
freeCodeCamp.org
Starting a New React Project (P2D1) - Live Coding with Jesse
freeCodeCamp.org
React Project 2 Day 2: Learning Material UI - Live Coding with Jesse
freeCodeCamp.org
The Agile Manifesto - Agile Software Development
freeCodeCamp.org
jQuery: get and set with http, text, val, and attr - Beau teaches JavaScript
freeCodeCamp.org
React Project 2 Day 3 - Live Coding with Jesse
freeCodeCamp.org
The INVEST approach to product backlog items
freeCodeCamp.org
React Project 2 Day 4 - Live Coding with Jesse
freeCodeCamp.org
Chickens and Pigs - Agile Software Development
freeCodeCamp.org
React Project 2 Day 5 - Live Coding with Jesse
freeCodeCamp.org
jQuery: add and remove DOM elements - Beau teaches JavaScript
freeCodeCamp.org
React Project 2 Day 6 - Live Coding with Jesse
freeCodeCamp.org
More on: Algorithm Basics
View skill →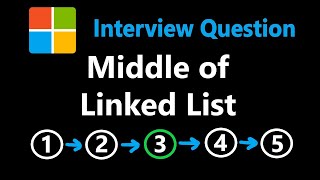


Related Reads
📰
📰
📰
📰
Morris Pre Order Traversal
Dev.to · Jaspreet singh
Advanced Stack ApplicationsData Structures and Algorithms Deep‑Dive — Advanced Stack Applications…
Medium · Programming
The Minecraft anvil is a tree-cost optimization problem in disguise
Dev.to · Mark
KMP Algorithm (Knuth-Morris-Pratt): The Smart Way to Perform String Matching in O(N)
Dev.to · Jaspreet singh
🎓
Tutor Explanation