Basics os Scratch
Key Takeaways
Covers the basics of Scratch coding for kids and beginners
Full Transcript
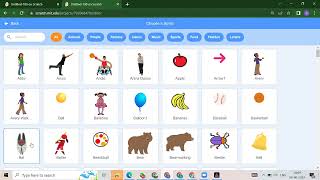
Hello everyone, welcome back to our channel code for kids. How are you all? How was your day? I hope you're enjoying your day. So today, video. I will give you this link in the description box also. So you can directly check on the description box. So the very first thing in order to use any platform you have to first sign okay before that let me explain you why we are learning the scratch and what is coding okay so we can say nowadays we have lots of devices if you know we have computer we have our laptop right we have our mobile phone so these all are the devices In order to communicate with your device, you will require certain language. It means for example, I want to communicate with any other person at least we will require one common language. By using that language, we can communicate. Okay. In the same way in order to communicate with your laptop or computer or mobile phone or any other devices you will require one language and that language is nothing but coding. Okay. So we can say coding is our computer language. Okay. So if you will learn the coding you will get lots of benefits. The very first benefit you are able to use the new technologies. You are able to create your own animations. You are able to create your games. Okay. Even you can create the apps also. You can create the robots also. This all are the some benefit that you will get once you will learn the coding. Okay. So as you can see we open the scratch. First you need to join the scratch because you have to create your own user ID and password. So once you will click on join the scratch it will ask you you need to create a username. So you have to write one username which is unique. You need to write for example I'm just writing ABC 1 2 3. So if this is already exit you will get like this is already exit please try to select any other. Okay. So once you will fill all these details like your username and you need to create one password for example C 1 2 3 ABC 1 2 3 Okay. So it's two you see. Let me add one unique name. We can add code for kids. Okay. So this is like our username. This one is the password. You have to press the next button. It will ask you what country do you live in. So I'm from India. So I will select like I'm from India. Okay. Whatever is your country you need to select that. So when you born you need to enter your date of birth. For example, I'm just entering my date of birth. Next. So what's your gender? So if you are male, you need to select male. If you are female, just try to select the female. Okay. Now you need to just enter your email ID. whatever email id you are using and then just press on create your account so that you are able to create your own account. I already created lots of account so I will not enter my email id. So once you will enter your email id and just press create your account. So you are you will get one user ID and password. You need to remember that user ID and password. The best way you can write your user ID and password in your notebook. Okay, once you will create your account, you need to just click on sign in. So after sign in, just try to write your user ID and password. Okay. So once you will write your user id and password you need to just press on sign in button so that whatever project we are going to create you are able to save all the projects. Okay. Suppose if you will create any project so automatically your project will save inside your account where you will get it. Just click on your username click on master you will get all the project that you created. Okay. So as as you can see I created like total 722 project. So in your case if you are beginner you will get like a zero project is created. After that how to create a new project. So as you can see this is your create button. Okay like this one. Once you will click on this create button you are able to create a new project. Okay. So just press here on create button so that you are able to create a new project. Okay. If you have any question just write your question in the comment section. So I will give you the reply. Okay. After that this is the scratch as you can see. If I will show you scratch is divided into two three part. This is the first part that you have. This one is the second part that we have and this one is the third part. Okay. The first part is called as pallet window. Okay. So this is the first part which is pallet window. The second part is called as script area. Okay. This is nothing but your script area. So this is nothing but a stage area. So we have total three thing. One is pallet window, one is script area and one is stage area. So let me show you the next part. Now suppose I want to delete this cat. You need to just press on this delete button so that you are able to delete it. Okay. The very first thing in order to create any game or any animation you will require some backgrounds. So that background is called as backdrop. If you will click on this option, choose a backdrop. You will get lots of backdrops. It's your choice which one you wanted to add. Suppose I want to add this colorful city. So that you are able to add this colorful city. Okay. After this suppose I wanted to add some character for my game or for my animation that is called as sprite. So once you will click on sprite you will get lots of sprite. You can add any sprite. Okay. For example we added one girl. We can add some more sprite. For example Abby. there is a two curl. Okay. After that the next part is how to add instructions how to pass the command. Now suppose I want to move this girl from here to here. Okay. What we can do if you will run this project nothing will happen. Why? Because we not added any command. How to add the command? So as you can see if you will click on this this blocks you will get different different option and each block have different meaning. Okay. So always we need to start the project with event. Event is something like action like if I will click on flag I want to move the girl. So that action you need to add like this. You have to hold it and drop it here. Okay. So when flag is clicked we need to move the girl. So all the movement like motion you will get here like move 10 step. So when we will click on the flag we need to move the girl. Okay. Like see when I'm clicking on the girl the girl is moving. See but what we want we want to move the girl again and again. like it is not when I'm clicking the flag then only the girl is moving. No, we want to move the girl again and again. So that is nothing but control. It's like forever. So whatever thing we want again and again we need to add that inside the forever. Like see when I'm running it girl is moving but the girl is going outside from my stage area. Let's see in order to return the girl what we can do because this is your ages. If you want if girl will reach to this age we want to return it back. So it's a very simple just click on the motion little bit scroll down you will get if there will be the age see now the girl is turning back but you can observe the girl is like ups and down okay so what we can do for that we need to set the rotational style for the girl okay now the girl is moving fine if you want to provide uh the hand movement and all you need to simple go to the looks you can add this next costume but see the movement is very fast. If you want to slow it down we can just go to the control like after waiting for 1 second now the girl is moving and girl is giving the action. So in this way you can start your code. This is my logic that we added. When we will click on the flag, we want to move the girl if there will be the age girl will return it back. After waiting for 1 second, we want to change the hand movement of the girl. In the same way, we can do for this Abby, the second girl. So, you need to select the Abby. Just click on this event when flag is clicked. Now, what is the next step? Just write in the comment section. Click on control. Add this forever. Inside the forever, we need to move it. Okay. Now see add is also moving but she is going outside. Again you can take the edge. Now for upside down you need to just add the rotational size. If you want again the hand movement, you can add this next costume. See, but if you want slow it down, just add this weight. So after waiting for 1 second, they both will work. They both will move. So in this way, you can start your project. So as you can see in this video, we covered all the basic thing about Scratch, right? We just join the scratch like how to login into the scratch then how to set the backdrop, how to set the sprite, how to start the code. All these things we covered in this video. Okay. So, thank you so much for watching this video. Please like, share and subscribe our channel and press the bell icon if you want more latest update. If you want any particular project just write that project name in the chat box so that I will create a video for that project as well. Okay. So thank you so much. Nice to meet Hello everyone. Good morning all of you. How are you all? How is your day? I hope you are enjoying your day. So this is our second day for summer camp projects. So in the previous video if you remember we just added and backdrops and I explain you about what is coding right. So as you can see in the previous video we added three things. One is fish, crab and shark. So today we are going to be learn about how we can start our code. How we can add the blocks in scratch. Okay. So basically this video is all about how we can add blocks in scratch. Okay. Each and every block what is the use of all the block that we are going to see today. Okay. So as you can see in this project we added fish, we added crab, we added the shark, even we added one background. Okay. So let's see the second part how we can add our quotes. Okay. So in the scratch if you remember our previous video I just explained you this is your coding pallet pallet window we can say. So over here as you can see there are blue color there are purple color. So for each and every color block have a different meaning. Okay let me explain you one by one. For example this is called as motion. It means if you want to move any sprite from one position to another position you will require the motion blocks. Okay, for example, this is fish. I want to move the fish. So, you need to just drag and drop like you have to press on left click. You have to hold it and just drop it. So, see if I will just press here. See my fish is moving only for 10 step. Suppose you want to move 100 step. You need to mention 100. Suppose now if you will click on fish see fish is moving 100 step. So in order to move from one position to other position we will require the motion block that is called as motion block. In the motion block there are second part which is turn 15°. Suppose you want to take your left turns or right turns. Okay. So that uh you can use this block. Suppose where is my fish? it is going outside of the boundary. Okay. So for example, let's start that in the crab. I want to take a 15° turn. Okay. See if I will click here. Crab is taking turn. Which is called as left turn. Suppose you want right turn. So you have to just drag and drop it. So what will happen? You are able to get the right turns. Okay. See, so all the motion related thing in order to move, in order to take a turn, in order to jump from one position to other position, you will require it. Okay? Suppose I want glide. Glide means I have to jump from one position to other. See, for example, this is my value. I gave the value. If you will run here, the crab is moving from one position to other position. So you can glide, you can glide to the random position as well. Suppose see now crab is gliding to the random position. Okay. So all the motion related thing you will get inside the motion block. Okay. Let me delete it now. So all the related. Now the second block is all about looks. Now look means what? If you want to say something, if you want to think, okay, if you want to switch the costume, now costume is like for example, this is the red color. Suppose I want the first one. Now see the crab is changed the costume. Okay. So even if you want crab will say something now see you will get the hello in order to change you can change it then suppose uh we want the next backdrop we want to change a color effect. So all these thing you can add here. Suppose I want to check change it. Okay. You will get a different styles. So we added the brightness. All this thing all the looks part you will get in the look session. Then we have a sound. Sound means suppose uh in any game if you know the Roblox, Minecraft or any car racing game or any space shooter game always we are getting uh while playing that game you are getting the sound you are getting the music how you will add that music. So you have to just go to the sound tab you have this play sound. So you will get the sound. Okay. Suppose you want to add a different sound. So how you will add that different sound over here there is a code there is a costume there is a sound. So if you will click on sound just little bit scroll down in the sound you have this option which is choose a sound. So we have all these sounds which is inbuilt in such whatever sound you want just click on it. So sound will add. Okay. again come to the code section. So we we have uh we just learned about the motion looks and sound. Okay. So till now if you have any query just write that query in the comment section. Okay. Then we have a event. Now event means what? In a coding language event is something like action. Okay. So action is what? Suppose I want to run my project. So if I will click on flag, if I will click on flag, I want to perform all these activities. So what you can do? You can add this block here. It means when we will click on flag, we have to perform all the activities. Okay. So that is called as event. Event is nothing but the action. Suppose instead of clicking on flag what I want when I will press the space bar then I want to run my project. So we can add this one also like if I will click on space bar. So we have to play the game. Instead of space bar we can add if I will press on up arrow then I want to run my project or if I will press on down arrow then I want to run my project. If I will press on right arrow, left arrow or any other key whatever we have in our computer. So that event also we can add. So there are lots of event that we can use. Okay. After that there is a control block like this is little bit advanced part. So we will see each and everything one by one. So this four are basics like motion, looks, sound and event. These blocks we are going to see in our next video which I will launch tomorrow. Okay. So let's start our fish aquarium project first. So as you can see we added three things. One is like we added the crab then uh we added the fish and we added the shark. Okay. So how we will start the project now? Now uh as you can see there is a no fish fishes move outside. So you can take it written back from this position. Suppose I want 29. Let me explain you how you will get this axis. Okay. So whenever uh you have this stage area so we can say the stage area is divided into four part. Okay. This is your left one. My writing is very bad. So this is your right. This is your top and uh this one is the bottom part. Okay. So whenever whenever we want to move to the left side, we have to use our positive x value. In order to move to the right side, you need to use negative x value. In order to move to the top top position, you have to use a positive y value. In order to move to the down position, you need to use negative y value. So always you have to remember this thing. Okay. In order to move to the left side, just use your left like positive x, right is your negative x, top is your positive y, and uh bottom is your ne. Okay. So let's start our project. So always you have to start with you have to apply some events to your project. Okay. Suppose we will start with fish. I want to first apply event. Event is like when I will click on flag. It means when we will click on flag we have to move the fish. So when flag is clicked where you will get your motion part. How you can move it? Yes, you have to just click on motion. You need to move 10 step. So it means when I will run the project, see my fish is moving with 10 step. Okay. But always I have to click on flag then only as you can see the fish is moving. What I want when I will click on flag I have to move my fish again and again until and unless once I will stop the project then only the movement will stop. So how we can do that. So as you can see in the control there is a one block which is called as forever. So we need to take this block. We have to take the move here and just add it. Now see what will happen. My fish is moving right. But again we uh we have a boundary right but fish is moved apart from your boundaries. So what you need to do in order to take your fish return back again you have to go to the motion you need to add if we will get the age. See there is a four ages. So once you will get the age we have to return our fish. See whenever age is collide with the fish fish is return back. See now I want to change my rotational style from left to right only. See so you can add it. So this we did in the fish. Same thing you have to add for the crab also. Okay. How we can add? This is our crab. So always you have to start with when flag is clicked. So we added when flag is split in the forever forever you will get in the control box we have to go to the motion we need to move the fish. Now if there will be age so age part you will get in the motion itself little bit scroll down you will get age will bounce to set the rotational style of it. Let's run the project again. Now as you can see the crab is also moving. Same thing we can add for the shark also. Okay. So again we need to go to the motion like first go to the event when flag is clicked in the control you will get the forever in we have to move the 10 step and we need to add if there will be age you have to set the rotational style. See the shark is also moving now all the three sprite they are moving. Okay. Now we can add some interesting thing here like for example the fish will say the orange fish will say hello. Okay. So fish will say hello shark how are you? So we can add this one also like hello shark how are you? Same thing we can add for the crab also. Crab will say hello fish, how are you? So this thing you can add in your project like you can create your project very interesting. You can add more parts here. You can switch the costumes. Okay. For example, every time I need to change the costume. Okay. Even for
Watch on YouTube ↗
(saves to browser)
Sign in to unlock AI tutor explanation · ⚡30
Playlist
Uploads from Code For Kids · Code For Kids · 0 of 60
← Previous
Next →
1
 2
2
 3
3
 4
4
 5
5
 6
6
 7
7
 8
8
 9
9
 10
10
 11
11
 12
12
 13
13
 14
14
 15
15
 16
16
 17
17
 18
18
 19
19
 20
20
 21
21
 22
22
 23
23
 24
24
 25
25
 26
26
 27
27
 28
28
 29
29
 30
30
 31
31
 32
32
 33
33
 34
34
 35
35
 36
36
 37
37
 38
38
 39
39
 40
40
 41
41
 42
42
 43
43
 44
44
 45
45
 46
46
 47
47
 48
48
 49
49
 50
50
 51
51
 52
52
 53
53
 54
54
 55
55
 56
56
 57
57
 58
58
 59
59
 60
60

#Scratch Tutorial 1 | How to create your own Scratch account #codeforkids #scratch #Game Development
Code For Kids
#Scratch Tutorial 2 ||How to enable Share Button option in Scratch #codeforkids #scratch #game
Code For Kids
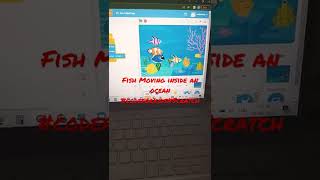
Fish Moving inside an Ocean 🌊🌊 #codeforkids #scratch 🥰
Code For Kids
Scratch Programming | Fish Aquarium game | #codeforkids #scratch #game
Code For Kids
Draw the circle in scratch#codeforkids #scratch #game
Code For Kids
Draw Circles in Scratch || How do you draw shapes on Scratch? #codeforkids #scratch #game #coding
Code For Kids
How to Make a Dino Jump Game in Scratch | Tutorial #codeforkids #scratch #game
Code For Kids
Scratch Tutorial || How to Make a Catch Game in Scratch.|| Scratch Tutorial for absolute beginer
Code For Kids
Scratch Tutorial || Day 1
Code For Kids
Scratch Tutorial || Day 2 (DJ System , Dance and Story writing)
Code For Kids
How to Make A Maze Game in Scratch 3.0 | Scratch 3.0 Tutorial |Scratch Tutorial for begineer
Code For Kids
Scratch Tutorial || Day 3
Code For Kids
Scratch Tutorial || Day 4
Code For Kids
Scratch Tutorial | Cat And Mouse Game | Scratch Tutorial for Beginner
Code For Kids
Scratch Tutorial || Day 5
Code For Kids
how to make dress up game on scratch || Scratch Tutorial for Beginner
Code For Kids
How to Make a Pong Game in Scratch || Scratch Tutorial for Beginner
Code For Kids
Scratch Tutorial || Day 6(part 1)
Code For Kids
Scratch Tutorial || Day 6( Part 2)
Code For Kids
Scratch Tutorial || Day 7
Code For Kids
Scratch Tutorial || Day 8
Code For Kids
How to Make Piano Game || Learn to Use Music Extension || Scratch Tutorial || Day 8
Code For Kids
How to Make Piano Game || Learn to Use Music Extension ||Scratch Tutorial for beginner
Code For Kids
Scratch Tutorial || Day 9
Code For Kids
Scratch Tutorial || Draw Shapes #shorts #codeforkids #youtubeshorts
Code For Kids
Scratch Tutorial |How to Draw Shapes in Scratch #scratch #scratchtutorials #codeforkids
Code For Kids
Day 10|| Scratch Tutorial
Code For Kids
Scratch Tutorial || Archery Tutorial
Code For Kids
#1 || Thunkable Beginner Tutorial Platform Overview
Code For Kids
App Development ||Tutorial 2 || how to add button in Thunkable || Thunkable for beginner #codeforkid
Code For Kids
App Development || Tutorial 3|| Beginner Tip "Change screens with a button click" in Thunkable
Code For Kids
Scratch Tutorial ||
Code For Kids
Thunkable Tutorial || Using Camera and Image Recognition components with Thunkable
Code For Kids
Build a Translator App with Thunkable ||Thunkable App Development || Tutorial 5||
Code For Kids
Thunkable Beginner Tutorial #6 || Web Viewer|| Redirecting App
Code For Kids
#1 World in Python || Python Tutorial || Python Programming || Google Colab
Code For Kids
#2 Python Tutorial for Beginners | User input in Python | Command Line Input | Python Variable
Code For Kids
#3 Python Comments | How To Write Comments In Python | Python Tutorial For Beginners |
Code For Kids
#4 Python Tutorial for Beginners | Data Types in Python
Code For Kids
#5 Numbers & Typecasting in python | Python Tutorial
Code For Kids
#6 Strings Tutorial | How To Use Strings In Python | Python Tutorial | Python Training |
Code For Kids
#7 Slicing And Other Functions In Python | Python Tutorials For Absolute Beginners.
Code For Kids
#8 Boolean in Python | Python Tutorial for Begniner
Code For Kids
#9 Python Tutorial for Beginners | Operators in Python
Code For Kids
#10 Lists And List Functions | Python Tutorials For Absolute Beginners
Code For Kids
#11 Tuple in Python | Python Tutorial
Code For Kids
#12 In Python | Python Sets Tutorial | Python Tutorial for Beginners | #python #pythonprogramming
Code For Kids
#13 If Elif Else Statement in Python || Python Tutorial for Beginners |
Code For Kids
#14 While Loop in Python ||Python Tutorial for Beginners
Code For Kids
Python Tutorial for addition of 2 numbers #shorts #youtubeshorts #codeforkids #pythonprogramming
Code For Kids
Python Tutorial for absolute Beginner|| While loop #pythonprogramming #shorts #youtubeshorts
Code For Kids
Machine learning for the kids with Scratch || Machine Learning for kids ||Day 1
Code For Kids
# Tutorial 1 || Machine Learning for kids | Image Classification example | Girl and boy
Code For Kids
#15 For loop in Python || Python Tutorial for Beginner
Code For Kids
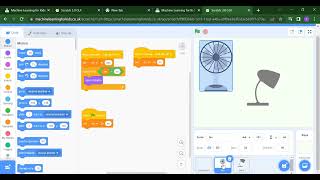
# Tutorial 2 || Machine Learning for kids | Smart Home Automation | Turn On the Fan
Code For Kids
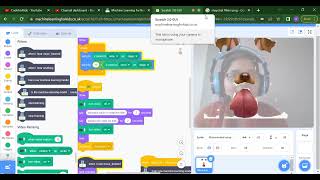
#Tutorial 3 || Snapchat Filter in Machine Learning|| Machine Learning for the kids ||
Code For Kids
#Tutorial 4 || Image Identification || Machine Learning for the kids|| Tiger , Elephant, boy
Code For Kids
Scratch Tutorial || Apple Catcher Game || Fruit Catcher|| catch game in Scratch
Code For Kids
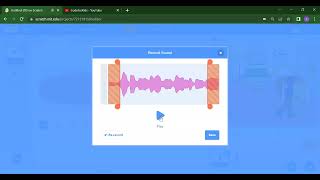
Scratch Tutorial || How to record audio in Scratch || Scratch Tutorial for beginner ||
Code For Kids
Scratch Tutorial || how to translate language in scratch || Scratch tutorial for beginner
Code For Kids
More on: Visual / Block Coding
View skill →




Related Reads
📰
📰
📰
📰
TypeScript for Python Developers: A Practical Guide
Dev.to · qing
How to Build a Good Human-in-the-Loop for AI Coding Agents
Dev.to · Brenn Hill
Architecture Is Even More Essential in the Age of AI
Dev.to · Bohdan Turyk
Top Open Source AI Developer Resources Worth Exploring in 2026
Dev.to AI
🎓
Tutor Explanation
 DeepCamp AI